
Puzzle
Create a themed word search
The Brief
Create a word search puzzle around a chosen theme and format the result in InDesign
Trim Size
Any square format
Learning Points
Using Gridify to create multiple threaded text frames
Controlling text flow with Keep Options
Working with monospaced fonts
Tools
InDesign
Fonts Used
Anonymous
Inspiration & Resources
www.education.com/worksheet-generator/reading/word-search
There’s only one way for a middle-aged person to keep up with the next generation: puzzles. You always thought your parents did crossword puzzles because they enjoyed them? Wrong. They were trying to keep their brains nimble enough to outsmart you. The fact that you didn’t figure this out already is proof that their strategy works.
One way to keep your mind even more nimble is to design the puzzles yourself. In creating this puzzle, I (Nigel) started by creating a list of words around a theme. It could be any theme — my version has 28 words on a 20 × 20 grid, and I used an online word search puzzle generator to randomly generate their order. This elevates the humble word search from the puzzle pages to the status of amusing and interactive art piece or gift.
I used the word search maker at Education.com; there are several alternatives available. Having generated the puzzle, I copied the text to the clipboard and switched over to InDesign. I created a square document; the exact size can vary, but bigger is better. I made it as large as my printer could handle.

The puzzle brings up some interesting InDesign techniques. This project is unusual in that each letter is a single paragraph and goes into its own frame. I started with a grid (Layout > Create Guides) of 20 rows and 20 columns. With the Type tool, I dragged out a text frame, pressing the Right Arrow to add columns and the Up Arrow to add rows. Not only does this feature — Gridify — create frames, but when you use the Type tool, it makes sure the text frames are threaded; that is, the text will flow from one frame to the next.
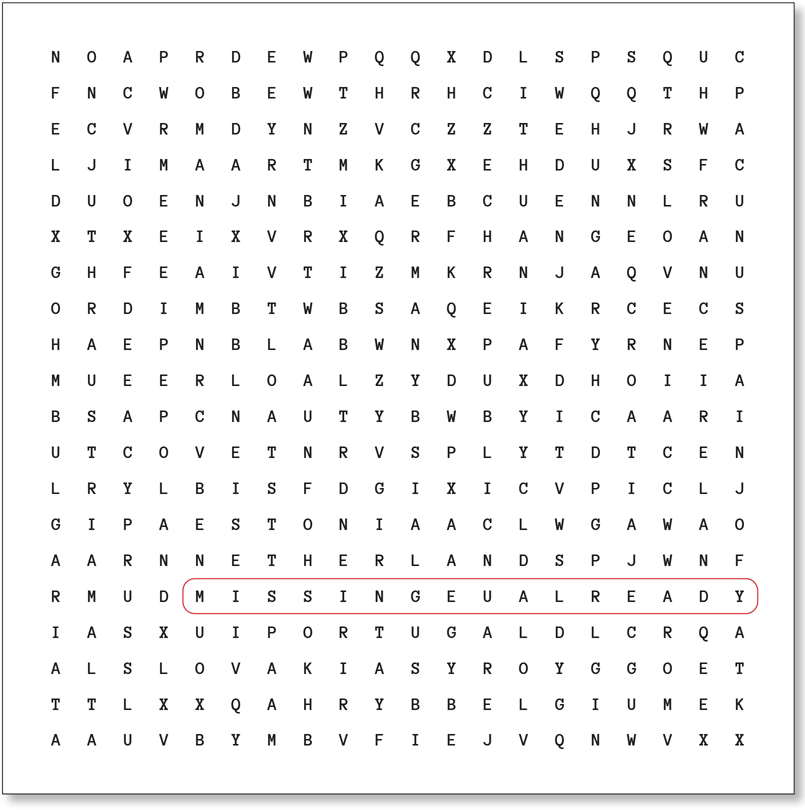
Hidden within the puzzle are the 27 nations of the European Union. Note that I am also using diagonals.
I then pasted the text into the first text frame. It started out looking a mess, but there’s no need for panic. The next step is to create a paragraph style that centers the text horizontally and includes a Keep Option to start each paragraph (i.e., each letter) in the next frame.
I chose a size and weight of font appropriate to the size of my page. I used a monospaced font, Anonymous Pro by Mark Simonson. Because monospaced letters are all the same width, they will stack up on top of each other, making it easier for the viewer to scan vertically down the columns.
To finish the composition, I vertically centered each letter within its text frame. With the Selection tool, select all the text frames, and from Object > Text Frame Options, choose Vertical Justification: Center.
I find solving puzzles of my own creation to be oddly satisfying. True, I’m just inventing the rules that I will then use to confound myself. It’s an odd form of self-torment. But think of it this way: This is what designers do all day, every day — try to think their way out of traps they themselves have laid. It’s good practice for everyday life!
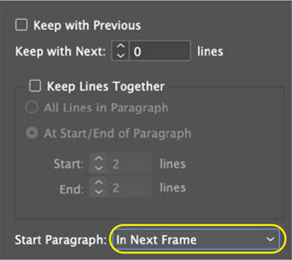
The Keep Option to start the paragraph in the next frame ensures that each letter inhabits its own text frame.