
The hood doesn't look right, does it? Let's fix that now. This is the complicated bit, because cars are complicated. Car bodies are not defined by the simple intersection of three forms that we've carried out just now. Cars want to be curvy! Curves are our enemy in SketchUp. Don't forget that SketchUp was initially designed for architects, and the nearest an architect ever gets to modeling curves is when they enter the annual RIBA fashion show for charity.
There used to be an advertisement going around where a guy made himself a VW Beetle lookalike from his old beat-up car, by getting an elephant to sit on the hood. Turns out this method is actually quite successful. I've chosen to show you how, in here. Remember, the model now represents the biggest dimension the car could get to, because you made it by tracing the very outside of the three car views. The real-life curved geometry of the car must sit somewhere within this outer box you've created. And here lies the beauty of this method. You can now keep working on it, or reducing it in size or form, until you get what you want. Easy! If an elephant can do it, so can you.
- Select each image in turn, explode it, sample the texture, and paint it onto the car's geometry. Start with the side view and paint all the sides of the car.
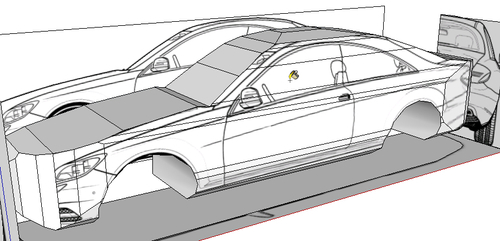
- Follow with the plan, and finally the front and back view. It's up to you which geometry you paint with which texture.
- Now, hide the texture images again. When you're done you should have something like the following screenshot:
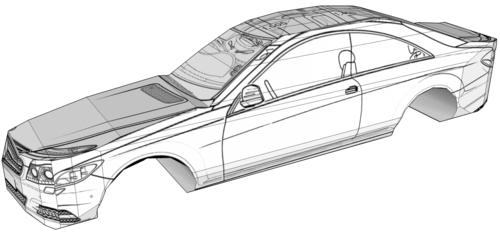
- It immediately looks more like a car! We could stop modeling here and just add the texture. But have you noticed something's not quite right with the hood?

- It looks real messed up. That's because we haven't got the curve in the hood right yet. Let's fix it now.
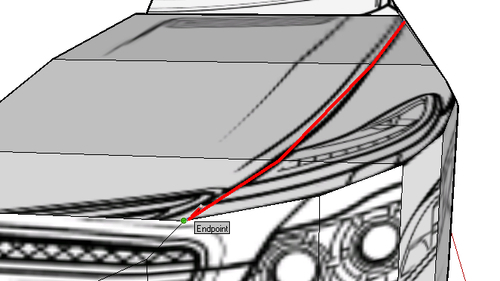
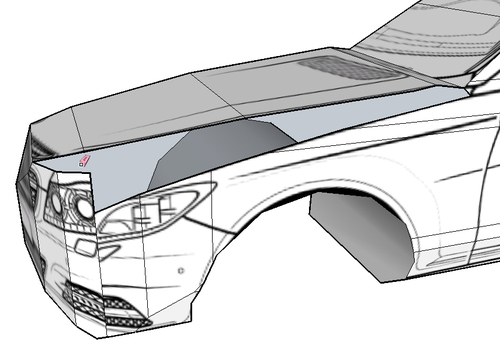
- With the Pencil tool, draw along the line of the hood as it appears on the Plan view, as I've indicated here. Make sure your tooltip shows On Edge or endpoint each time you create a line, not On Face.
- Now, draw along the line of the hood where it appears on the side view, as shown next.
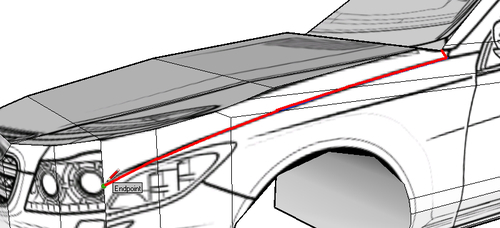
- The funny thing is that both these lines should be the same line. See how they end just by the headlight in both the plan and side views? Let's fix it.
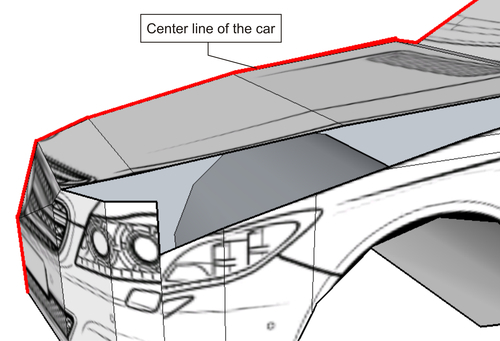
- First use the Erase tool to delete everything in between the lines, as shown in the following screenshot. We now know none of this exists, so we're getting rid of it. Remember the elephant?
- Because the geometry we have is the largest shape the car could attain, we know that the line at the centre of the hood is pretty much accurate (see next image). So, that has to stay as it is.
- We also know that the line we've drawn on the hood is accurate in the plan directions (Red and Green). So, it only has to move in the Blue direction. The line on the side view is accurate in the Blue axis, so we will use this as a guide.
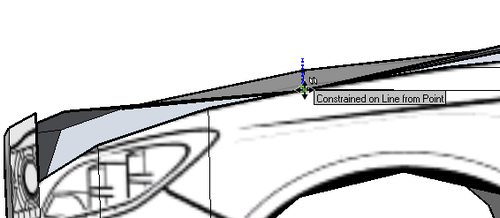
- Line up your view so that you're looking at the hood from the side, as shown in the following screenshot.
- Use the Move tool and click on one of the endpoints on the edge of the hood. Press Alt once to operate the fold mode.
- Remember that we simply need to move this point down in the Blue axis until it's at the same level as the other line. Make sure the axis line goes blue, and then hold Shift to keep movement locked to the Blue direction.
- Now, click on the edge of the car, on the second line you drew, as shown next:
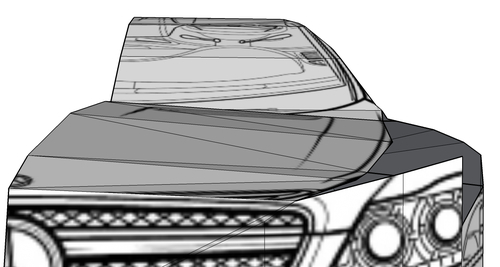
- Repeat this with each endpoint along the line of the hood until you've pulled the whole line down to where it should be. You can see the result in the next image:
Every point in 3D space can be defined by a place in the red, blue, and green directions. To find any point in the geometry of our car, we need only to decide where these are on the plan, side, or end views. We decided by looking at the plan view that the red and green points were correct. This is always the case with a plan view. We simply needed to find the one missing—namely the blue one. The side view has the blue axis correct, so now we have all three. Having discovered this, you then drew the line correctly on the plan view, and modified the blue axis position of the line by referring to the side view. Phew!
This is how you can model anything in SketchUp, no matter how complicated it seems. All you need to do is draw a line correct in two axes, then move it in the direction (axis) you haven’t got right yet.
Armed with this knowledge you're now entirely equipped to model's complex organic forms, namely the rest of this car! But before you do, let's patch up the hole we made just now.