
The main area that your character will be walking around in is made of worn concrete. This is brought on to site in huge slabs and laid down. The idea we're trying to give here is of a worn, old, and weathered surface:
- Go to CGTextures.com and find ConcreteFloors0060 using the search feature. Download the small versions of image 02 and 05.
- Open image 02 in GIMP. Select the Crop tool and use it to draw a box around the edges of six concrete squares as you can see here:
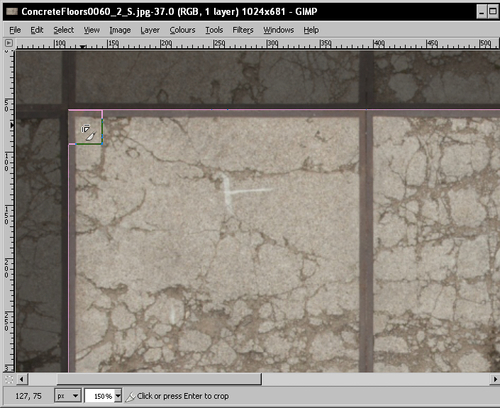
- When you've fine-tuned the corners so that they sit in the middle of the steel edges (as shown in the screenshot), press Enter to complete the crop.
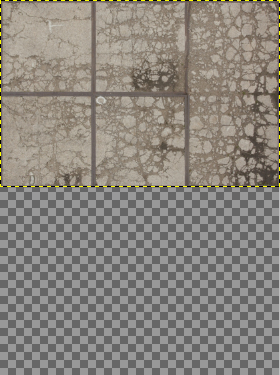
- Now go to Image ¦ Canvas Size and de-select the chain icon.
- Change Pixels to Percent. Now, enter 200% in the height box.
- Click on Resize. You now have six concrete slabs at the top of the image, and room for six more as shown next:
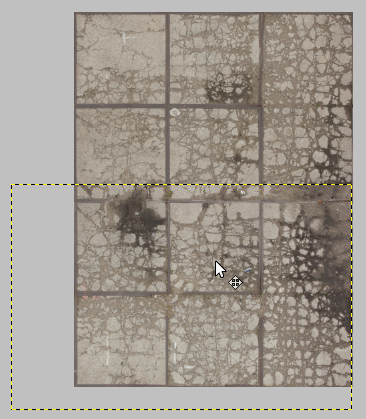
- Go to File ¦ Open as Layers. Select the other texture you downloaded. This now opens in its own layer.
- Select the Move tool and drag the new texture into place so that it fits below the previous one. You should have something like the one following:
Tip
Smooth mover
While you have the Move tool selected, you can also tap the arrow keys on your keyboard to move a layer by single pixel increments.
- Click on the uppermost layer in the Layer pallet and right-click. Select Add Layer Mask. If using a Mac, go to Layer ¦ Mask ¦ Add Layer Mask.
- Now select the Paint Brush tool and begin painting along the top edge of the layer to blend it in with the one below. Make sure the black and white foreground and background colors are selected by clicking the icon shown with an arrow in the next screenshot, and switch black to the foreground color if you need to with the little double arrow.
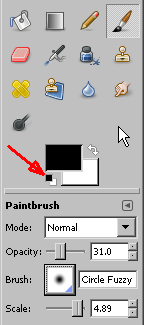
- Now select one of the fuzzy brushes and set the scale and opacity. Opacity reduces the strength of the effect, so setting it lower will now allow you to fine-tune your blend.
- When you're done, the one layer should be blend in seamlessly with the other. You can see the result in the following screenshot:
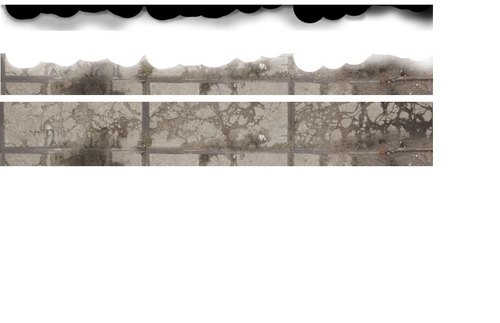
- At the top is the layer mask so that you can see the simple rough edge I've created. In the middle is the mask applied to the upper layer, and below that is the finished effect. For a rough texture like this, this quick technique is usually good enough. At other times, you may need to use more brush strokes.
..................Content has been hidden....................
You can't read the all page of ebook, please click here login for view all page.