
- Go to Select ¦ All and then Edit ¦ Copy.
- Switch to your
Map_Masterproject and go to Edit ¦ Paste. - Right-click your pasted item in the Layer Pallet and select New Layer.
- You now have three layers. Label them as shown next by right-clicking and selecting Edit Layer Attributes.
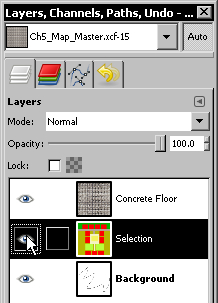
- You can turn the selection layer on or off at any time by clicking the eye icon. This layer will not contribute to your final image, but you will use it to select parts of it.
- Make sure the selection layer is current by clicking it in the Layer pallet. Click the Fuzzy Select tool and select the area inside the industrial building at the center of the image.
- Now hide the selection layer. Right-click on the Concrete Floor layer and select Add Layer Mask.
- Select the button next to Selection, then click Add. You will now have the texture confined to the floor of the industrial building, as shown here.
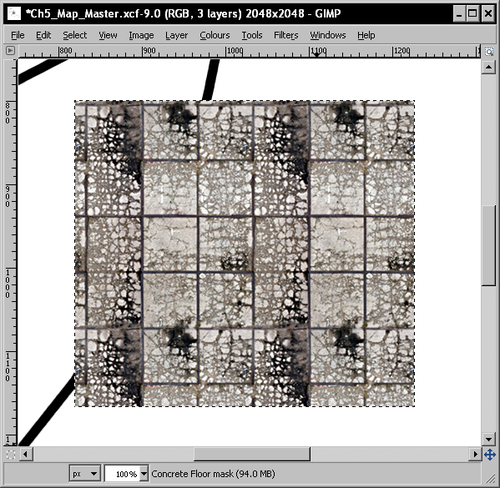
You've used the selection layer to control where your texture was placed. The concrete floor is now visible only within the boundaries of the area you created when you drew your 2D map. Good, isn't it?
You're going to do exactly the same with all the other textures you need, but all the rest will already be tile-able straight from CGTextures.com. This will be the easiest paint by numbers drawing you ever did, trust me!
I'll start you off with the first one, and then you can complete the rest by yourself. Let's start by downloading all the textures you'll need.
..................Content has been hidden....................
You can't read the all page of ebook, please click here login for view all page.