
- In the Layer pallet, make sure the concrete road texture is above the asphalt road texture in the list.
- Switch on the Selection Layer. Use the Fuzzy Select Tool to select the road.
- Now go to Select ¦ Border. Enter 5 in the box and click on OK.
- In the Layer Pallet, switch off the selection layer. Now, select the layer with your concrete texture on it. Select the mask next to it in order to start editing the mask.
- Switch the foreground and background colors so that you have white in the foreground (you learned how to do this when you were blending together your two concrete tile floor textures).
- Now select the Bucket fill tool and click inside your selection. You can see the result here:
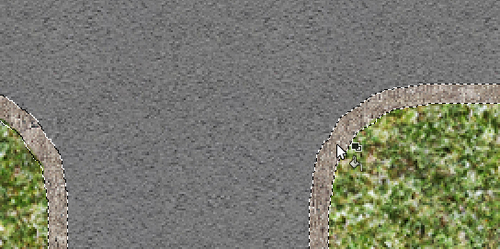
- Now, to create some shadow at the edge of the road and roadside curb.
- Select the road again in the same way as before. Now go to Select ¦ Shrink. Input 5 and click OK.
- Make a new Layer by clicking the New Layer icon at the bottom of the Layer Pallet. Select Transparency and enter a Layer name. Click OK.
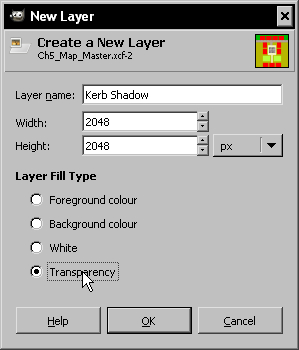
- Move the layer to the top of the list by using the little green arrows at the bottom of the Layer pallet.
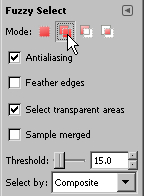
- Select the Fuzzy Select tool and click on the Add to current selection button as shown next:
- Select each of the rectangles on the selection layer which represent buildings.
- Make sure black is your foreground color. Select the new layer. Now go to Edit ¦ Stroke Selection.
- Select Stroke Line, with a Line Width of 4, and select Solid Colour.
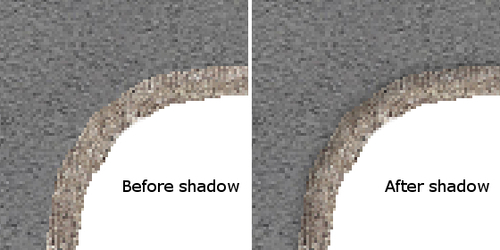
- Now click on Stroke. A thick black line will appear along the line of all your selections. This will depict the area near buildings and roads that collects dirt and grime, also an element of shadow.
- Make this look more real now by blurring the line. First remove your selection by going to Select ¦ None.
- Go to Filters ¦ Blur ¦ Gaussian Blur. Leave the settings as default (5 pixels) and select OK.
- Now reduce Layer opacity to 30%. You can see the effect, subtle but important, in the next image:
..................Content has been hidden....................
You can't read the all page of ebook, please click here login for view all page.