
- Right click on the texture image and select Explode. This turns the image into a rectangle of geometry that you can model with.
- Use the mouse wheel to zoom in to the bottom left-hand side of the pallet. Click on the Line tool, or press L.
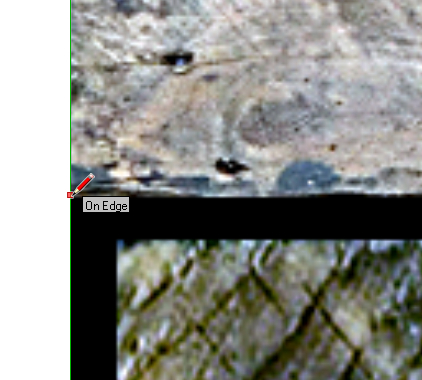
- Move the tool over the edge of the photo and notice that the pencil snaps to the edge, and shows an On Edge prompt (as you can see here).
- With the pencil still snapped to the edge, find the corner of the pallet and click.
- Find the other corner of the pallet to the right and click again. You can zoom out with the wheel, and pan by holding Shift and pressing the middle mouse button (usually the same as the mouse wheel).
- Notice that the horizontal line turns red to show you it's snapping to the horizontal.
- Zoom out, and then select the Eraser button or press E. Click on the shaded view button. You can see that the bottom rectangle is made up of lines and two light blue or grey faces.
- Erase the left, right, and bottom lines that enclose the bottom face. Notice that the face disappears, too.
- You should now have only the top rectangle with the pallet in it. Click on the Shaded with Textures view button to see the texture again. Press the spacebar to turn off the Eraser.
- Double-click on the rectangle. Right click and select Make Component. Type in
pallet_boards. Make sure Replace selection with component is selected and click on Create.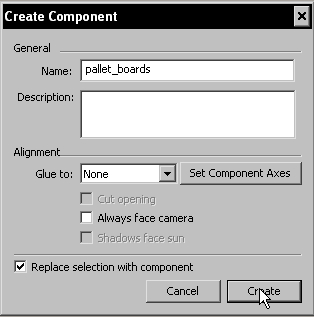
- Click on the Move button. Select the bottom left-hand side corner and move it to the origin. Click on again.
- Double-click on the Component to edit it. Press L for Line.
- Zoom in to the left edge and draw a line from the left edge to the right edge that follows the first plank of wood.
- Repeat this for all planks of wood.
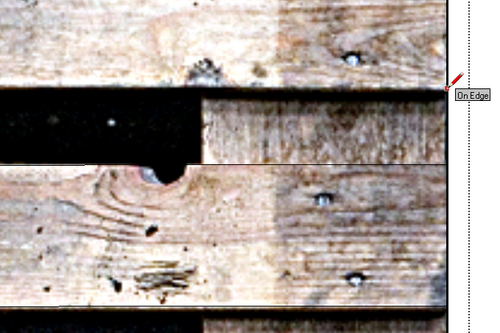
- If your line turns red to snap to the horizontal, but you want a slightly off-horizontal line, zoom in further to the edge and you will be able to make finer adjustments to the line.
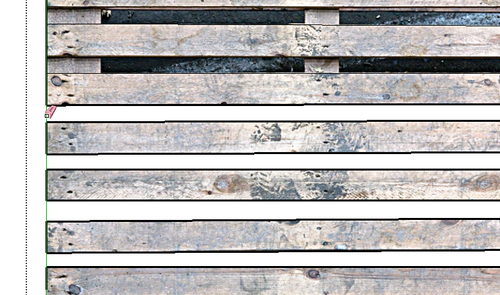
- When you've finished, use the eraser to delete all the rectangles between the wood planks. Delete first the left lines, then the right (see the next screenshot).
You've made a component which consists of the top planks for the pallet. You traced the geometry from the image with the line tool that has created one face for each plank. A component is an intelligent group of SketchUp geometry, and you will see what it does in a minute. Do remember to save your model.
Hold the middle mouse button and move the mouse up and to the left. The model orbits around. Orbiting in 3D is what you learned when you installed MeshLab in Chapter 2, Tools that Grow on Trees. Remember to think about an invisible globe wrapped around your model. When you move the mouse, you spin the globe with your hand. You will notice that the pallet is still only flat, even though you can view the flat geometry in 3D. You're now going to give it some thickness.