
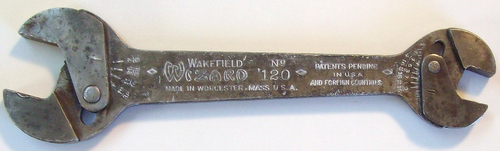
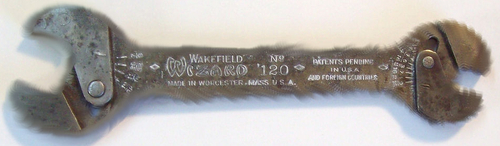
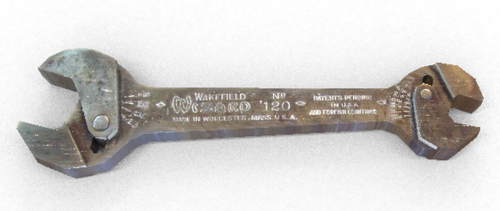
- First, find an image with a side on view of your wrench. Here's mine:
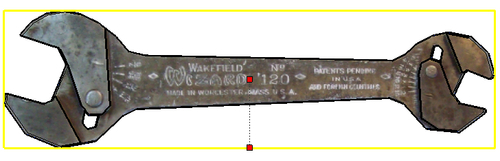
- Import it into SketchUp. Set the plan view and go to Camera ¦ Parallel Projection.
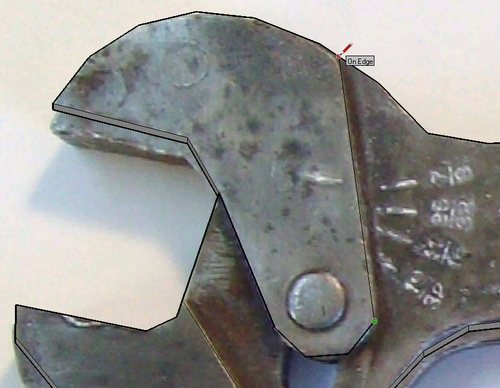
- Take out your pencil and draw around the outline. Remember this is going to have to be low polygon, so use as few clicks of the mouse as you can.
- Start with the curves, because these look circular, and so you will be able to use the Arc tool. When you click the tool, type in 3 (or 4) and Enter. All the arcs you draw will now have only 3 (or 4) sides to them, as shown next:
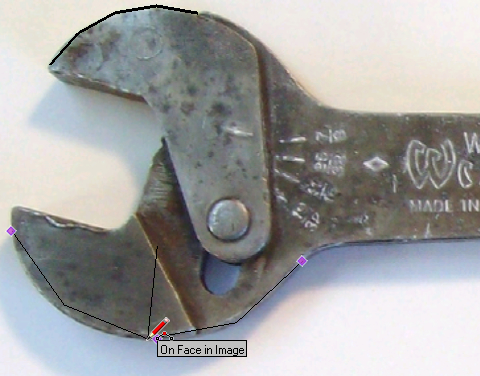
- When you've drawn in the curves, finish the outline off with the pencil tool.
- You can now Push/Pull the wrench out to give it some dimension.
- Move the image away from the wrench using the Move tool. Now, explode the image.
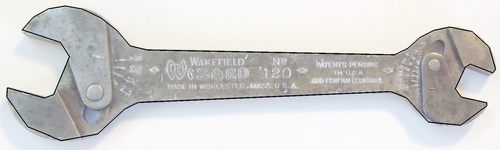
- Use the Sample Paint tool in the Materials pallet to sample the image, then paint it onto the top face of the wrench. Now it looks like we're getting somewhere!
- Use the pencil or arc tools to trace over the internal parts that you wish to push in or pull out. Keep it all nice and simple as you can see here.
- When you're done, use Push/Pull on the areas you've just created to raise or lower them.
- Getting a balance between modeled detail, and detail that's best left to the texture comes with experience.
- Now in GIMP, open your wrench image and use the Smudge tool to smudge the colour at the edges of the wrench outwards as much as you can, like so.

- Save the image with a new name. Now here comes the trick. This trick allows you to model most 3D objects without any more than a single photo view of the object.
- In SketchUp go to the Materials pallet. Select your photo of the wrench and go to the edit tab. Click Browse, and load in the blurred version of the image.
- Select just the bottom face of your wrench. Now use the Scale tool and carefully expand it slightly in one direction, using the Ctrl key (Cmd on the Mac) to scale about the center, as you can see here.
- Triple-click to select the whole model. Now use the Sample Paint tool in the Materials pallet again to sample the image, then paint it onto the model.
- The bevelled edge you created now takes on the colour that you blurred outwards in GIMP.
- Delete the image and delete the bottom face of the wrench.
- Select the whole wrench and turn it into a Group. Copy it down the Blue axis, and then use Flip Along ¦ Group's Blue Axis.
- You now have two sides of the wrench. Explode them both and use Move along the Blue axis to join them together.
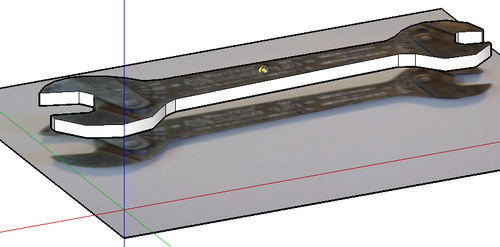
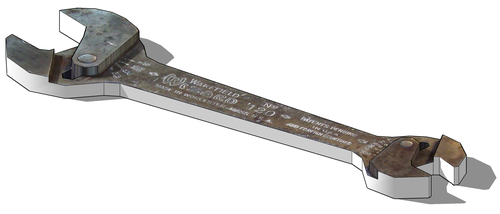
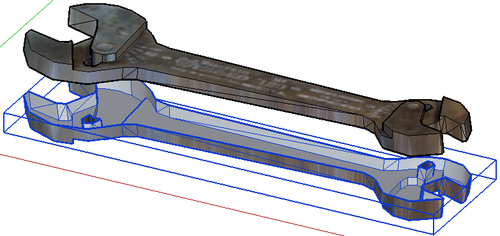
The previous image is a quick render in Shaderlight, a free rendering plugin, and the SketchUp version shown next.
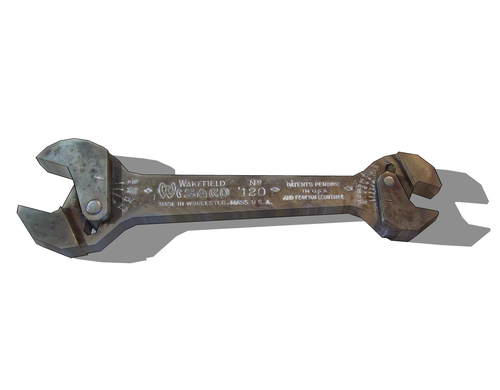
You've created an asset using the simple but effective image modeling method that SketchUp is so good at. You did this by simply creating a 3D outline and then Push/Pulling parts of it until you got the shape you wanted. You also learned a trick to allow you to use a single plan image, without the side views, to texture your model. There are lots of props that can benefit from this method.
..................Content has been hidden....................
You can't read the all page of ebook, please click here login for view all page.