
You may have noticed that you have a clear space at the bottom of your texture. This is where you're now going to arrange some more textures, namely the wood ends of the pallet. The reasons for putting them on the same texture are:
- Ease of use when modeling
- Economical on file size (using all of the memory block allocated to the texture)
- Better in game graphics performance
- You don't need to work on multiple files when resizing or changing color or shade
- Easier to bundle with the asset
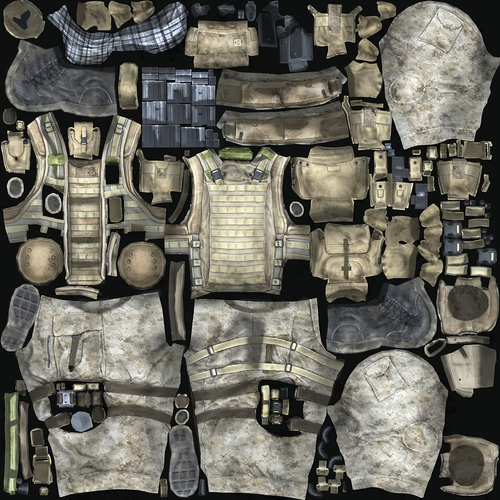
I'm sure there are many more you can think of too. If nothing else, this keeps everything neat and tidy. If you end up with a game level with 500 assets in it, do you prefer 500 textures to go with it, or 5000? Things can get messy very quickly. So, on behalf of your future employer, I counsel you to texture in this way! Here's an example from the Bootcamp Demo level-bundled with Unity 3D. It's a 1024x1024 size image, and as you can see, every available space is used so that every bit of the allocated texture memory block is used too.
- Find the second texture you downloaded and saved from: http://www.cgtextures.com earlier.
- Open it in GIMP as before.
- Zoom in to 100% and use the sidebars to scroll around the image. Can you find a sharply focused, interesting timber end?
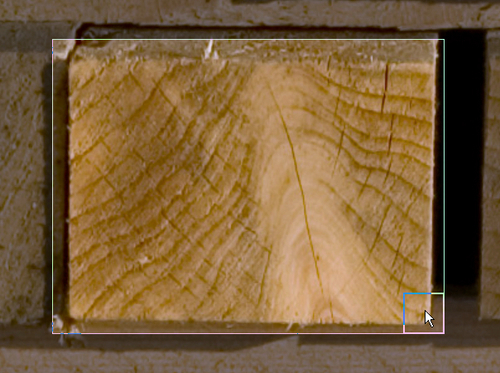
- Use the Crop tool to crop round a timber end, as shown next, leaving some space around the edge. Hit Enter to complete the action.
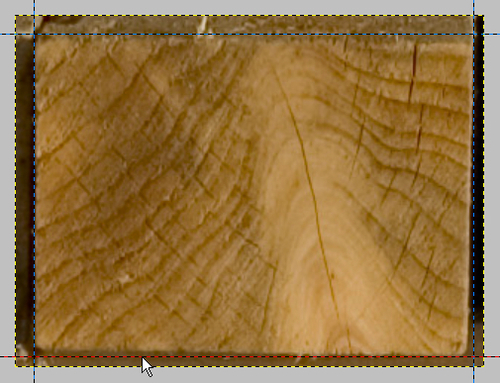
- Set up your four guides as you did before, dragging them from the side rulers with your mouse.
- You'll notice that this time the edges are not perfectly vertical and horizontal, as you can see in this screenshot:
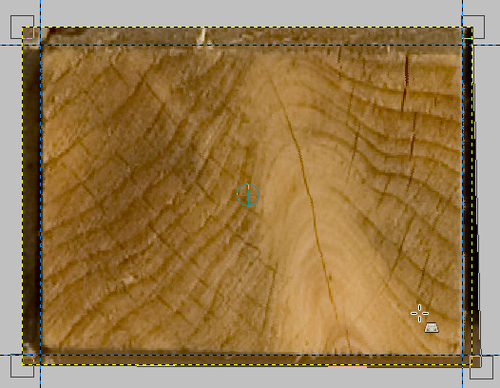
- You need to stretch the wood end so that all the sides and corners line up with the horizontal and vertical guides. To do this, select the Perspective Tool.
- Click near a corner and hold the mouse button down. Drag to change the shape of the image. You can see this being done at the bottom right-hand side of the next screenshot.
- This way, it's a simple task to go around each corner and stretch the wood end to fit squarely into the guides you've created.
- You can take as long as you like over this, because the actual image doesn't changed until you click on: http://www.cgtextures.com.
- When you have finished, click on the Transform button in the Perspective part of the Toolbox window, and then use the Crop Tool like before to crop the image to the guides.
- Go to Image ¦ Scale Image and resize using Width of 256 pixels.
- Go to Filters ¦ Enhance ¦ Unsharp Mask to sharpen the grain. You already know how to do this from the previous example.
- Go to Select ¦ All and then Edit ¦ Copy.
- Switch to your original pallet texture project, or open it in GIMP.
- Go to Edit ¦ Paste. The wood end texture will appear over the top of the pallet texture.
- Make sure the Layers, Channels, Paths, Undo pallet is visible. If not, you can open it using the Windows menu. You can see what it looks like below.
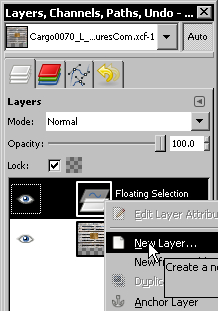
- Right-click your mouse on the part that says Floating Selection and select New Layer (or alternatively select Layer ¦ New Layer from the main Layer menu). This fixes your new texture to a new layer, distinct from the pallet texture.
- Using the Move Tool, click and drag the mouse to place the new texture under the pallet texture.
- Notice that the color of the wood is different from the pallet texture. This will make your model look wrong. You can remedy this by either going to Colour ¦ Auto ¦ White Balance or for a more controlled effect, go to Colour ¦ Hue-Saturation and alter the Saturation value.
- You should have something like this for your finished texture:

Now it's your turn to repeat these steps a few times and complete the texture set. Go back to your wood ends project and click on the Undo tab of the Layers, Channels, Paths, and Undo pallets. Here, you have a list of actions you performed with the image. Go to the top of the list and select the item named Base Image which will return the project back to the original image. You can now repeat the steps above a few other times to create two more wood ends, and paste them into the main project.