
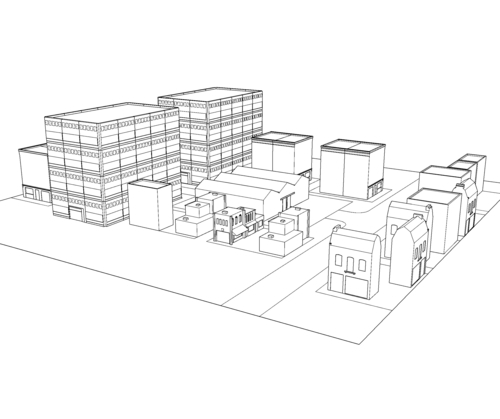
- Using the terrain you have created or the one provided in the download pack, insert your main building onto the flat plan above the terrain, right in the square you allocated for it.
- Now use File ¦ Import to bring in more of the contextual buildings you created in Chapter 7, Quick Standard Assets, once you have cleaned them up from the 3D Warehouse, made them from photos or taken them from the download pack.
- Place them where you want them in the level—but not on the terrain—on the flat plan. You might get something like this:
Tip
Increasing computer speed
When you're dealing with a large number of models in one SketchUp scene and you find that your computer system is slowing down, you can use the monochrome view style to make everything faster. That's because SketchUp doesn't have to worry about sending texture information to your screen, which frees up your computer's memory.
- When you're happy where everything is, move each building down onto the terrain individually using Move and locking to the Blue axis as shown here.
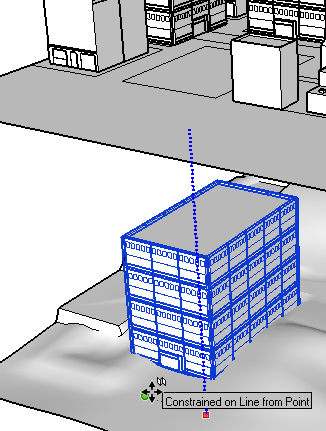
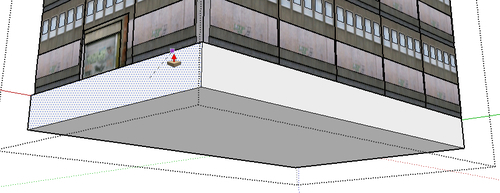
- After dropping each building down, check that the whole building footprint is poking through the terrain by looking at the building from the underside:
- As you can see in the previous screenshot, the left-hand side of the building is still partly above the terrain. You can now either move the building down further, edit the terrain to make it higher at that point, or extend that part of the building downward.
- The rest of our building looks absolutely fine partly buried in the ground, as you can see to the right of the image, and the windows are well above ground level, so in this case I'll just drop the building down a little so that the door touches the terrain.
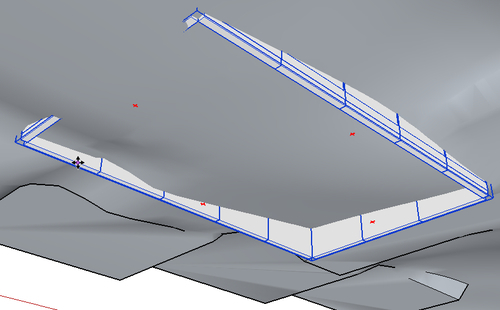
- In the case of the next one, lots of the windows are ending up getting covered, so let's put the building on top of a retaining wall. To edit a building in-situ, it's best to select View ¦ Component Edit ¦ Hide Rest Of Model.
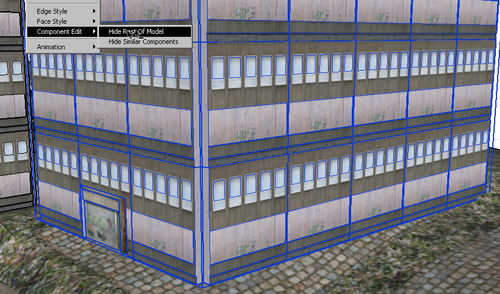
- It's now possible to double-click on the component to edit it, and you'll have a blank canvas to do it in.
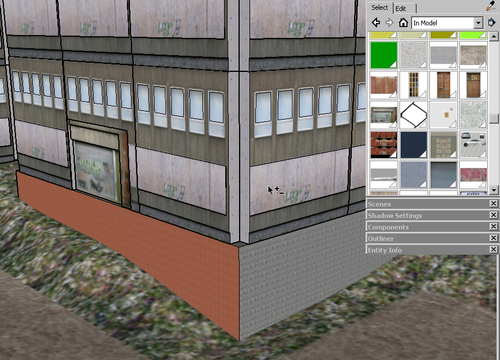
- Do this now with one of your buildings. Now use the Rectangle tool to create a flat base underneath and Push/Pull it into shape.
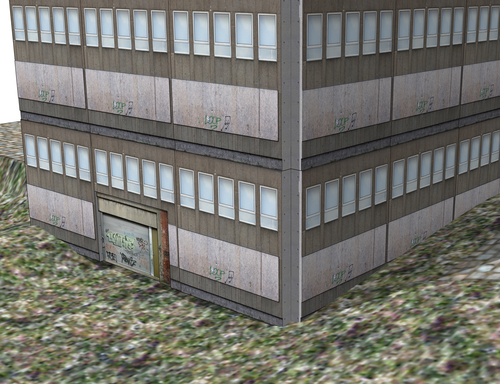
- Go to the Materials pallet and select an industrial looking brick from Brick and Cladding. Hopefully, you installed the extra materials pack from Chapter 2, Tools that Grow on Trees, so you have a good range to choose from. Paste the texture onto all surfaces.
- It looks truly awful as you can see here. But I can assure you, retaining walls are more often than not awful in real life too!
Our level appears to be going from bad to worse. First, we had to half bury a building, and now we're having to put it on top of a hideous wall! It's that blasted hilly terrain's fault.
There's nothing else for it. We're going to have to make the terrain nice and flat so that we can continue un-interrupted.
Not so fast! Let's think about this for a minute. If you were the architect of this building, what would you do? Well, look at the thing, will you? It's a concrete monstrosity. No architect went anywhere near that thing. It was put together after the 2nd world war when utility was the order of the day. So, yes, it's ugly, but ask yourself this question: Is ugly an exception, or a rule?
Now we're getting somewhere. Ugly is (most of the time) a rule, not an exception. If you want a realistic game world then you're going to have to embrace the concept of "ugly." What this terrain is actually doing for us is forcing us to compromise on our neat design plan and actually make it live. We are having to botch things up, make a compromise, and add in ugly patchwork details, just as in real life. In fact, this is leading us down avenues that will make the game better—more real—without us even having to think too hard. The game level is leading us to better design. All we have to do is react to what it is asking of us.
Now's your chance to start experimenting. Notice in the previous screenshot that there are several doors, shutters, and metal textures already in the model. We can utilize these to our advantage and just let the level lead us where it wants to go. Ask yourself, what would the architect or builder do here? Notice the following things:
- The door is now inaccessible. How will people get to it?
- The walls are bare. What would a young person with plenty of time on his/her hands think about that situation?
- What's behind the wall? Did the builder think about putting a basement or utility room inside?
- Could the office workers be parking down there? If they could, do they need air or are they just going to have to hold their breath? What about car fumes?
In asking yourself these questions, you will come naturally to the answers. They don't have to be the answers—just a bunch of answers. Then, go ahead and model it as if you were building it. You can see my attempt when you open the model Chapter 9's Final.skp from the download pack.