
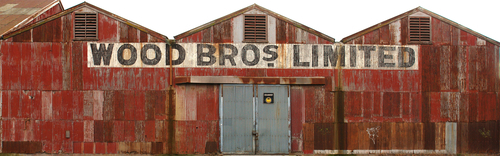
- Just like before, let's find the textures we need on CGTextures.com. The one you want is within Buildings ¦ Industrial.
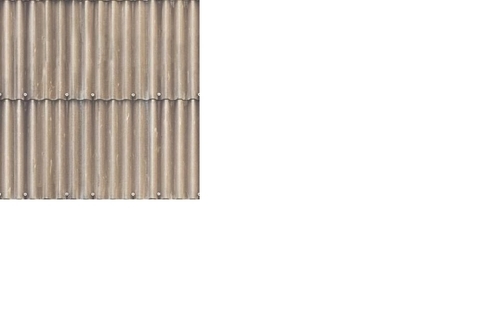
- Download the large one. Here it is:
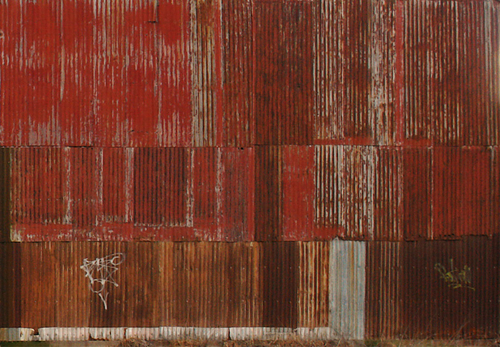
- Open it up in GIMP and select a large rectangular area, the full height of the building, containing only the metal cladding panels.
- Using what you learned in the previous chapters, create a seamless texture for the side of the building. You should end up with something like the one shown next:
- If you want to be really clever, resize the canvas of the first texture and add this new texture to it. This will also leave space for further textures for the roof and interior.
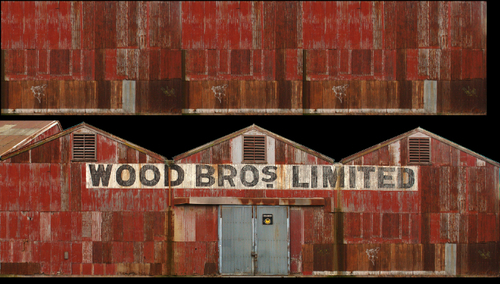
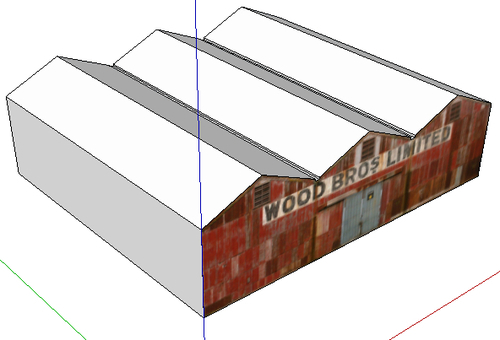
- You might have something like the image shown here.
- Now, copy the layer containing the front of the building. Place the copy below the original one.
- Now use the Clone tool to paint over the sign of the copy.
- Use Save a Copy to save your completed texture as a PNG file.
- Find a suitable roof material on CGTextures.com and turn it into a tile-able texture if it isn't tile-able already.
- In SketchUp, import the texture of the building using the Import as Image setting, and resize it with the Tape Measure Tool. The full width of the front of the building should be about 20m.
- Set the image upright and draw around the front of the building. Alternatively, draw around it with the texture lying down, then put it upright afterwards.
- Push/Pull the building until it's 18m deep (you will adjust this with Push/Pull to fit the side texture in Step 19).
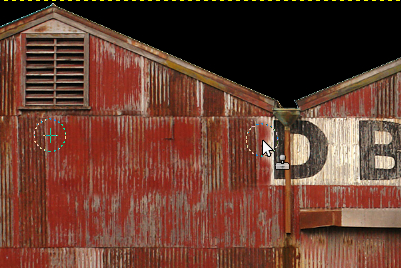
- Now explode the image. Use the Sample Paint tool to sample the image and paint it onto the front face of the building.
- Erase the rest of the image. You should have the following:
- Place the bottom left-hand side corner onto the Origin using the Move tool.
- Texture the sides of your building by selecting your new material in the In Model tab of the Materials pallet, and then painting it on the left-hand side.
- Move and scale the texture as necessary from within the right-click menu.
- Repeat with the opposite side. Push/Pull the back face of the building to fit the texture if you need to.
- Create a new material and load up the Roofing Plates texture, as shown in the next screenshot:
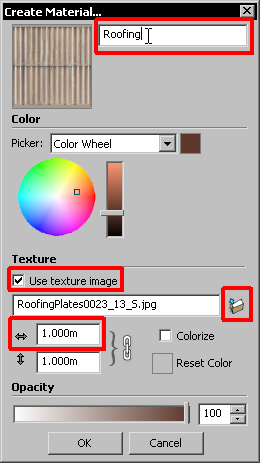
- Type in a material name and set the scale as required. You may change this number a few times until it looks right in the model.
- Paste the new texture onto the roof.
- Sample the front and paint it onto the back. Notice the sign's the wrong way around? This is why you created a separate back texture. Move this into place now.
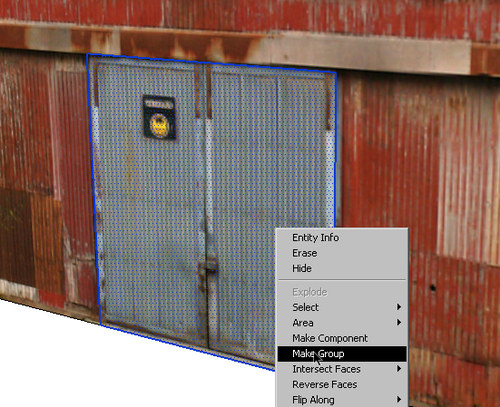
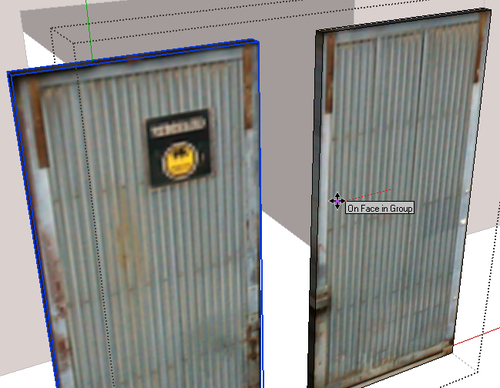
- Draw a rectangle around the door, select it, right-click and select Make Group.
- Use the Move tool to copy the door away from the building. Now, Explode the group that's left on the building face.
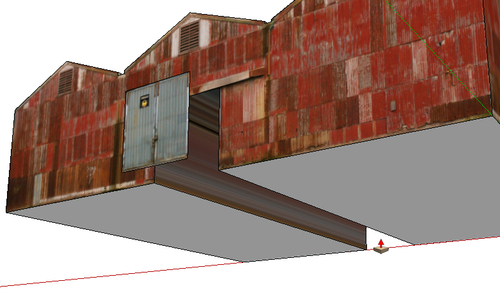
- Use the Push/Pull tool to create a corridor as shown next:
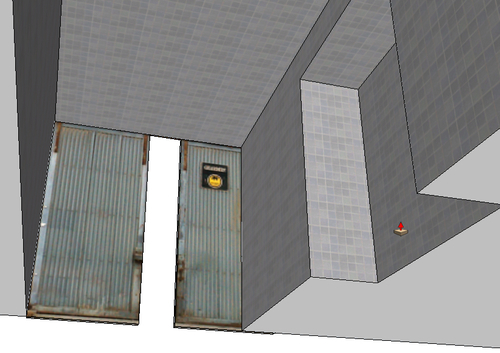
- Create Rectangles for both leaves of the door and group each one (into two groups). Now, double-click on each group to edit it and Push/Pull each into shape as shown here.
- Move them aside to open the doors.
- Move them back against the face of the building.
- Now, create a rectangle on the face above the door. Push/Pull it out a little further than the doors as you can see here.
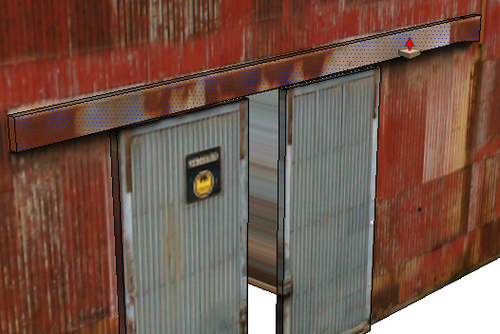
- Do this on both the front and back of the building.
- Now copy the doors to the other side of the building and close them. We want the player to have to go right around the building before they can gain entry.
Now, it's time to move our attention to the inside of a building for the first time. Here's an easy way to quickly model corridors and rooms inside your building.
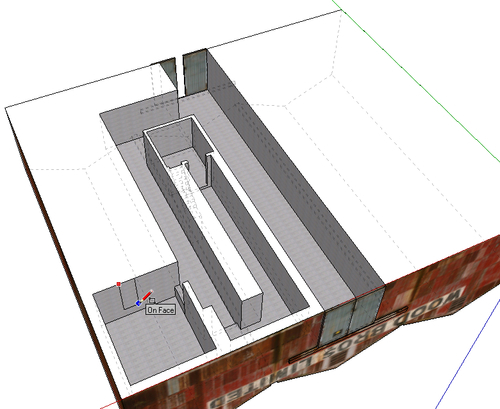
- Move your view so that you can see under the building.
- Select any tile material and paint it onto the three sides of the corridor.
- Now use the Rectangle tool and create an opening as you can see next. Use the Push/Pull tool to carve out a corridor, alcove, or room.
- Simply repeat again and again, as you can see next.
You've just learned how to create a fairly complex building with external and internal features and texturing. You made the doors as separate groups so that these can be animated in Unity (or any other game development environment) later. The reason you turned your building upside down to model the interior is that this method is just so easy to use. You can fluidly (and admittedly, fairly randomly) experiment with rooms, corridors, stairs, alcoves, and the likes. Literally, all you have to do is draw a line from top to bottom whenever you wish to create a bend in the corridor. All you have to do is make a rectangle (as you can see me doing in the previous image) to create a new door and room. It's "subtractive modeling," which forces you to work with the space you have. This is actually what happens in real life—you only have so much room in a building.
How you finish the inside of your building is up to you. It's as simple as carving out your upside-down world with rectangles and Push/Pull, then texturing using the techniques you have learned already. Take a deep breath, pull your stomach in and puff out your chest, straighten your back, and salute. You're a genuine hero now. Go to work.