
- Use the search feature on http://www.the-blueprints.com to find the Mercedes CL 2010 plans. If you need to you can enter this URL instead: http://www.the-blueprints.com/blueprints/cars/mercedes/42052/viewsingle/mercedes-benz_cl-class_(2010)/.
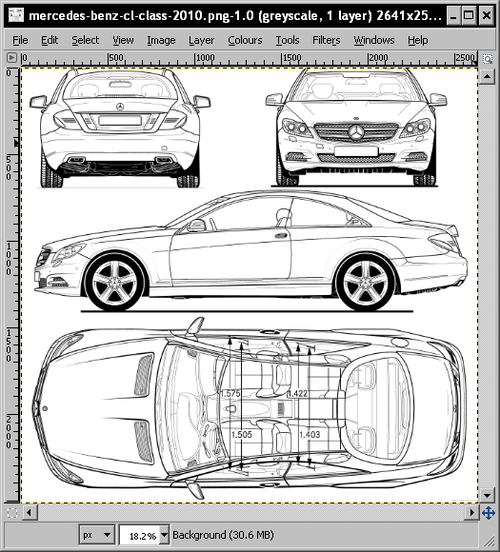
- Download the plan and open it in GIMP. You should see the following:
Note
Notice how you have the whole car described here in four views? From top left-hand side to bottom: Back view, Front view, Left side view, Plan. We don't need any more views than this because the right-hand side is the same as the left-hand side, and the bottom of the car is immaterial. These views are called Orthographic views, and are commonly used in technical drawing. You will need Orthographic views to make cars because they aren't distorted like perspective or camera views.
- If the image is not a square, use the crop tool to make it a square, and then resize the image to 4096x4096 or 2048x2048.
- Perform a Save As to save your
.xcfmaster file, and then use Save a Copy for a.jpgcalledMB_ambient_2048.jpg. - This second image is what you will be using in SketchUp.
- Import the image into SketchUp using File ¦ Import and select jpg image, then check the Use as Image box.
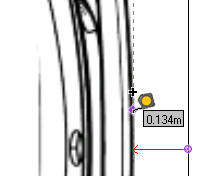
- Place the image in SketchUp. Use the Tape Measure tool to click at the end of one of the dimension lines, then click at the other end. Then type in the measurement and press Enter. Accept the resize action by clicking on Yes.
- Your image is now correctly to scale. Right-click on it and click explode.
- Divide it into four sections using the Pencil tool. Then make a group out of each section by double-clicking and selecting Make Group in the right click on the menu. You'll see it in the following screenshot:

- Once grouped, rotate each of the front, back, and side views upright.
- Now move the side view, front view, and back view images so that the baseline lines up with the plan image as you can see following screenshot:
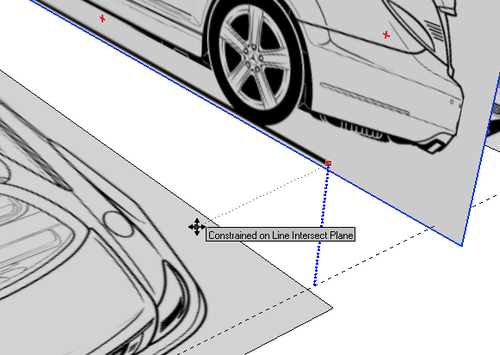
- Use the Tape Measure tool to set a construction line at the farthest front and back point of the car on the Plan view, as you can see in the following screenshot. Do this by first clicking on the edge and moving the tape measure parallel to it.
- Draw further construction lines at the very center of the plan, front and rear images. Use the Mercedes Benz logo to line them up correctly.
- Now divide each of these images in two parts with the Pencil tool by drawing along the construction lines. Delete the right-hand sides.
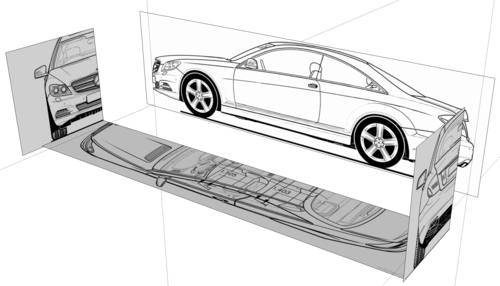
- Move all the pieces in one place as you can see in the next image. Use the construction lines to line up the side image with the plan.
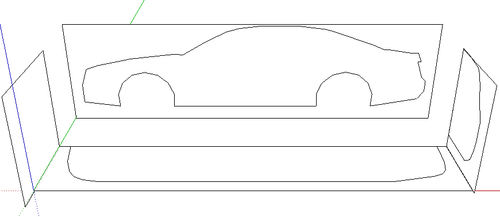
- Now, using as few lines as possible, draw around each of the plans, both sides and one-end view. Just include the overall shape, and forget about the wing mirrors.
- You now have outlines of each view. If you switch to Monochrome view, your outline is visible and should look something like the next image:
You've taken an orthographic car drawing and cut it into its individual views. Plan, Front, Rear, and Side views. You've placed them back where they came from in the first place. If you think about it, someone looked at a real car (which is a 3D object) from the front, rear, side, and from above, and drew what they saw. In order for you to recreate the 3D object, you need to arrange the 2D drawings to replicate where they were in the first place.
Now that you've drawn round the outside outline of the car from three directions, you can use these to create a 3D outline.