
Before we go on with modeling the terrain, let's set up the texture image which you will project onto the terrain.
- Open up GIMP and go to File ¦ New.
- Type in width 2048 and height 2048 in pixels.
- Go to File ¦ Save As and name the image
Map_Master.xcf. - Draw something random on the image using the Paint Brush tool, and then go to File ¦ Save a Copy.
- Save a copy of the image in PNG format named
Map_2048.png. - Back in SketchUp, go to File ¦ Import and select png from the drop down list. Select the image you just saved and select Use as Image. Click on Open.
- Select the bottom left, and then the top right of the grid rectangle. This inserts your image at the same size and location as your grid.
- With the Move tool, click on the image. Hold Ctrl (the Option key on the Mac) and move up along the blue axis and click.
Tip
Awkward selection tip
If you can't get to something to select it, make use of the Outliner. The Outliner contains all of your Groups and Components and allows you to select them without needing to click on them. You can also right-click and use hide / unhide to temporarily remove groups or components that are in the way.
- Hide the Map_Base component so that you can get at the first image. Select and delete the original image.
- Unhide the Map_Base component. You will have the following:
- Right-click on the image and select Explode.
- Now, in the Materials pallet, select the Sample tool and click on the image to sample it. If using a Mac machine, select the Paint Bucket and command Click on the image.
- Press the spacebar to return to the Select tool. Double-click on the
Map_Basecomponent. Re-select the Paint Bucket tool and paint the face. - Finally, double-click on the original image. Right-click and select Group. Hide this group.
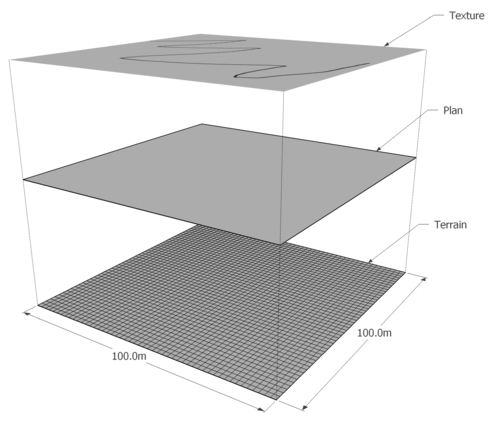
You have now created a master texture in GIMP. You exported a copy image and imported it into SketchUp, where you scaled and placed it exactly over the rectangle you created earlier. You now have a terrain, a 2D plan, and a texture. All of them are the same size and are lined up with each other.
Make sure you save your SketchUp file now. It's now time to rough out the game map. You can see the map as follows:
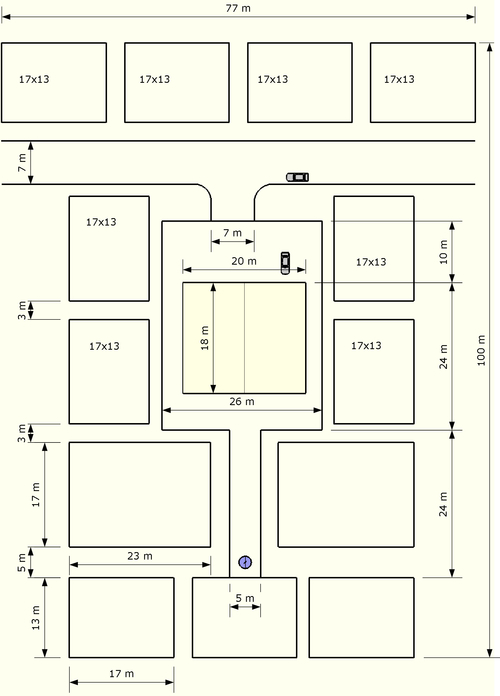
Now it's your turn to put some of your new SketchUp skills into practice—the ones you learned in Chapter 4, Wooden Pallet: Modeling. Have a go at drawing out the plan in your SketchUp project:
- Hit the Top view button and double-click on the 2D map component to get started.
- Use the Rectangle and Pencil tool to draw the plan to the dimensions shown next. Use the Tape Measure tool to create offset guidelines.
- All the rectangles are either 17x13 or 23x17, so just draw one of each and then use the Move tool to copy them around. Check back in Chapter 4, Wooden Pallet: Modelling if you need any help.
You don't need to be exact. Just get the main elements in about the same place as I've got them. Note that the plan on the previous page it is 77m wide so that it fits nicely into the page of the book. Yours will be centered on your 100m wide map. Draw the roads to the edge of the map.