
- Open your SketchUp file and go to the Materials pallet. Select the Home icon and then the
MapMastertexture. - Click on the Edit tab. Now, click on the Browse icon next to the texture filename and re-load your
MapMaster.pngimage. - If your edges are still switched off, switch them back on now (View ¦ Edge Style).
- You're now ready to start crafting your terrain with Sandbox tool. Make this possible by selecting both the base and terrain components and selecting Explode from the right-click menu.
- Press the spacebar to get to selection mode and click in a blank area of the screen to deselect everything.
- Now, click on the Smoove tool, type 40 and press Enter. This gives you a broad brush to work with.
- Click on the terrain. Move the mouse up and down to raise or lower the terrain, as you can see in the following screenshot:
- Click when you're done. You can undo this modification with Ctrl-Z (Cmd-z on Mac OS).
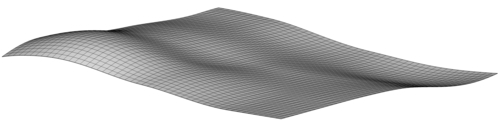
- Do this a few times over the terrain to get the rough geometry you want. Here's mine!
- You can now add finer undulations by reducing the radius of the Smoove tool. Click on the tool again, type in 20 and press Enter.
- Make some adjustments with this. Then try with 10.
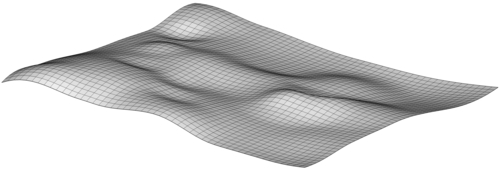
- This is mine so far. You can do it completely differently if you like.
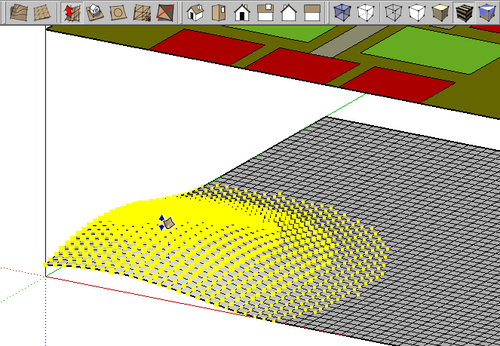
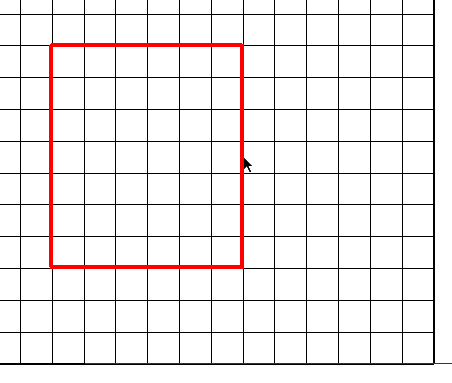
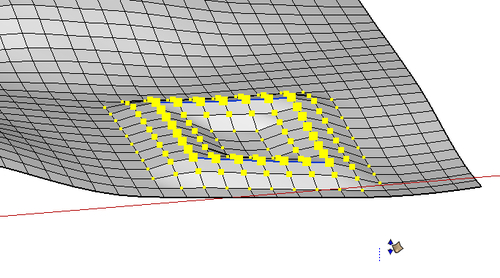
- You can also select lines or areas of the grid directly and then smoove them. Go to the Top view, and from there, select a square of edges as shown in the following screenshot. You may need to hide the texture and plan first.
- Now click the smoove tool, type in 5 and Enter.
- Orbit the view. Click and move up as shown next:
You've just created some random terrain using one of the Sandbox tools, Smoove. Here, you've learned how to use it with different diameters, and also when selecting parts of the grid directly. You should now have a pleasingly undulating terrain, rather than a boring flat surface. Within the game development industry, terrains are usually created within the game engine itself, an example being the terrain tools within Unity 3D. But what you've now learned will give you a valuable tool for your toolbox. The reason to create a terrain this way is that this terrain can be used in any game engine or 3D software. As such, it is possible to create and sell terrains as assets.
What you have now is the base deformation. It's time to stamp some of the map geometry onto it. Just as in real life, roads and buildings are more or less level surfaces placed on un-level terrain, the same we'll do in SketchUp. The Stamp tool will take your 2D map geometry as a base and project it onto your terrain.
Tip
I got a bit carried away...
If your terrain is a little too over the top, you can easily tone things down a little without having to go back and repeat anything. Triple-click on your terrain and turn it into a group (Right-click and select the Group option). Now, select Tools ¦ Scale. Use the top, centre grip to squash the whole group. Then, you can right-click and Explode.