
- You're almost there! In your GIMP project, click on the New Layer icon at the bottom of the Layers pallet.
- When prompted, select Foreground Color under Layer Fill Type.
- Click on OK.
- In the Layers pallet, click and drag the black layer you created so that it sits at the bottom of the list.
- Click on the Text Tool and click in some spare space at the bottom right of your image. Type in your text. Change text size as required using the Size field, as you can see in the following screenshot.
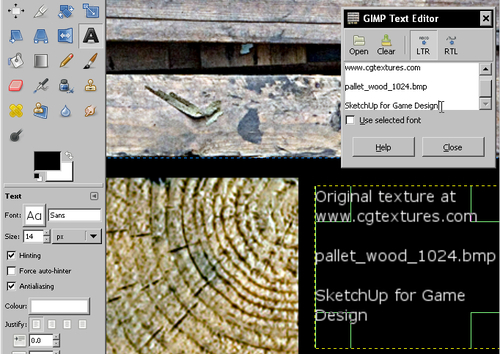
- Click the Colour field and select the white color.
- Stretch the text box to fit the space you have available, as visible in the screenshot.
- Your texture project is now finished. Click on File ¦ Save.
- Now it's time to save several sizes to use in your SketchUp model. Go to Image ¦ Flatten Image.
- Select File ¦ Save As. Navigate to the folder you named Textures.
- In the Name field, type in pallet_wood_1024.tga and click on Save.
- Select Origin ¦ Bottom Left.
- Now resize your texture to 512x512 pixels as you did before. Save this as
pallet_wood_512.tga.
You've saved your master project as a GIMP XCF file which you will be able to alter again later if you wish. You've flattened the image to get rid of the individual layers, and saved the file twice as a simple flat image in Targa (.tga) format. These are the textures you will use, they and won't be altered again.
..................Content has been hidden....................
You can't read the all page of ebook, please click here login for view all page.