
- If you hid the 2D map, unhide it now using the Outliner pallet. Make sure it's exploded.
- Select the Stamp tool. Type 2 and press Enter.
- Click on the area surrounding the industrial building. You will see a red line around the area indicating where the 2 meter offset lies.
- Click onto your terrain, which will turn blue.
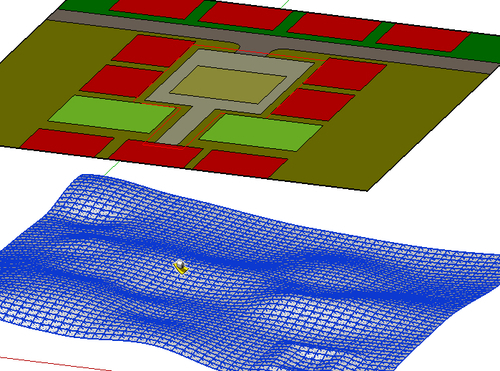
- Wait a little while SketchUp decides how it's going to proceed. There's a progress bar at the bottom of your window.
- You can now move the mouse up and down to stamp the selected shape onto your terrain, as you can see next:
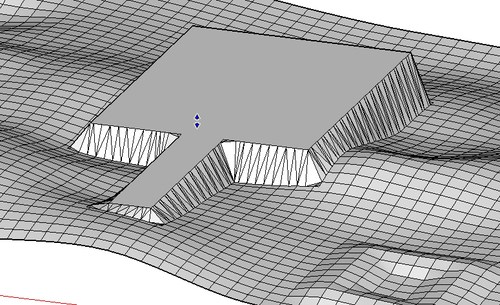
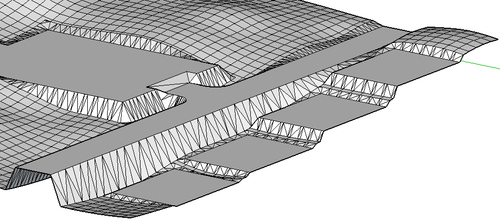
- The 2m offset is applied as an embankment. The idea here is to make the area look like it's been built up, and cut out of the terrain. Move the mouse until you get the best balance of cut and fill, then click to exit. You can see mine from another angle here. The front is built up and the back and right side are cut in to the hillside; this is an average level of the two.
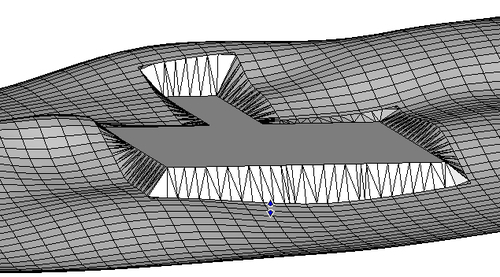
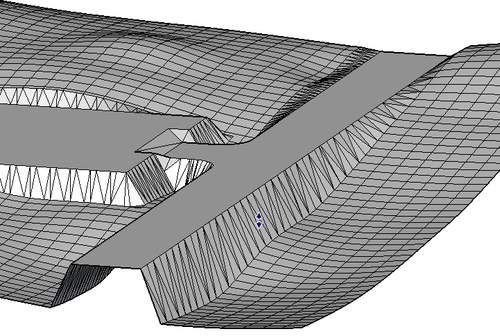
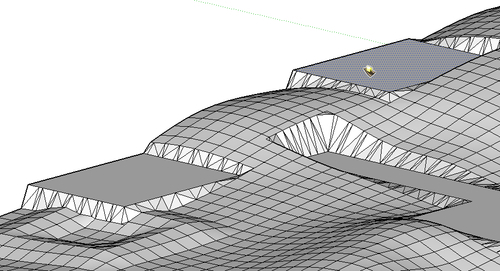
- Now try the road in the same way like this:
- Now type in 1 and press Enter. Create a little plateau for each of the houses by the roadside, raising or lowering depending on the slope.
- Use an offset of 1 for the two buildings to the left and right at the bottom of the map.
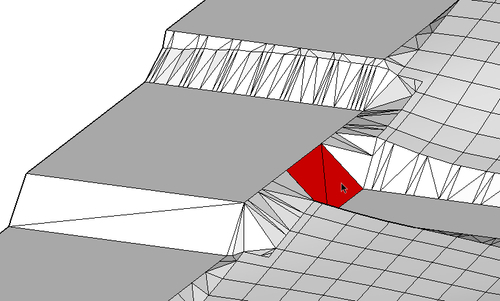
- Use an offset of 2.5 for the building between these two, where the game character starts off. This can be turned into a feature later—steps going up to the building—where in the game's storyline the character emerges from. Try to create a 45 degree ramp, either up or down, like the one I've shown highlighted in the next screenshot:
You should now have something like the terrain shown as in the following screenshot. Yours will differ from this because we started from different base terrains. If you don't like the one you've got, go back and have another go using different offsets. There's no right or wrong way to do this—you're just making an interesting terrain. There's an infinite number of different terrains you can make using the same 2D map, but starting with different Smoove base terrains and applying different stamps.
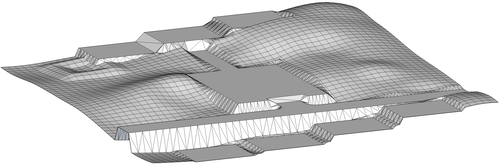
The Stamp tool selects geometry from a plan above or below where you want to stamp. Then, using an offset distance either side of this geometry, cuts into the terrain. The offset you entered becomes the transition zone between this new flat area and the surrounding terrain. You've used the Stamp tool on a hilly terrain to create a terraced effect, just as you would see in real life.