

Exercise: Cartoon Body 2
For this cartoon body exercise we move to a bigger body. By mas-
tering the two generic forms — thin and fat — you will get a good
understanding of the procedures to model any variation based on
them.
Figure 12-88 shows the reference sketch used in this cartoon
body modeling exercise.
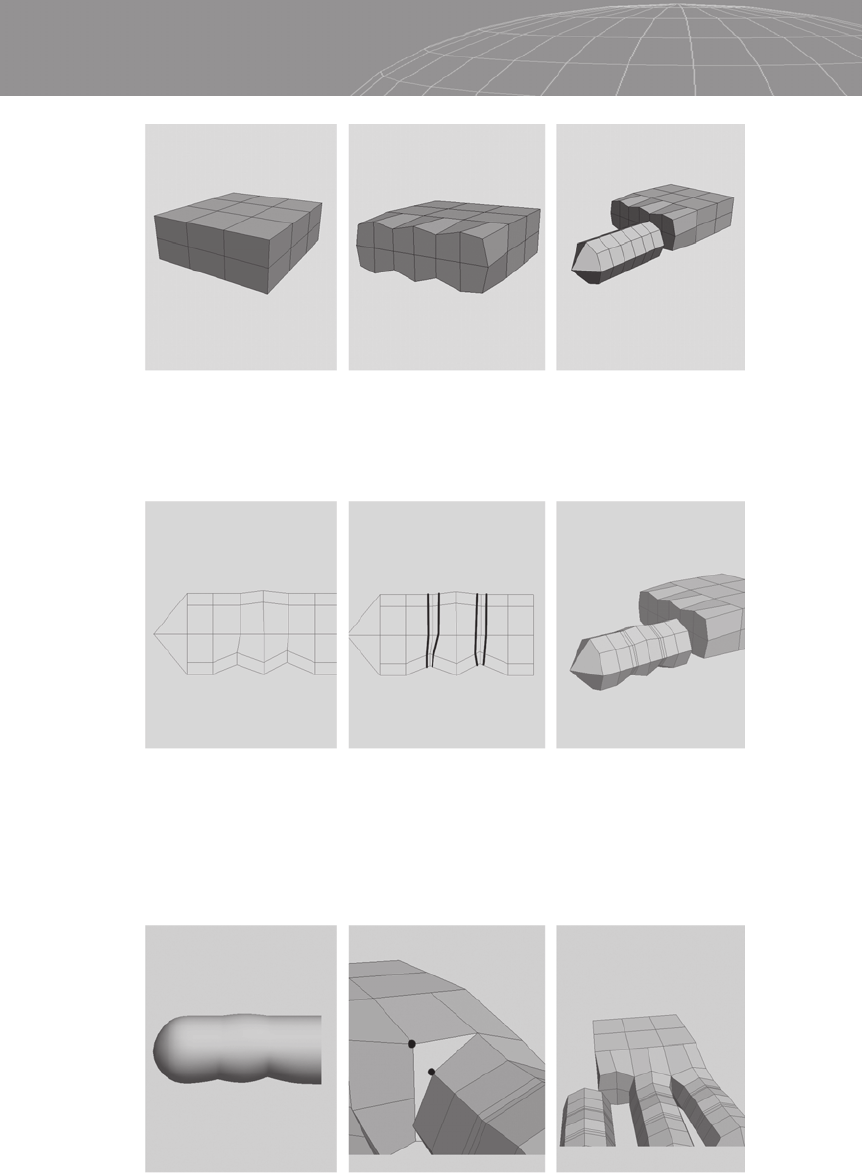
Start with a box, delete half, and place it according to the reference.
311
Chapter 12 – Cartoon Modeling
Figure 12-88: Reference sketch for the cartoon body.
Figure 12-89

Then move the vertices in the top view. Although we don’t have ref-
erence from the top view, we can still reshape the mesh to fit the
rest of the reference as closely as possible.
Cut the edges marked in Figure 12-91.
Make another cut so the hole for the arm is eight-sided, select the
internal polygons, and extrude a little bit.
312
Chapter 12 – Cartoon Modeling
Figure 12-90
Figure 12-91
Figure 12-92

Extrude the arm until we reach the wrist position, as shown below.
Then cut the areas marked at the right to produce the base edges
for the leg extrusion.
Select the marked polygons and extrude down a couple of times
until you reach the spot where the foot will be attached.
For the hand we start with a box, cut the middle edges of each fin-
ger, and reshape, as shown in the center image below. We start the
finger with a cylinder and push the center vertex forward.
313
Chapter 12 – Cartoon Modeling
Figure 12-93
Figure 12-94
From the side view we can move the vertices to conform to the fin-
ger shape. Cut the marked edges, and the finger is done.
After two levels of subdivision we can see how the finger will look,
as shown below on the left. Going back to level 0 of subdivision we
can make two more copies of the finger and start joining them one
at a time.
314
Chapter 12 – Cartoon Modeling
Figure 12-95
Figure 12-96
Figure 12-97
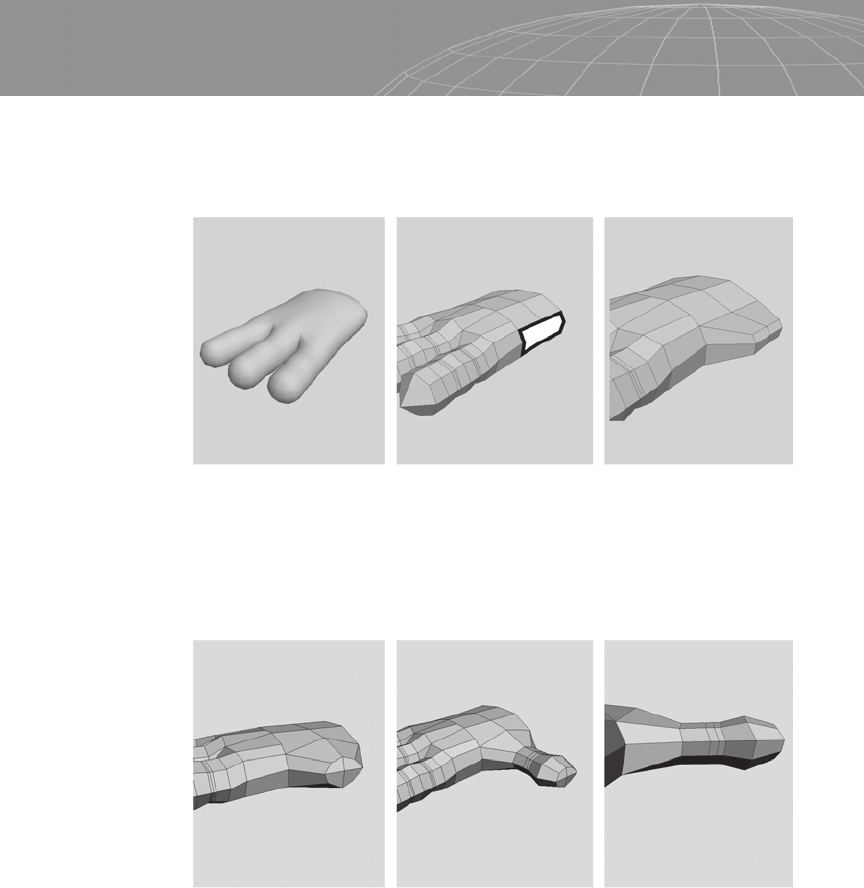
Figure 12-98 shows a subdivided version of the hand at the current
step (left). Select the marked polygons, extrude forward, and scale
down.
Before continue with the extrusion we need to make the thumb a
little rounder and continue extruding until we get the whole thumb
done. In looking at the thumb from the side, we can clearly see that
we must rearrange the vertices a little bit.
Notice the difference in the thumb after some tweaking (below,
left). The images at the center and right of Figure 12-100 show the
wire mesh and subdivided versions of the hand.
315
Chapter 12 – Cartoon Modeling
Figure 12-98
Figure 12-99
..................Content has been hidden....................
You can't read the all page of ebook, please click here login for view all page.