
Putting It All Together
At this point we have all the separate body parts nearly finished.
Now we can join them all together and start refining until we get a
well-defined male body. Later chapters show how to refine the mod-
els, but you can choose what level of detail you want for your model.
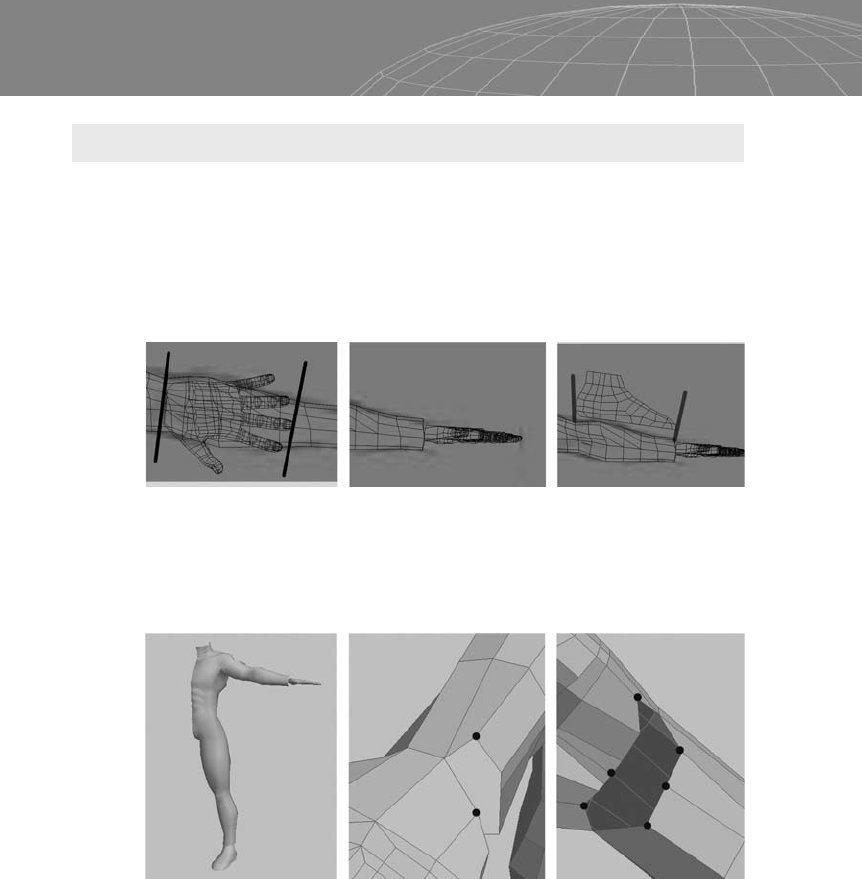
The first thing to do when joining parts modeled separately is to
check out the proportions.
Then we move the parts as close as possible and start welding ver-
tices. See Chapter 3 if you don’t remember how to weld unmatched
vertices.
Here we weld the wrist, attaching the hand to the arm.
142
Chapter 6 – Human Project: Male Body
Figure 6-76
Figure 6-77
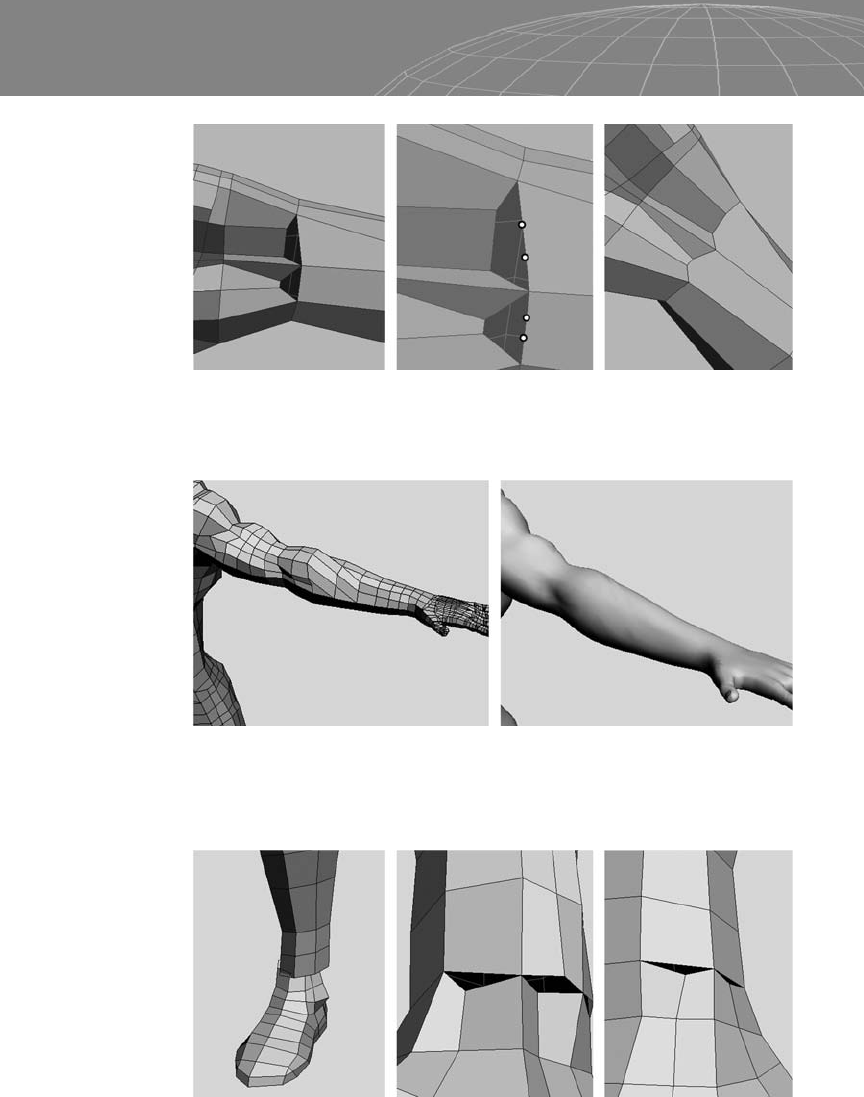
The complete arm is shown in Figure 6-79.
Now we can attach the foot to the leg and start welding just like
we’ve done with the hand.
143
Chapter 6 – Human Project: Male Body
Figure 6-78
Figure 6-79
Figure 6-80
You may want to continue the line flow of the foot by cutting the
marked area and then welding the marked vertices.
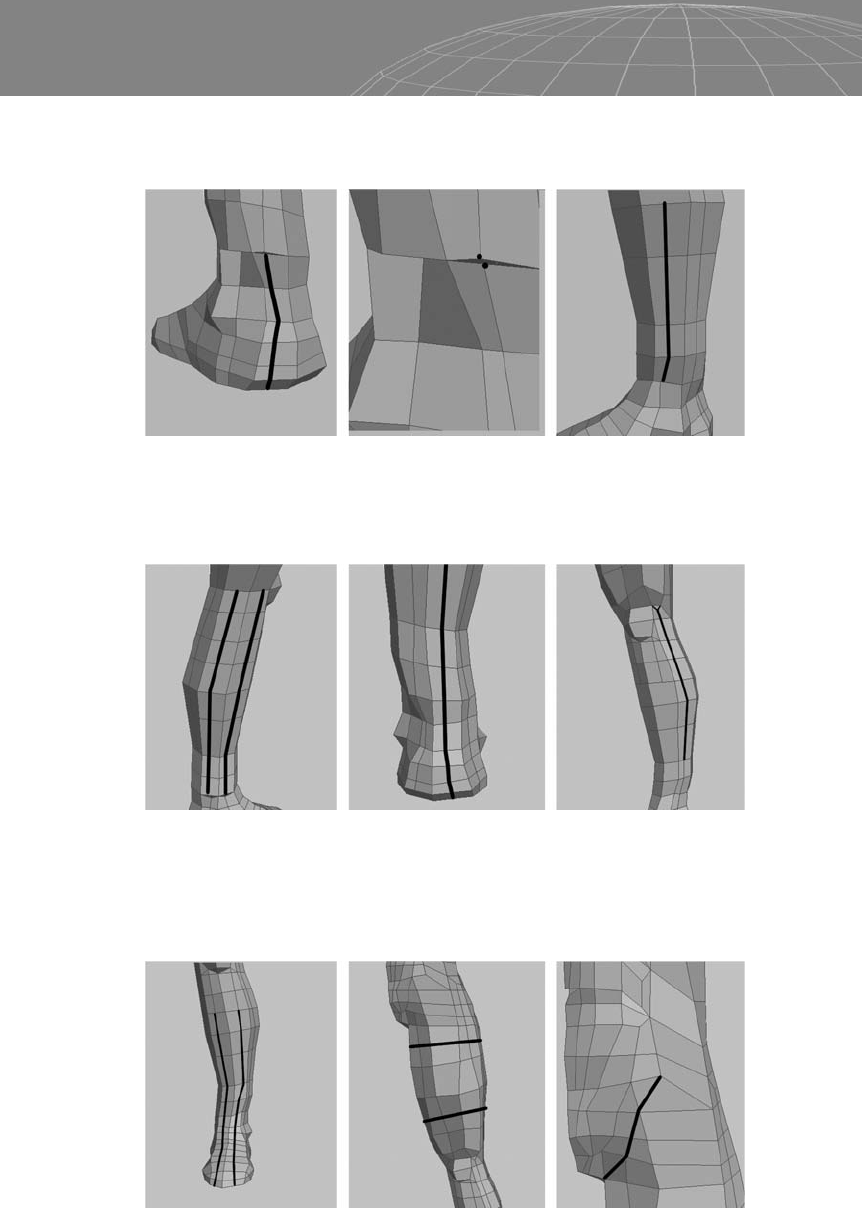
With these parts ready we can start adding the final edges for finer
control of muscles and definition areas.
Here we cut on the tibialis area. Notice the front marked edges;
they provide a base mesh for toes. Then we add more control verti-
ces for the quadriceps and start changing the structure of the pelvis.
144
Chapter 6 – Human Project: Male Body
Figure 6-81
Figure 6-82
Figure 6-83
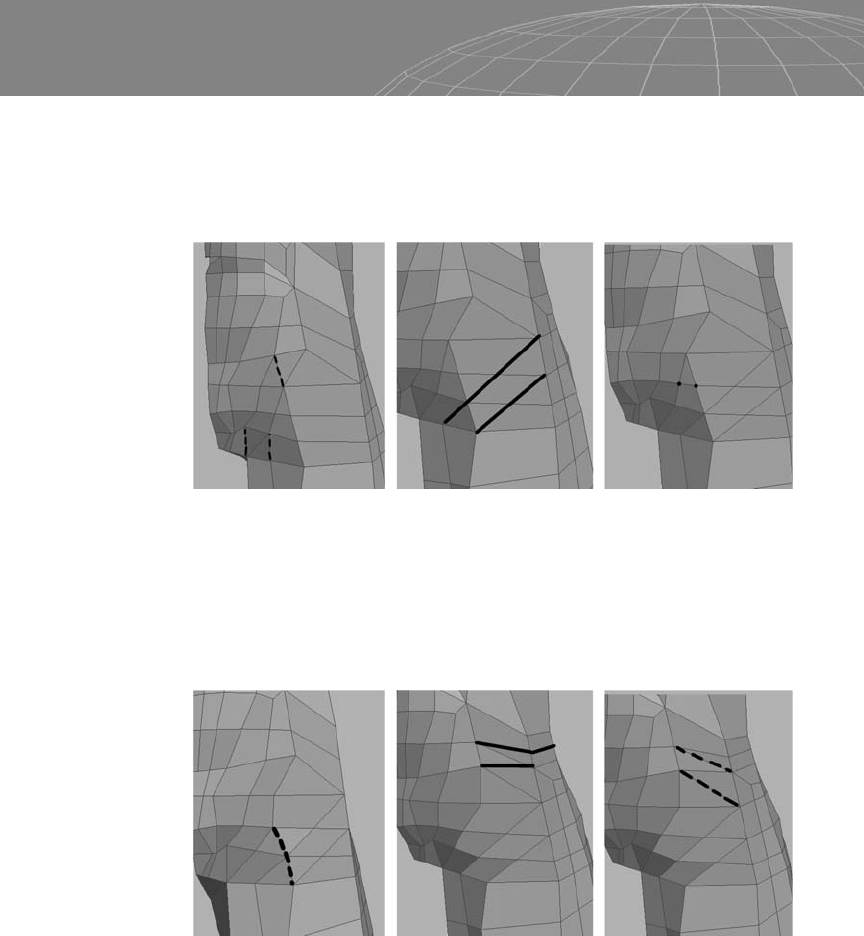
Notice that we must cut, remove, and weld some specific sub-ele-
ments to change the current flow of the edges. Remove the dashed
lines, cut the marked edges, and weld the marked vertices shown in
Figure 6-84.
Remove the dashed edges at the left and cut the marked area in the
following figure. Then remove the dashed lines at the right. Notice
that this procedure will lead us to a quad mesh as much as possible.
It is okay to leave some tris as long as they are oriented so that they
won’t cause problems.
Then we start adding more vertices that follow the edge flow to
improve the tension and control areas.
145
Chapter 6 – Human Project: Male Body
Figure 6-84
Figure 6-85

The wrist needs more control for deformation purposes as well as
some continuous edges for better definition of extensor muscles.
Notice that after we joined the hand with the arm, some edges are
made as long as possible.
146
Chapter 6 – Human Project: Male Body
Figure 6-86
Figure 6-87
Figure 6-88
..................Content has been hidden....................
You can't read the all page of ebook, please click here login for view all page.