
Chapter 6
Human Project: Male
Body
Torso and Limbs
This chapter describes the overall process of modeling a male
human body. The topology and workflow shown can also be used for
multiple purposes related to humanoid body modeling, with correct
deformation structure and proportions.
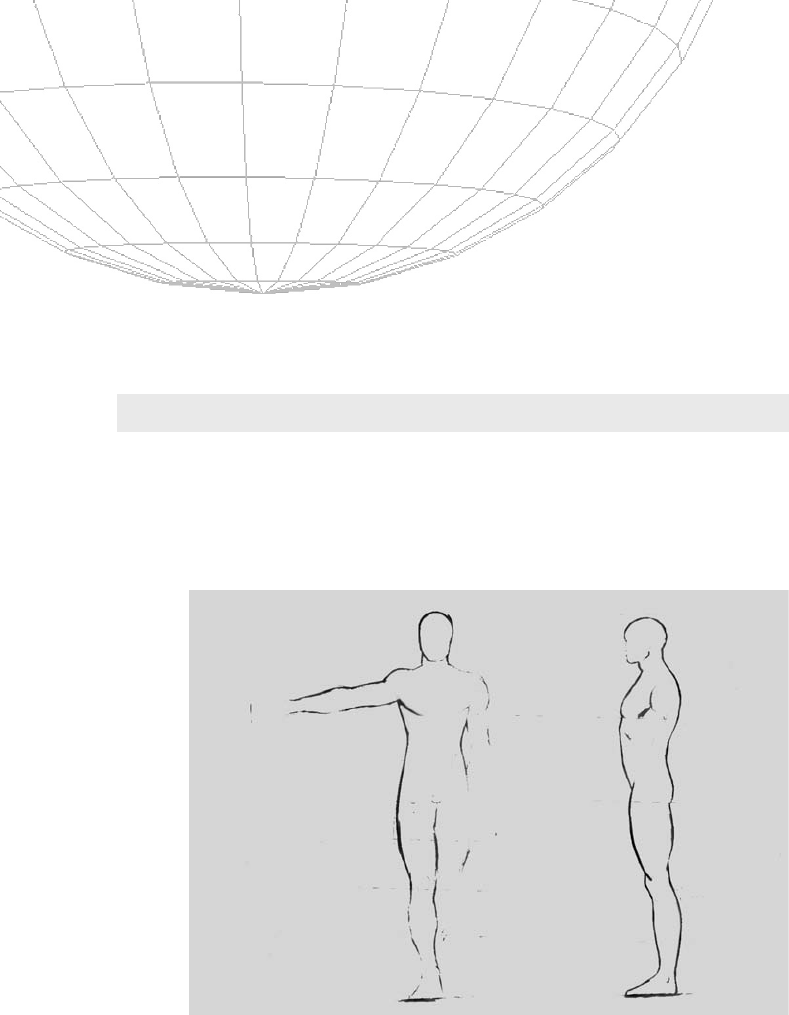
Figure 6-1 shows the reference sheet we use in this chapter.
For this lesson on torso and limb modeling we start with half of a
box. As shown in the previous chapter, just create a symmetrical
box. Select the vertices of one half and delete. Then position the
box to match the reference as closely as possible.
111
Figure 6-1: Male body reference.

We reshape the box to fit the reference without making any changes
to the original number of polygons (like cutting or welding). We’re
just making the shape for a basic low-poly body.
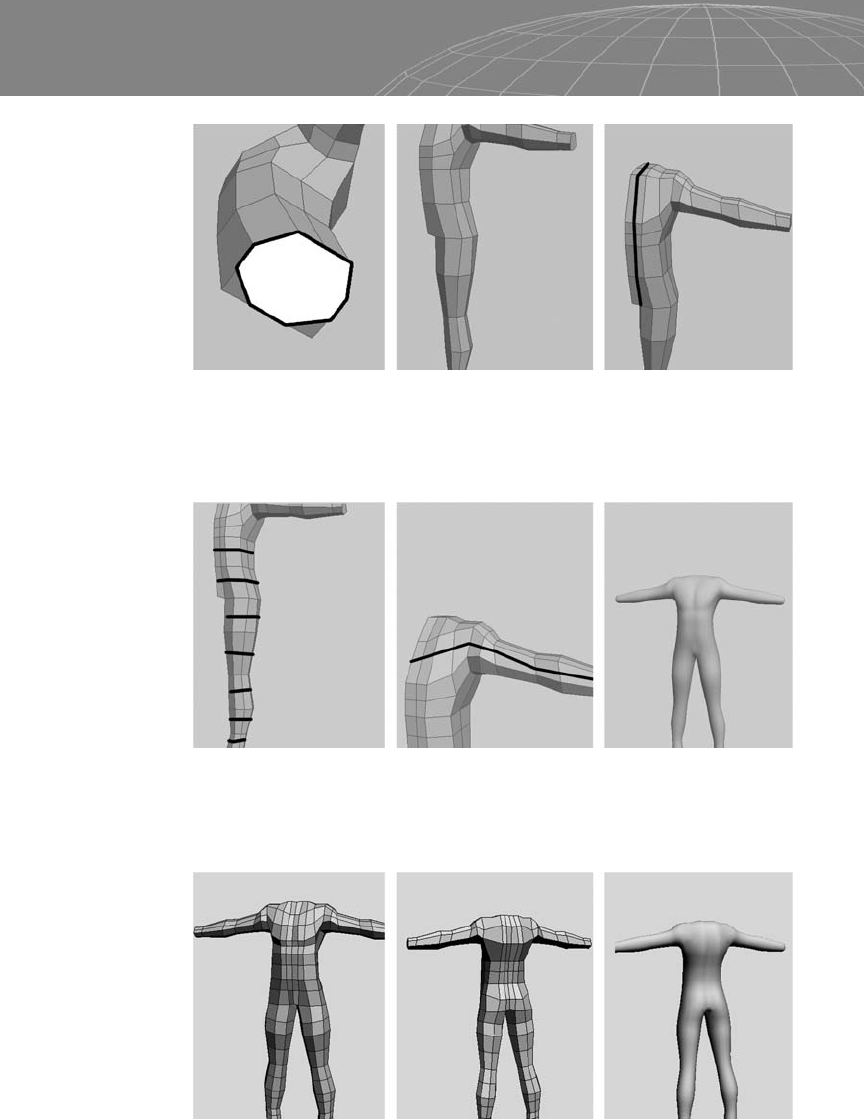
Cut as shown in the center of Figure 6-4 and select the polygon for
the arm. Extrude it one level, then cut as marked at the right. This
is the start of the basic arm.
112
Chapter 6 – Human Project: Male Body
Figure 6-2
Figure 6-3

Cut the marked area and move the eight-sided n-gon in the direc-
tion marked in the center image below, then cut some loops around
the arm area. These are pretty important because they are the first
steps in determining the basic workflow of the mesh. Like most
things in art (and in life too), if you don’t have a good foundation, it
becomes harder to make something more sophisticated.
With the upper body finished, we create a cylinder. Cut the marked
area below the torso to create an eight-sided shape to merge with
the eight-sided cylinder that will be the leg.
113
Chapter 6 – Human Project: Male Body
Figure 6-4
Figure 6-5

After some tweaks, we have a rough torso and leg in the viewport.
Low-poly game modelers would want to be careful about adding
polygons here so the mesh doesn’t slow down the game too much.
Now we select the marked polygons and delete, as shown in Figure
6-8. The vertices from the torso and the leg should match perfectly
after the attach operation. We also need to cut in a loop near the
center to get more control in the front and the back of the geometry.
114
Chapter 6 – Human Project: Male Body
Figure 6-6: Left, eight-sided cylinder for the leg. Right, cut the bottom of the
torso to create eight sides.
Figure 6-7
Create some more edges with the Cut tool to improve the control
cage of the whole mesh.
Notice the whole mesh after mirroring. It’s very rough but has good
topology. With efficient rigging, the mesh will deform smoothly.
115
Chapter 6 – Human Project: Male Body
Figure 6-8
Figure 6-9
Figure 6-10
..................Content has been hidden....................
You can't read the all page of ebook, please click here login for view all page.