
Navigation
The navigation tools in 3ds Max are located at the bottom right of
the user interface. These tools can be accessed by pressing the but-
tons, but it’s highly recommended that you customize shortcuts to
speed up your workflow.
Perspective and Axonometric (orthographic and isometric) views
are available in 3ds Max. Perspective is most often used because it
simulates the way our eyes see the world, with the correct perspec-
tive of vanishing points. Axonometric orthographic view is
constrained to 90 degrees in one of the planes (top, left, right, or
bottom), and Axonometric isometric is similar to CAD programs,
where parallel lines remain parallel to infinity instead of converging
to a vanishing point as in Perspective view.
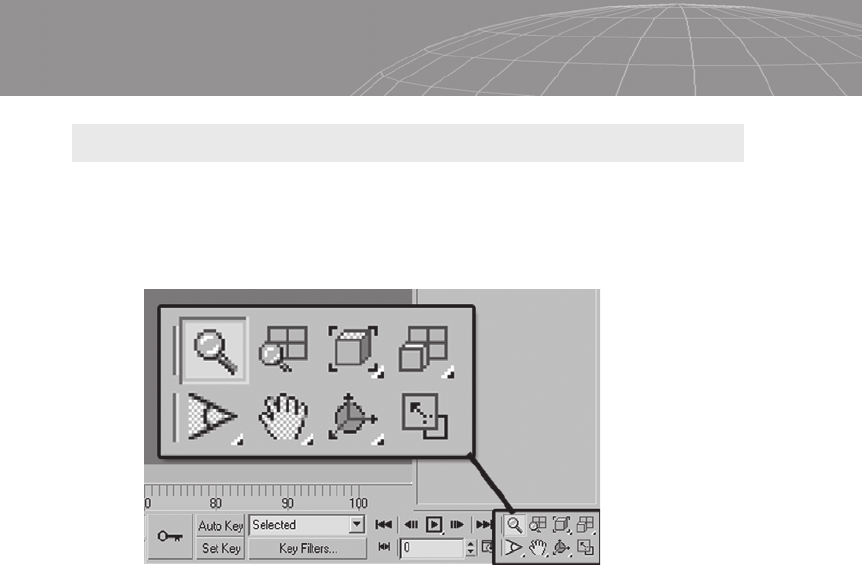
From left to right and top to bottom, the navigation options are:
Zoom: This tool moves the view closer or farther from the objects
in the active viewport.
Zoom All: Zoom closer or farther from objects in all viewports si-
multaneously.
Zoom Extents All: Zoom in on all objects of the screen.
Zoom Extents Selected: Zoom in on all selected objects.
Field-of-View (only in Perspective view): Control the view’s
width (FOV).
Pan View: Move the view by clicking and dragging.
Arc Rotate: Rotate the perspective around. The arc rotate with a
white center rotates around the selection. The arc rotate with
a yellow center rotates around a selected subobject.
344
Appendix A – 3ds Max Polygonal Modeling Quick Start Guide
Figure A-8: The navigation tools.
Maximize Viewport Toggle: Resizes the active viewport to fill
the space of all four viewports. Pressing the toggle again
causes the viewport to go back to the previous layout scheme.
Layouts
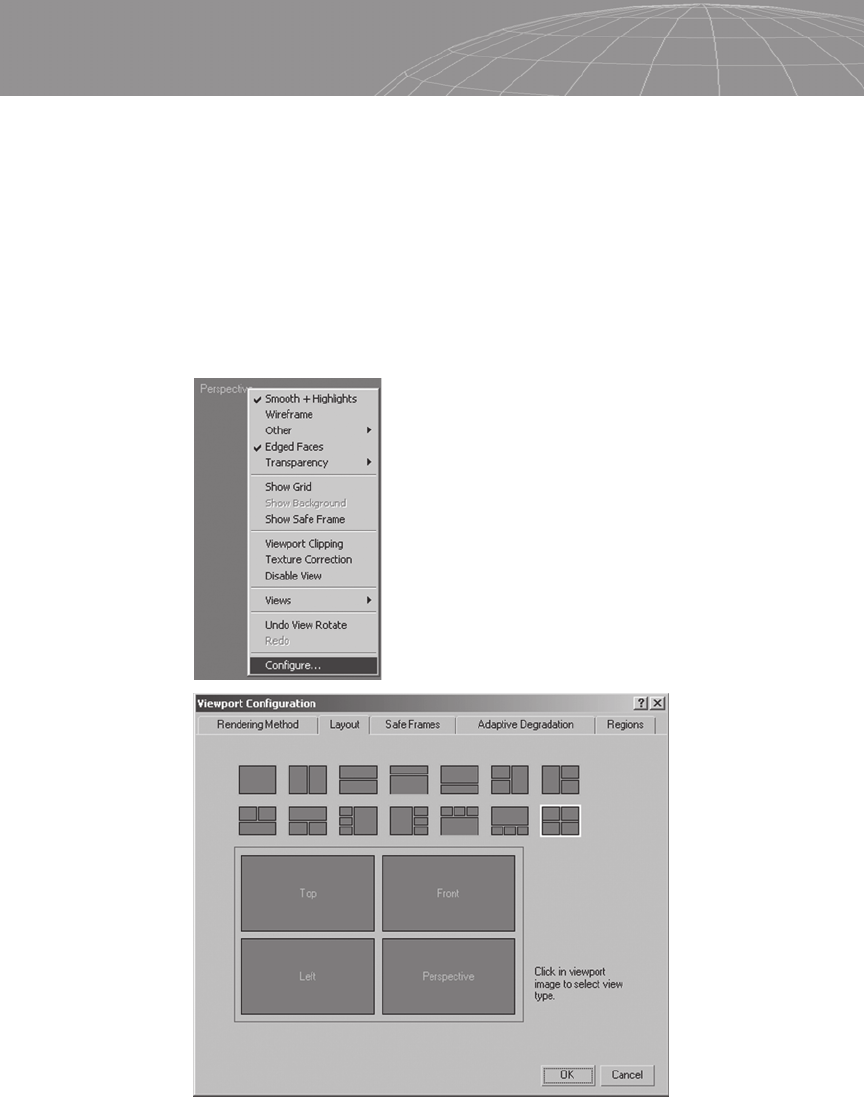
To change the viewport layout in 3ds Max, right-click the viewport’s
label and choose Configure, as shown in Figure A-9. The Viewport
Configuration window is displayed. Then choose the Layout tab, as
shown in Figure A-10.
345
Appendix A – 3ds Max Polygonal Modeling Quick Start Guide
Figure A-9
Figure A-10
In the Layout tab you can choose the layout scheme from prede-
fined layouts and then right-click the viewport panel to select which
view will be displayed. You can also change the viewport by
right-clicking the viewport’s label after choosing the layout.
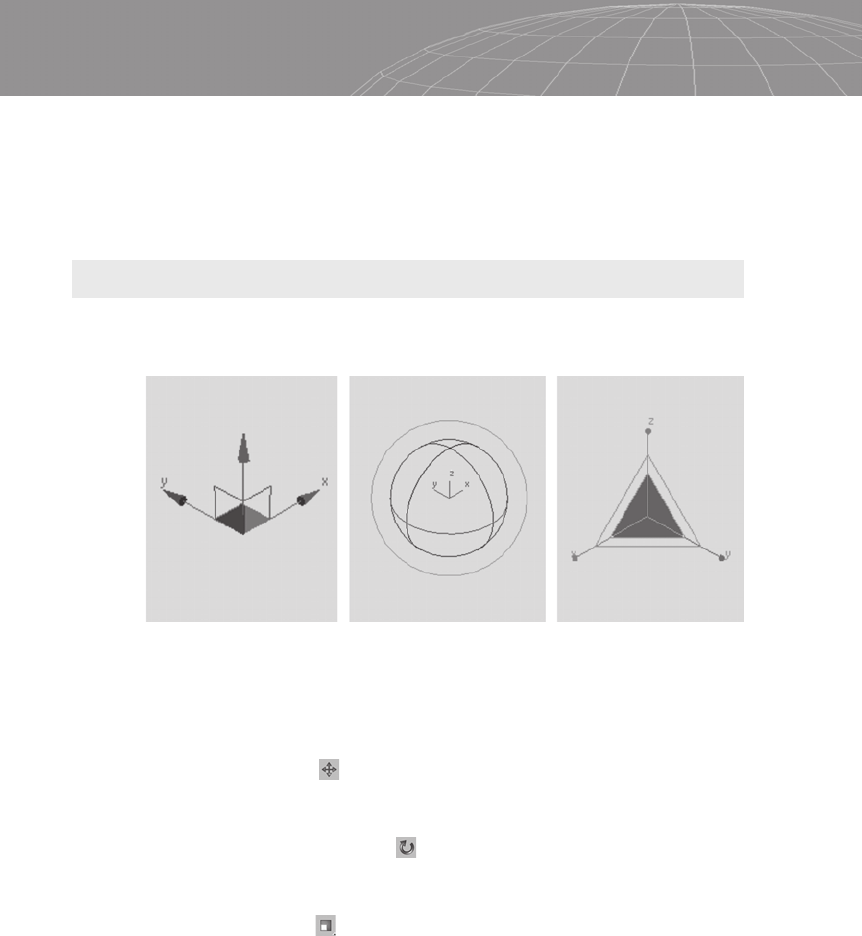
Gizmos and Basic Manipulation
The gizmos in 3ds Max are similar to those in Maya and Softimage
XSI.
3ds Max introduced better gizmos in version 5, which clearly has
had a positive influence in the quality and precision of selection and
manipulation objects and subobjects in basic operations.
The Move tool now has the 90-degree right angle relative
to the axis in three dimensions. If you select an angle, it will move
locked in the two axes relative to the angle you selected.
The Gimbal Rotate tool has an intuitive way of manipulating
the object and also displays precise angle rotation information while
performing the operation.
The Scale tool acts like the Move tool. When selecting the
middle triangle, 3ds Max will perform uniform scaling operation.
When selecting an exterior transparent strip, 3ds Max will lock the
scale in the two corresponding axes.
346
Appendix A – 3ds Max Polygonal Modeling Quick Start Guide
Figure A-11: From left to right, Move gizmo, Rotate gizmo, and Scale gizmo.
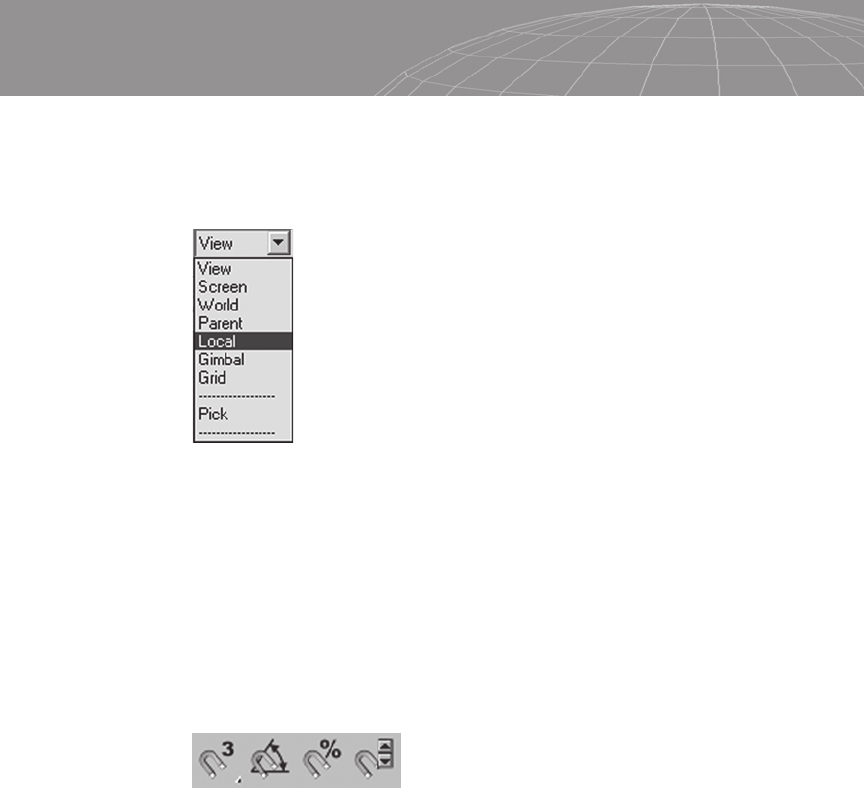
Axis
The Reference coordinate system in 3ds Max has seven options
available:
The local and world axis related to the object can be selected from
the drop-down list in the main toolbar.
Snap
The snaps are most useful for precise modeling, architectural wall
placement, or other modeling that requires perfect placement of
objects along a grid system.
In 3ds Max you can choose from four types of snapping mode.
The options are:
Snap toggle: Snaps the cursor to the grid’s unit.
Angle Snap toggle: Snaps the angle at every 5 degree rotation.
Percent Snap toggle: Snaps the scale to a specific percentage.
Spinner Snap toggle: Determines the spinner value at each
click.
The snap settings can be changed with the Customize | Grid and
Snap Settings menu option.
347
Appendix A – 3ds Max Polygonal Modeling Quick Start Guide
Figure A-12
Figure A-13: Snap options.

Mirror/Duplicate
To duplicate objects, hold Shift and apply a transformation tool (like
move, rotate, scale). The Clone Options window will appear with
parameters to choose from like copy, instance, or reference and the
number of copies and name for the new object.
To mirror an object, press the Mirror button .
The Mirror window has two main choices. The Mirror Axis area
allows you to choose from one or more axes on which to perform
the mirroring operation. In the Clone Selection area, you can choose
whether the mirrored object will be No Clone, Copy, Instance, or
Reference.
348
Appendix A – 3ds Max Polygonal Modeling Quick Start Guide
Figure A-14: Clone Options window.
Figure A-15: Mirror window.
..................Content has been hidden....................
You can't read the all page of ebook, please click here login for view all page.