

The Ear
The ear is probably the most intricate part of the human anatomy to
model. As with almost anything in the 3D world, there is more than
one way to create an ear. As you gain experience, you will find the
easiest way for you to perform this task.
For this ear modeling exercise, either we can start with a single
quad polygon and use extrusion or we can create a plane primitive
with a 1x1 segment. In 3ds Max you can create a poly box with 1x1
segments, delete the five faces, and position the face as shown in
Figure 5-26, or you can draw corner splines, extrude, and delete the
back part.
Starting with a single polygon, select the edge, and start
extruding until we get the ear reference covered.
98
Chapter 5 – Human Project: Male Head
Figure 5-25: The anatomy of a human ear.
Figure 5-26
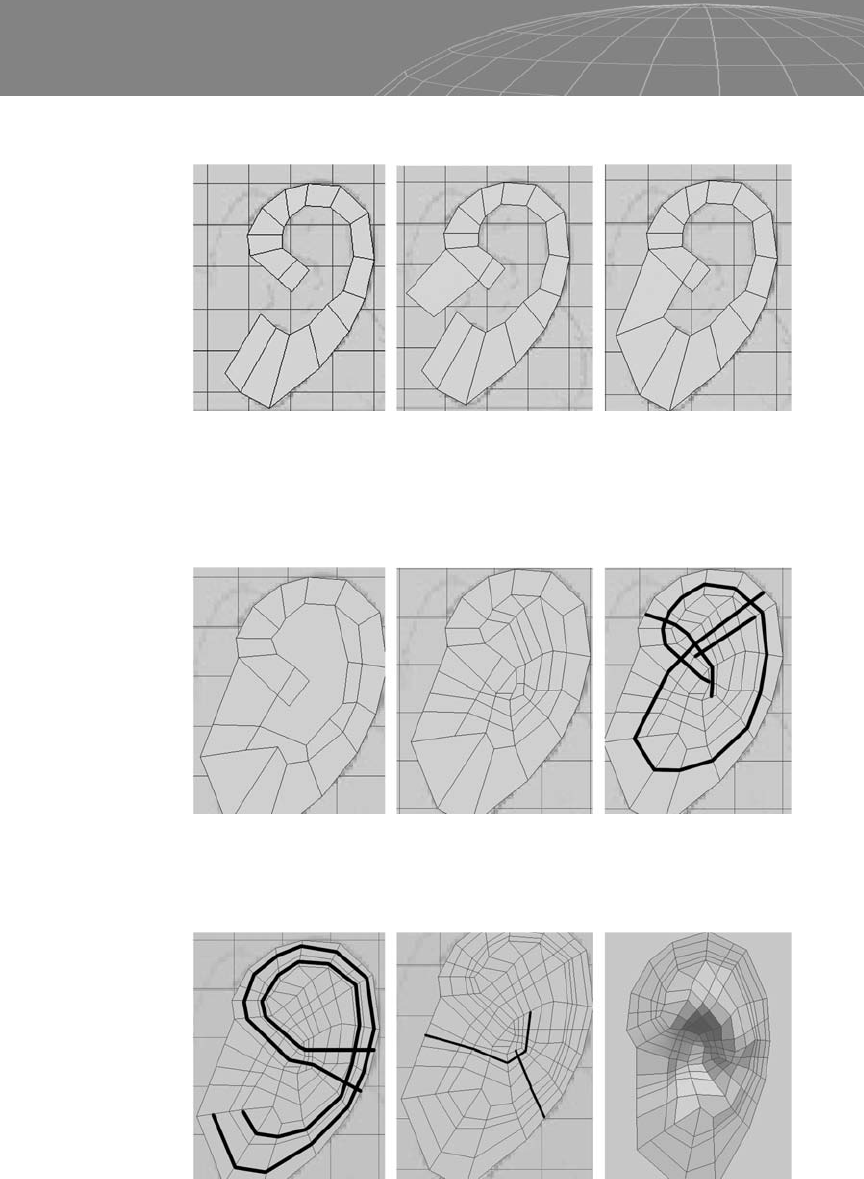
Then extrude the edge as shown below and weld the vertices.
Now we can cap the hole and start cutting the polygon. Keep in
mind that you should keep everything quad as much as possible
while following the flow of the ear’s anatomy.
At this stage you will notice the ear is pretty flat. You can choose
whether to cut now or later in order to add some volume.
99
Chapter 5 – Human Project: Male Head
Figure 5-27
Figure 5-28
Figure 5-29

Select the area marked in Figure 5-30, extrude in a bit, then scale
down.
Now we can see how it’s coming along in the smooth version.
Select the marked region and extrude a bit and scale down but not
too much.
We now have the base of the ear done. Select the marked vertices
and push forward to improve the roundness of the helix.
100
Chapter 5 – Human Project: Male Head
Figure 5-30
Figure 5-31
Figure 5-32
Weld the marked vertices of the image on the left to blend the
region of the helix and the concha. Select the vertices as shown at
the right and push back a bit to define the scapha.
Then push back the vertices as shown at the left in Figure 5-34 to
prepare the fossa triangularis. Select the marked vertices on the
right on the anti-helix area and push forward (with some Soft Selec-
tion, Cluster, or whatever tool you have at your disposal).
Cut the marked region to get more control over specific areas. We
now have more control over the fossa triangularis and the concha
area near the tragus.
101
Chapter 5 – Human Project: Male Head
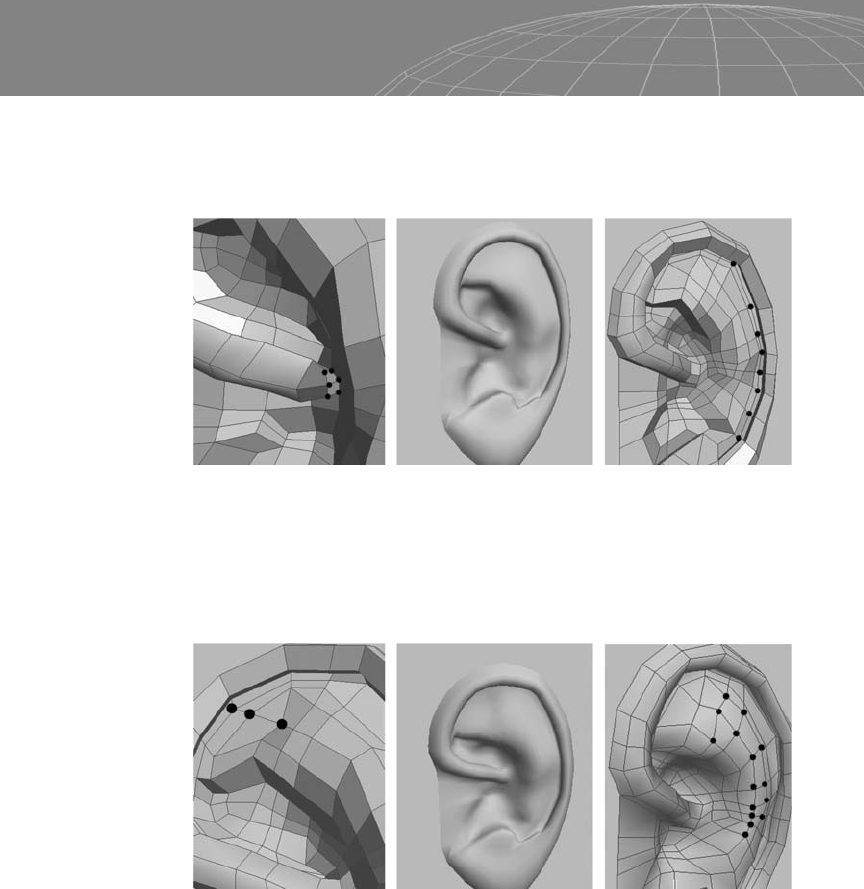
Figure 5-33
Figure 5-34

Now it’s time to define the tragus and the hole. Cut the marked
region in the center of Figure 5-36 and select that group of poly-
gons. Extrude in and scale down a little bit.
At this point we have something similar to Figure 5-37. (The image
at the left shows the view from the back with the normals flipped to
the other side.) Now we cut the marked area and weld the vertices
between the helix and tragus to blend them a little bit so that the
helix doesn’t protrude too much.
102
Chapter 5 – Human Project: Male Head
Figure 5-35
Figure 5-36
Figure 5-37
..................Content has been hidden....................
You can't read the all page of ebook, please click here login for view all page.