
Chapter 10
Ogre Head
In this chapter we model an ogre head that we will use in Chapter
11, “Introduction to ZBrush.” We also discuss displacement and
how it affects polygonal geometry.
Creating an Ogre Head
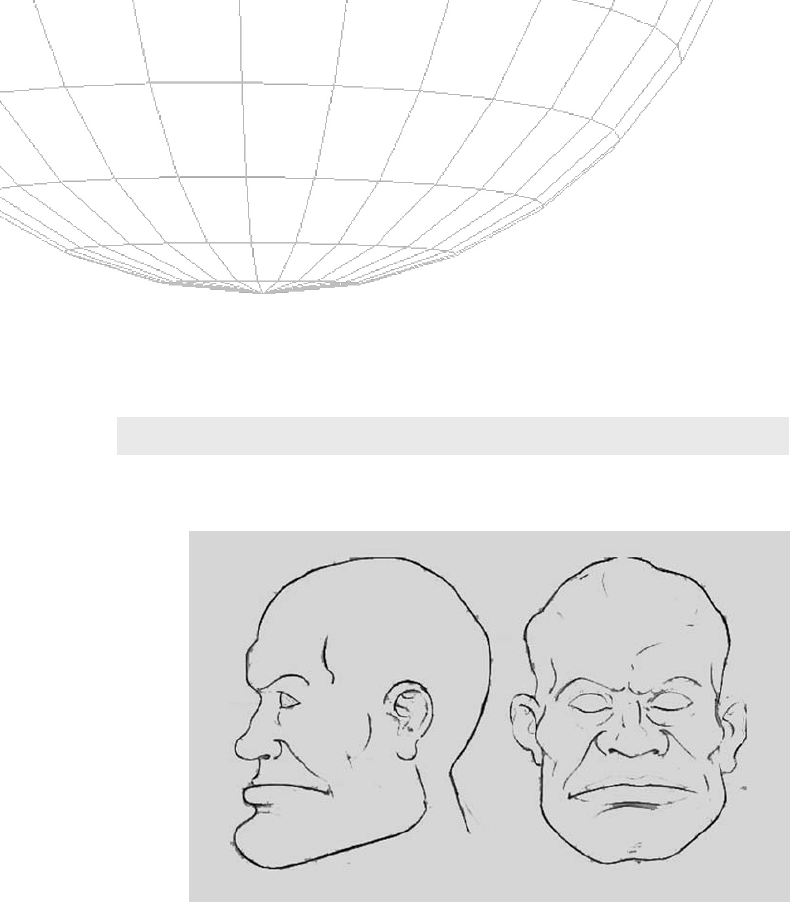
Figure 10-1 shows the reference sheet we will use to create our
ogre head.
223
Figure 10-1: Reference for ogre head.
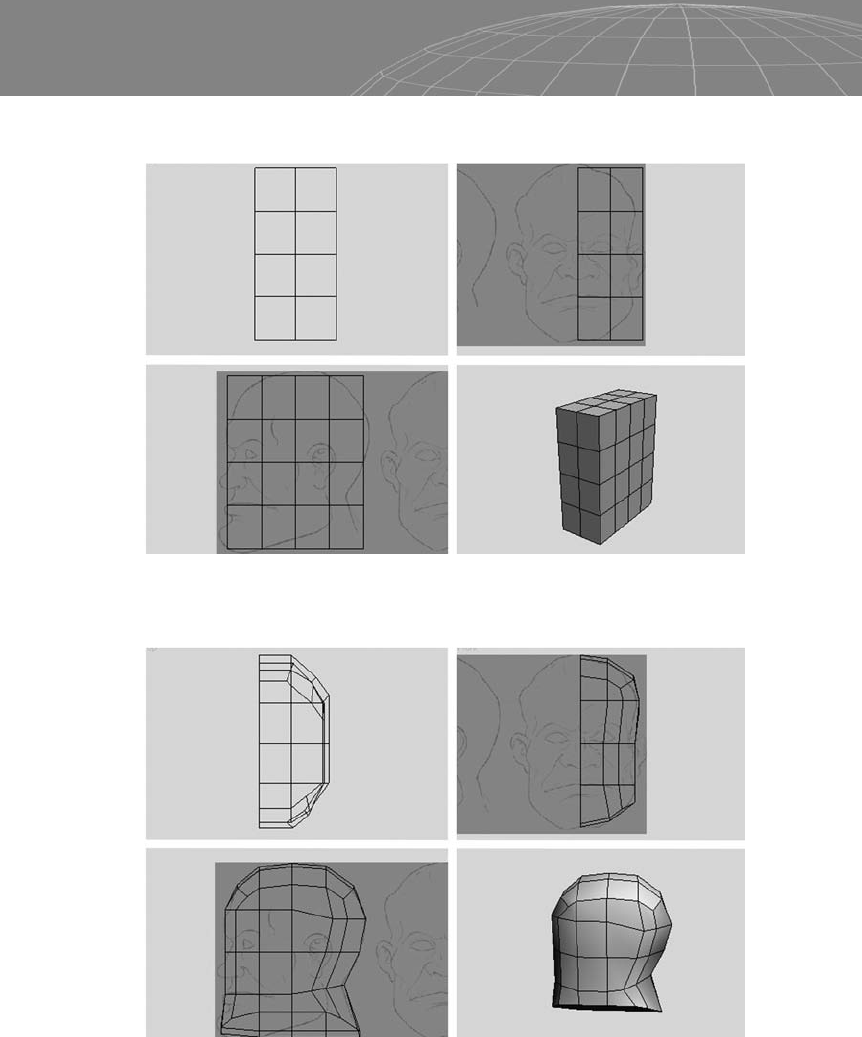
Start with half of a 4x4 box.
Reshape the vertices to fit the reference as much as possible.
Next we position the vertices marked below to match their respec-
tive positions in the side view. This will help us to prevent “flat
face.” Then we remove the marked edges.
224
Chapter 10 – Ogre Head
Figure 10-2
Figure 10-3
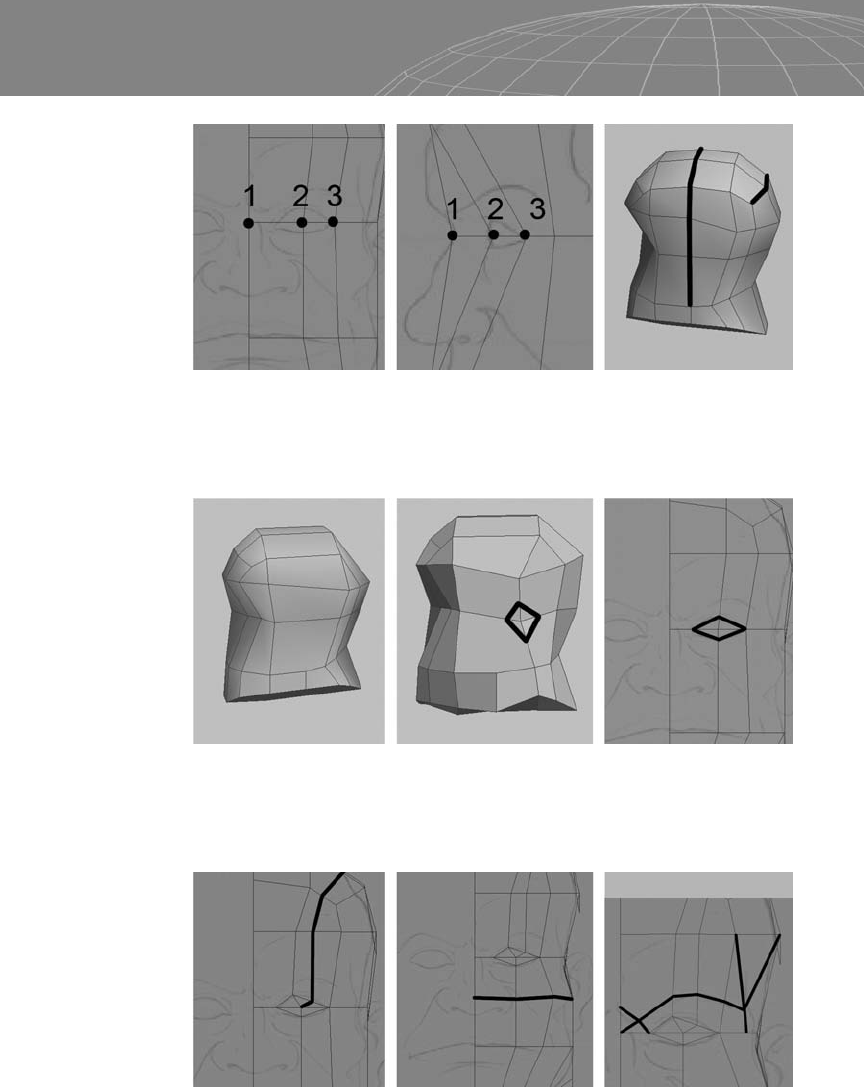
Cut as shown in Figure 10-5 to provide the base of the edge loop for
the ear and the eye.
Add more edges as shown in Figure 10-6, always watching to be
sure the topology of the head is correct.
225
Chapter 10 – Ogre Head
Figure 10-4
Figure 10-5
Figure 10-6

Remove the marked edges shown at the left in Figure 10-7 and
rebuild the edges as shown at the right.
Complete the loop around the eye and add more edges.
Cut the marked areas and notice the loops created: one internal and
one external. Be sure to keep everything quad as much as possible.
226
Chapter 10 – Ogre Head
Figure 10-7
Figure 10-8
Figure 10-9
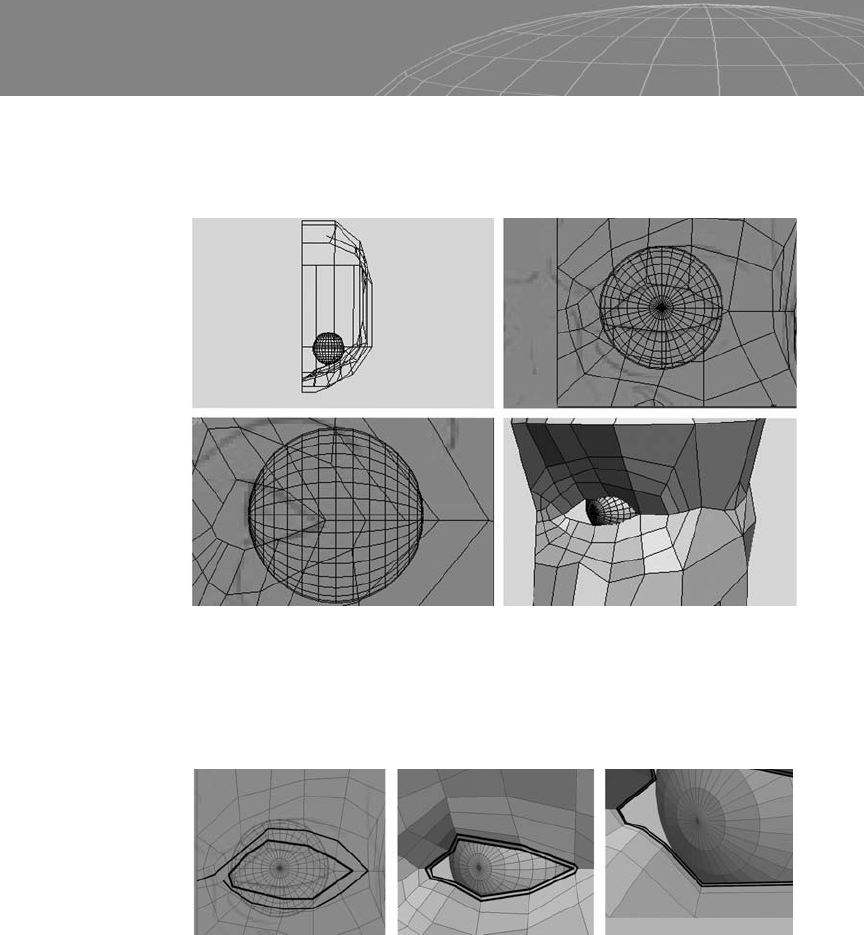
To define the eye area we’ll use the same technique described in
Chapter 9. Put the eyeball in position and reshape the area around
it.
Delete the hole and create one more loop inside so that we have
finer control there. The image in the center shows the two edges as
a result of using the Chamfer tool and the image at the right shows
an even finer chamfer of the interior edge.
As we did earlier, push back the border edges. It doesn’t matter if it
enters the eyeball; just move the vertices to fit the volume of the
shape you want.
227
Chapter 10 – Ogre Head
Figure 10-10
Figure 10-11
..................Content has been hidden....................
You can't read the all page of ebook, please click here login for view all page.