
The Male Head Shape
This section shows how to create the shape of a head for a male
figure.
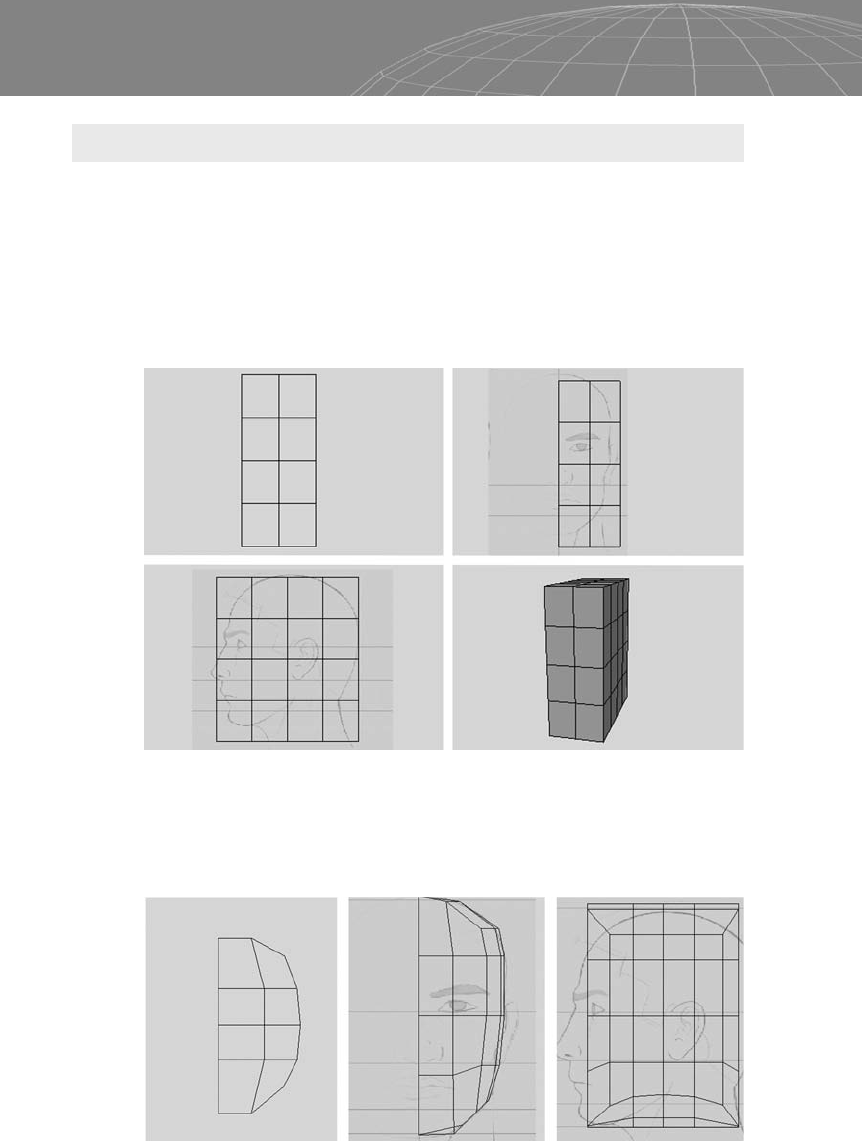
For this head, we use box modeling, starting with a 4x4 seg-
ment box and then deleting the other half. Since human heads are
symmetrical, we model half, mirror it, and weld the vertices. (3ds
Max has a symmetry modifier that automatically welds the vertices
while you adjust in real time.)
Position the cube’s 4x4 segments to fit the head and delete half. It
doesn’t matter which half you delete; just do it so that you can see
the edges and vertices from the side view (left or right).
88
Chapter 5 – Human Project: Male Head
Figure 5-2: Using box modeling to model a human head.
Figure 5-3: Deleting half the head and starting to reshape it.

The first thing to do when modeling a head is to shape it into an oval
from the top view, the front view, and then the side view. It’s one of
the quickest ways to start without getting confused about the
vertices.
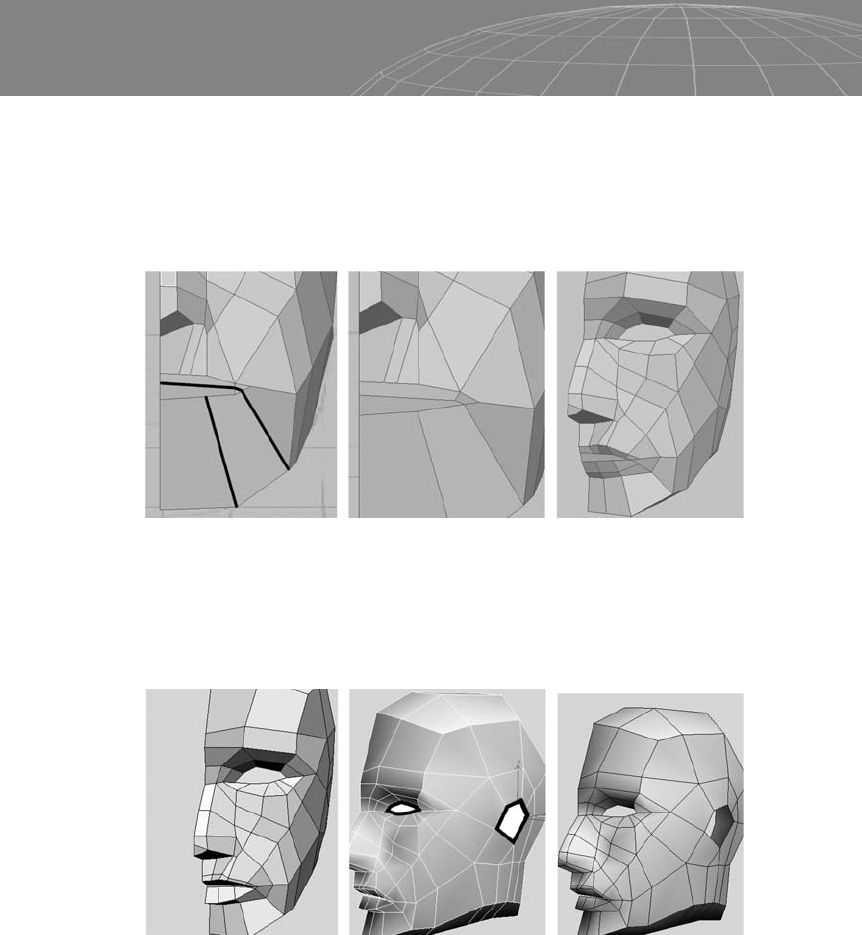
Select the edge that’s marked in Figure 5-4 and remove it.
Depending on the software you’re using, you’ll probably have to
remove stray vertices.
Then cut the marked area where the ear will be positioned, and
remove the dashed line.
At this stage we’ve made the basic shape of the head, so now we
can tweak it for just about any kind of humanoid-like head.
89
Chapter 5 – Human Project: Male Head
Figure 5-4
Figure 5-5

The head should look like Figure 5-7 when viewed in the viewports.
Although we’ve just started, the head is beginning to take shape. It
does not have to fit the reference exactly, but the proportions must
be matched during the process.
Now it’s time to define the eye and nose area. Creating a good
structure and a line flow that works is critical here.
90
Chapter 5 – Human Project: Male Head
Figure 5-6
Figure 5-7

Figure 5-9 shows where to cut the eye area and gives the main
scheme for the nose and face area.
Do not extrude the nose; just push the two front vertices to give the
shape. Remember, nothing substitutes for practice and keeping
everything quad while you cut.
91
Chapter 5 – Human Project: Male Head
Figure 5-8
Figure 5-9
Figure 5-10
When defining the mouth area, try to make the line flow as round as
possible. This will make it easier when animating phonemes. As you
gain experience, you will find your own way to do this, but for now
cut the mouth and cheek as shown in Figure 5-11 to create lines and
move vertices.
Now it’s time to define the mouth a bit. Be sure to delete the poly-
gons in the ear and eye socket areas so we can smooth them. The
areas will be processed as holes during the smooth operation and
will not generate tension as they would with polygons there.
Now it’s time to refine the area eye. After we open the hole, create
and position the sphere as shown in Figure 5-13. Be sure to use all
the viewports that are necessary.
92
Chapter 5 – Human Project: Male Head
Figure 5-11
Figure 5-12
..................Content has been hidden....................
You can't read the all page of ebook, please click here login for view all page.