

Now it’s time to raise the bar a little bit for details. The model at
this point can be used as a base mesh for sculpting (using displace-
ment) or as a high-end game model, but for a high-resolution model
it needs more details. We start by adding more control for the torso
area and the arm joints, extruding the selected marked polygons.
Weld the marked vertices and cut the marked edges; the actual
edges aren’t enough to generate sufficient tension and smoothing
for the gluteus area. Notice also that the edges of the leg are pretty
much the same as the reshaped cylinder, but the leg has much more
detail than a simple cylinder.
The new edges are very welcome, as they add detail, but remember
that they must be planned carefully to follow the edge flow and edge
loops in order to be topologically and anatomically correct.
121
Chapter 6 – Human Project: Male Body
Figure 6-23
Figure 6-24

Now the line flow of the arms must be rearranged to fit the anatomi-
cal flow of real muscle topology. Cut the marked edges, weld the
marked vertices, and remove the dashed lines in Figure 6-26. This
way we keep everything quad and redirect the flow correctly for
this purpose.
We do the same thing on the other side of the arm: Redirect the
edges by cutting diagonally and removing the dashed lines.
122
Chapter 6 – Human Project: Male Body
Figure 6-25
Figure 6-26
Figure 6-27
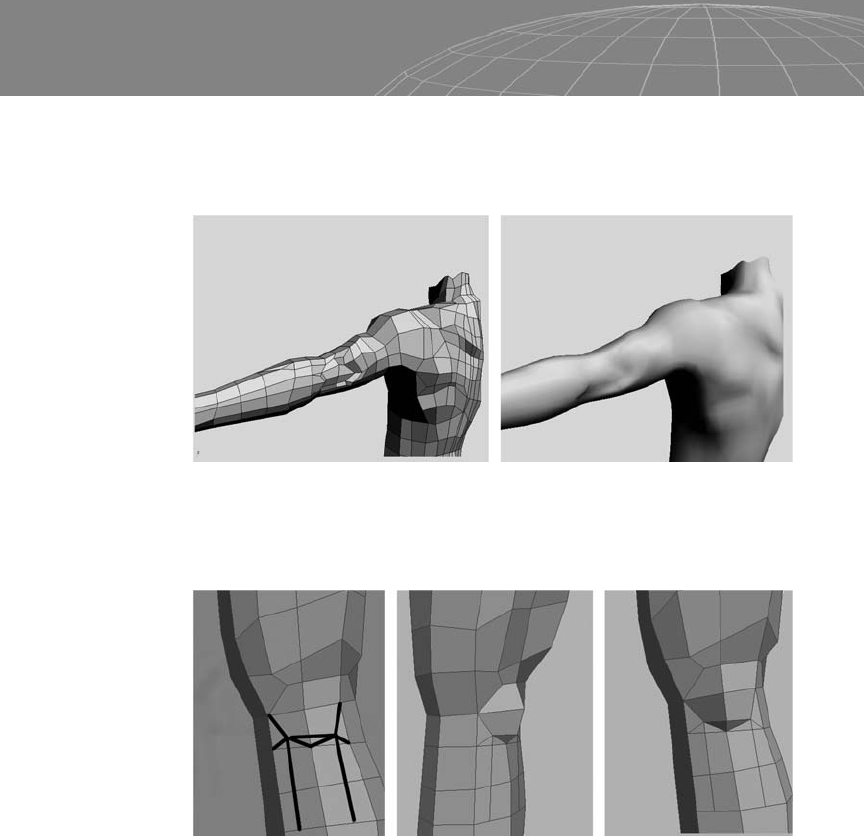
The triceps area needs some more cutting for a better refinement of
the muscle. Figure 6-28 shows the triceps area after additional cut-
ting and vertex moving.
The marked areas in Figure 6-29 will be the base for the patella and
the patellar tendon.
Now let’s work on the hands and feet. When they’re finished, we
will put them all together and refine the whole mesh at once.
123
Chapter 6 – Human Project: Male Body
Figure 6-28: Mesh and shaded versions of the triceps area.
Figure 6-29
..................Content has been hidden....................
You can't read the all page of ebook, please click here login for view all page.