

With the base mesh already done, we can start with more complex
refinement, like adding basic muscle structure for even further
definition.
Cut closer to the middle where we are going to weld the abdominal
muscles.
Improve control of the abdominal muscles a bit and then cut the pel-
vic area to obtain more control and redefine the correct polygonal
flow.
116
Chapter 6 – Human Project: Male Body
Figure 6-11
Figure 6-12

The following step adds more edges just by following the line flow.
There is a triangular polygon that will generate unwanted tension,
but as long as we cut the polygons, this triangular polygon will be
replaced by a quad.
Select the marked polygons in Figure 6-15 and extrude up, cut the
marked edges, and delete half. If the half is not deleted, it will pro-
duce undesired results when smoothing. Cut the marked back area
to increase the tension around the spine.
117
Chapter 6 – Human Project: Male Body
Figure 6-13
Figure 6-14

Notice the marked lines to cut. These follow the line flow and help
us to obtain more control of the mesh cage and improve the
definition.
Here we have the choice of where to cut and where we want to
have more or less tension.
118
Chapter 6 – Human Project: Male Body
Figure 6-15
Figure 6-16
Figure 6-17
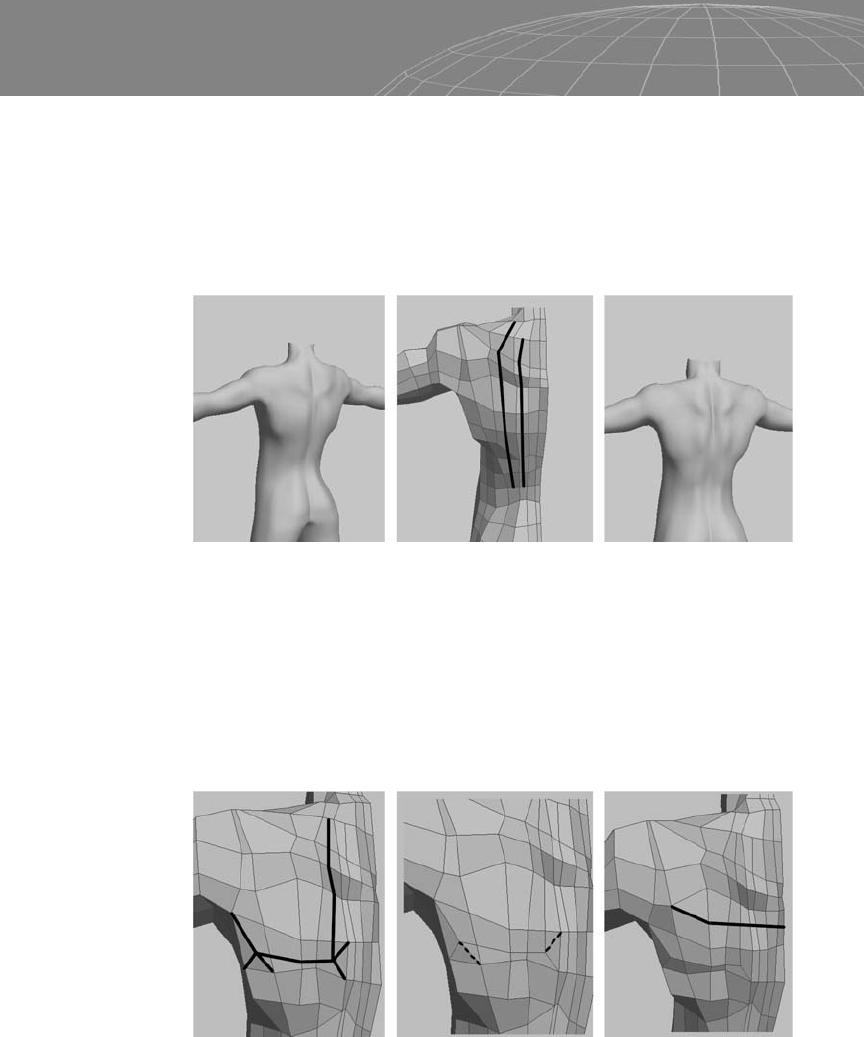
Now it’s time to define the back area. Use as much reference as you
can when adding muscles and other details, but don’t overdo the
cutting. If the model is going to be animated, having too many poly-
gons will make it hard to rig and set up the bones/deformations and
slow to animate. An alternative is to use displacement for these
extra details as described in Chapter 10.
Cut the marked edges and remove the dashed lines to make the
polygons quad. In the image on the right, a big triangular polygon
and a few discontinued edges appear on the mesh. Don’t interrupt
the modeling flow to correct little errors or things that can easily be
fixed later.
Be sure to mirror the geometry from time to time to check the
symmetry.
After tweaking some vertices, the shaded and mesh versions of the
male back torso look like Figure 6-20.
119
Chapter 6 – Human Project: Male Body
Figure 6-18
Figure 6-19

Notice that at this point, there are not enough vertices and edges to
produce well-defined muscles on the male torso. If your model is
nice and clean, you can choose between leaving it as it is right now
or increasing its definition with a number of details.
120
Chapter 6 – Human Project: Male Body
Figure 6-20: The male back torso.
Figure 6-21: The male front torso.
Figure 6-22: Perspective views of the torso in mesh view.
..................Content has been hidden....................
You can't read the all page of ebook, please click here login for view all page.