

Watch the reference when moving vertices so that the volume of
the head is correctly defined.
For the eye we need a sphere to fit the polygons, just like we did
with the male head.
Select the border edges around the eye and chamfer or extrude
them back a little.
163
Chapter 7 – Human Project: Female Head
Figure 7-28
Figure 7-29
Figure 7-30

Notice that the extra edges around the border of the eye add
tension.
We continue refining the head, moving on to define the base of the
mouth using a process similar to what we did with the loop around
the eye at the beginning of this chapter.
Select the lower edges and extrude up, welding the vertices at the
corner of the mouth.
164
Chapter 7 – Human Project: Female Head
Figure 7-31
Figure 7-32
Figure 7-33
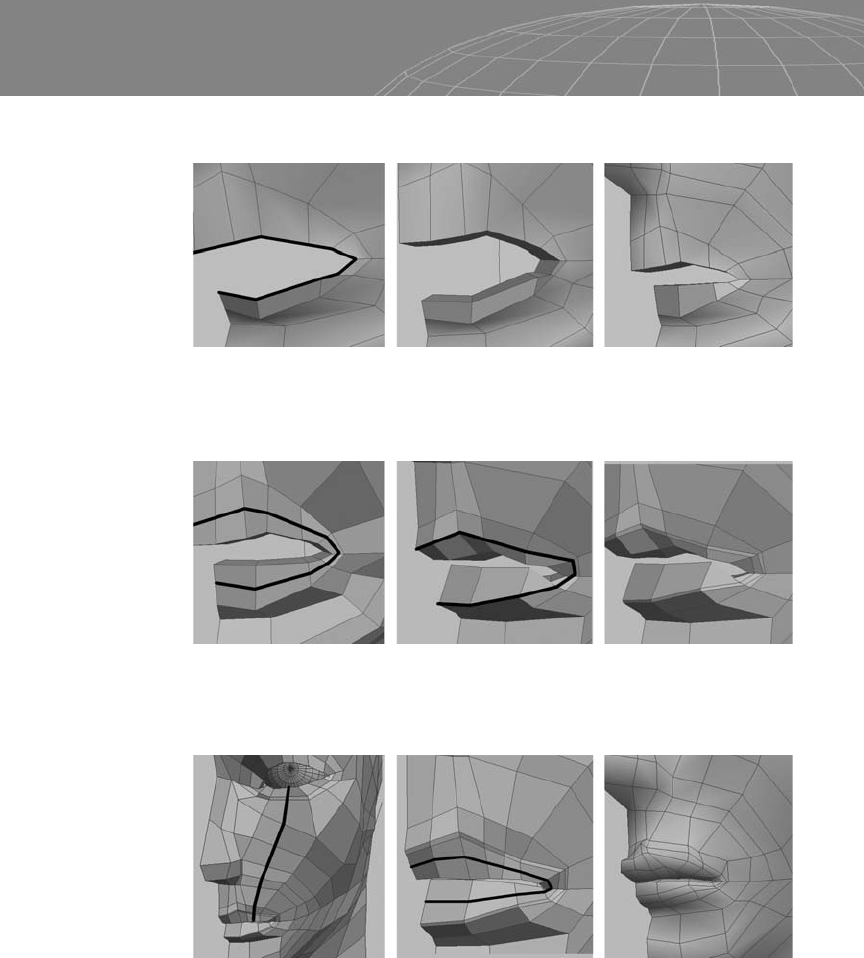
The interior edges are selected again and pushed back.
Then we cut the middle of the lips on the marked area and chamfer
an internal edge. We can also cut around the previous cut.
We add more edges for finer control.
Now let’s go back to the eye. Cut one more loop around the loop
that already exists and the upper eyelid, and push the marked verti-
ces back a bit. If you are modeling an Asian female, you may want to
skip this step or make it very soft.
165
Chapter 7 – Human Project: Female Head
Figure 7-34
Figure 7-35
Figure 7-36

The eyes are now finished, but the nose and lips still need more
work.
Below the nose we cut the marked edge to have more defini-
tion. Pay attention to the quad polygon flow in this area.
We cut one more time for the nostril and remove the unwanted
edges, making sure everything is quad. Then select the marked
polygons and extrude up a bit.
166
Chapter 7 – Human Project: Female Head
Figure 7-37
Figure 7-38: Shaded view of eyes.
Figure 7-39
..................Content has been hidden....................
You can't read the all page of ebook, please click here login for view all page.