
Recon-ng is an OSINT reconnaissance framework written in Python. The tool itself is complete with its own modules, database, interactive help, and menu system, similar to Metasploit. Recon-ng is able to perform web-based, information-gathering techniques using various open source platforms.
Recon-ng is already part of the arsenal of tools in Kali Linux. To access the interface of Recon-ng, simply click on Applications in the top-left corner to expand the application menu, and then select 01 – Information Gathering. You should see recon-ng. Click on it to open the framework:

To download and set up the latest version of Recon-ng, use the following instructions:
- Execute the following configurations on your Terminal to download the latest version of Recon-ng and install it:
git clone https://github.com/lanmaster53/recon-ng.git
cd recon-ng
pip install -r REQUIREMENTS
./recon-ng
After you're finished, your screen should be similar to the following screenshot:
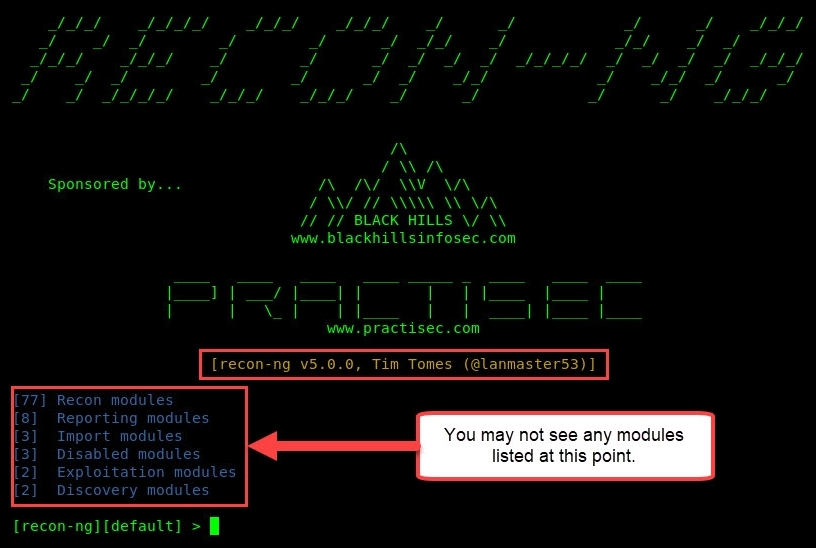
- If there are no modules installed or enabled, use the following command to install all modules onto Recon-ng:
marketplace install all
Now that the Recon-ng framework has opened, let's get familiar with its interface by using the following instructions:
- To view all the modules in Recon-ng v5, we must use the modules search command to view a list of all available modules. All the modules will be presented under their categories (Discovery, Exploitation, Recon, Reporting, and so on), as shown in the following screenshot:

As a penetration tester, you may use the same tools for multiple organizations throughout your career. We can create workspaces within Recon-ng to help isolate our projects/data more efficiently. If you look closely at the command-line interface, you will see the word default between square brackets. This implies that we are currently within the default workspace of Recon-ng.
- To create a workspace, we can use the workspaces create <worksplace-name> command. We are going to create a new workspace named pentest. Use the workspaces create pentest command within the Recon-ng interface.
- To view all existing workspaces and to verify the creation of our new workspace, we can use the workspaces list command:

- To use the pentest workspace, use the workspaces select pentest command. The workspace should change on your command-line interface.
- Now that we have added a company and its domain to our database, let's search for a module to perform a whois lookup. We can use the modules search whois command, where whois is the keyword or search criteria:

- We are going to use the point-of-contacts (POCS) module to obtain further details of people related to the domain. To do this, execute the modules load recon/domains-contacts/whois_pocs command. Using the info command will provide you with a description of the module and whether additional parameters are required:

- Let's set the SOURCE value to microsoft.com; this can be done by using the options set SOURCE microsoft.com command, as shown in the following screenshot:
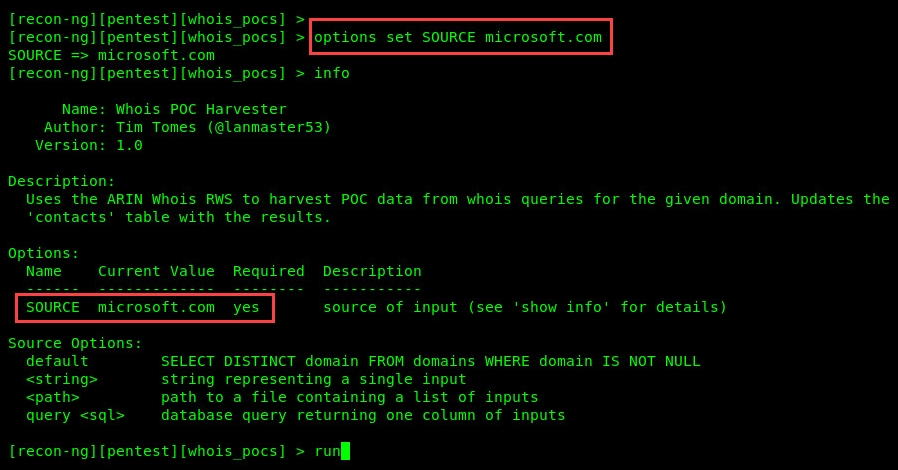
- Once everything is set correctly, use the run command to execute the module against the domain. Once the module has completed its analysis, we can use the show contacts command to view the list of information, such as a person's first and last names, email addresses, region, and country.
As you can see, Recon-ng is a very powerful tool and is able to handle data management quite well. Organizations usually create subdomains for many purposes; some can be used as a login portal, or simply as another directory on a website.
To obtain a list of subdomains of a target, observe the following steps:
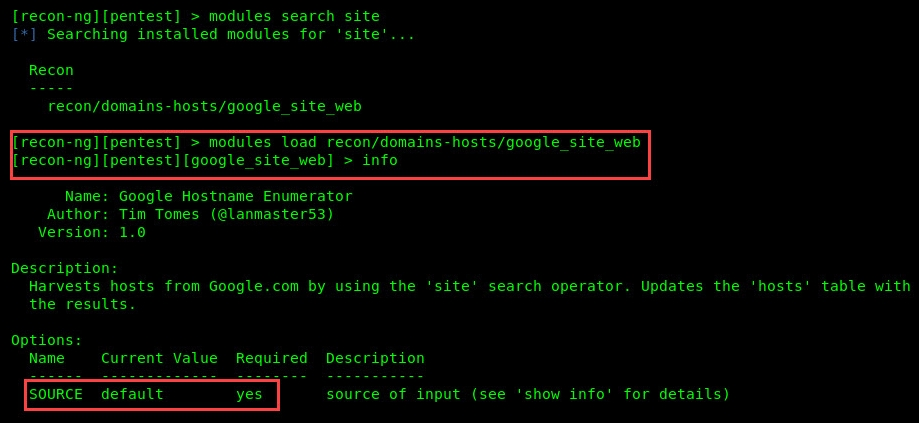
- Let's start by searching for a suitable module by using the modules search site command. Recon-ng will return some of the modules that contain site as part of their names.
- We're going to use the google_site_web module. Simply execute the modules load recon/domains-hosts/google_site_web command:
- Next, let's change the SOURCE value for this module by using the options set SOURCE microsoft.com command, as shown in the following screenshot:

- Use the run command to execute this module.
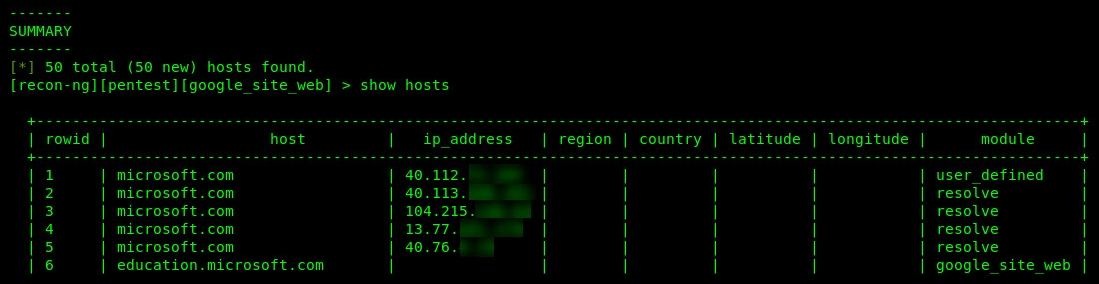
- Once the module has finished its query, use the show hosts command to view the list of subdomains that were found for the microsoft.com domain:
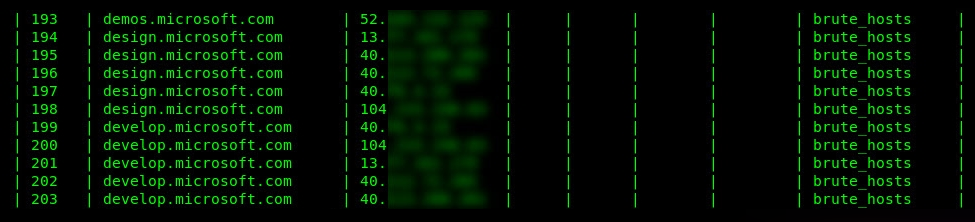
- Now, let's make this a bit more exciting. How about obtaining the IP addresses for the subdomains? To do this, we are going to run the module load recon/domains-hosts/brute_hosts command and set the SOURCE value to microsoft.com:

- Once the module is finished executing, use the show host command once more. You should see IP addresses corresponding to a subdomain:
As a penetration tester, writing reports can be very overwhelming as a report is a summary of the actions performed and results obtained while you were performing various tasks and using a number of tools. Recon-ng has a few reporting modules that are able to generate reports in multiple formats. The dashboard command will provide a summary of tasks performed with Recon-ng, as shown here:

To generate a report, you can use the modules search report command. This will let you view a list of reporting modules within the Recon-ng interface. We are going to create a report in HTML format. To create the report, perform the following steps:
- Execute the modules load reporting/html command.
- Use the options set CREATOR command to set the creator of the report.
- Use the options set CUSTOMER command to set the customer.
- Use the options set FILENAME command to set the output location with the filename of the report.
- Lastly, use the run command to execute the module and generate the report.
The following screenshot has labels that correspond to the aforementioned steps for generating and exporting a report file using reporting/html module:

Finally, navigate to the output location on your Kali Linux machine and open the HTML file. The view should be similar to the following:
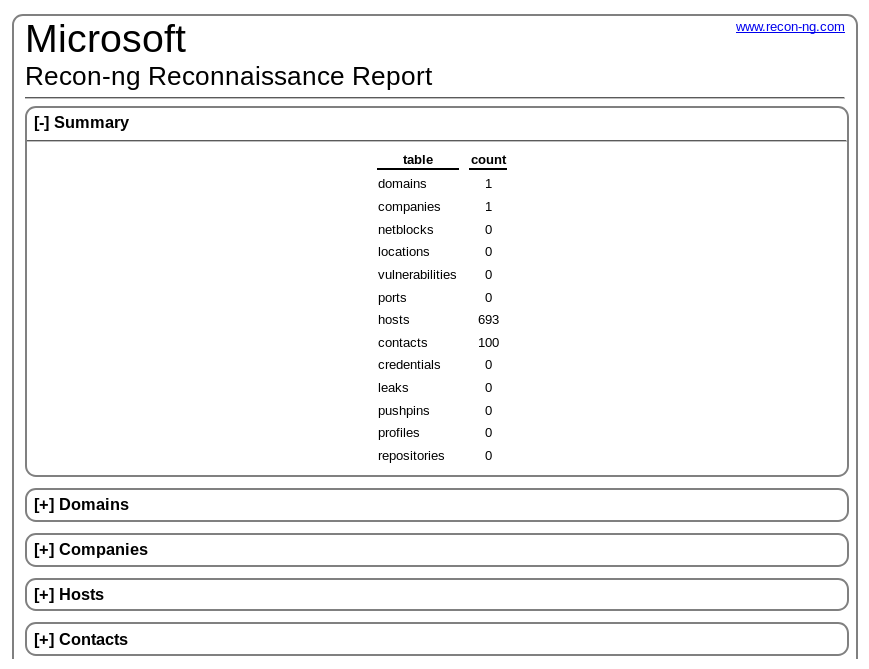
Now, the information is nicely categorized and summarized for viewing.
In the next section, we'll take a look at using theHarvester to gather the email addresses of people associated with an organization.