
In the following exercise, we'll be using capture from The Honeynet Project (www.honeynet.org) to help us understand packet analysis. To perform the parsing of Wireshark packets, observe the following steps:
- Go to https://www.honeynet.org/node/1220 and download the conference.pcapng file. Additionally, the following URL, https://honeynet.org/sites/default/files/conference.pcapng.gz, is a direct download link to the file.
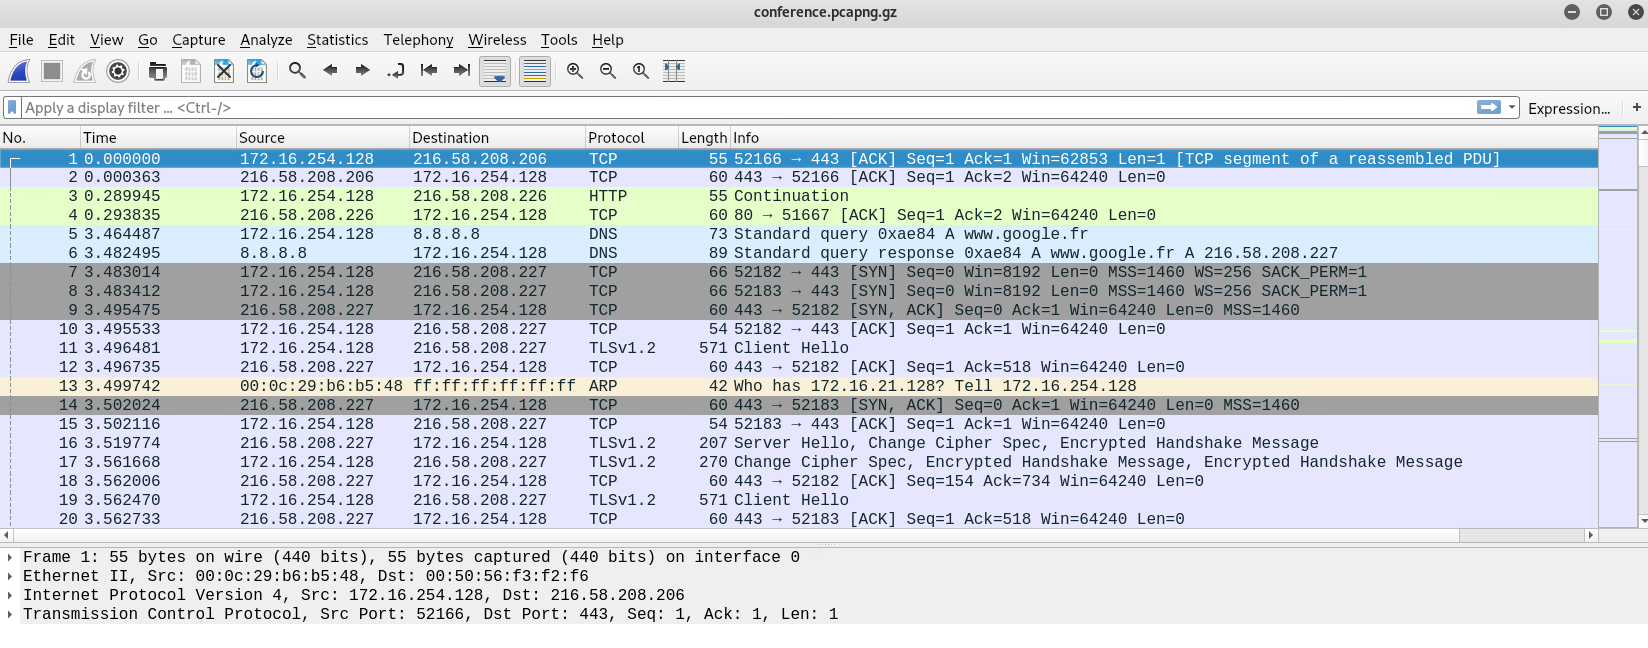
- Once downloaded, open the conference.pcapng file using Wireshark; you should have the following view:
- A helpful feature of Wireshark is to auto-resolve IP addresses to hostnames via DNS, resolve MAC addresses to vendor names, and resolve port numbers to services and protocols. To enable this feature, go to Edit | Preferences | Name Resolution. Ensure the following options are checked:

- Click OK to confirm and save the configuration. Back on the main user interface, you'll notice that all the public IP addresses are now resolved to their public hostnames:

- What makes Wireshark such a powerful tool is its display and capture filters. To see all traffic originating from a source IP address, use the ip.src == <ip address> filter:

To display all traffic for a specific destination address, we can use the ip.dst == <ip address> filter. However, we can combine filters to view traffic from a specific source to a destination using the (ip.src == <ip address>) && (ip.dst == <ip address>) filter. In the following screenshot, we are using a filter to view all traffic originating from 172.16.254.128 going to Google's DNS server 8.8.8.8:

When combining filters, you'll need to use logic operations to get the task done. The following is a short list of various operators for combining filters in Wireshark:
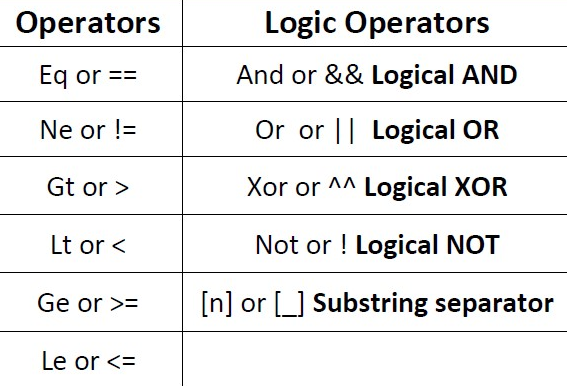
The Ge operator is used to indicate greater than or equal to, while the Le operator is used to indicate less than or equal to.
Memorizing display filters can be very challenging for anyone. However, Wireshark has made it simple to create custom filters quite easily using the right-click options on the user interface. Let's now try a few exercises to help you become more familiar with display filters.
To get started with creating display filters in Wireshark, perform the following steps:
- First, right-click on the source IP address on packet 1, and then click on Apply as Filter | Selected to immediately create and apply the filter:

Now, we have a filter showing all traffic originating from the 172.16.254.128 address.
- Next, in the Destination column, right-click on 8.8.8.8 or google-public-dns-a.google.com, click on Apply as Filter, and then select the option ...and Selected:
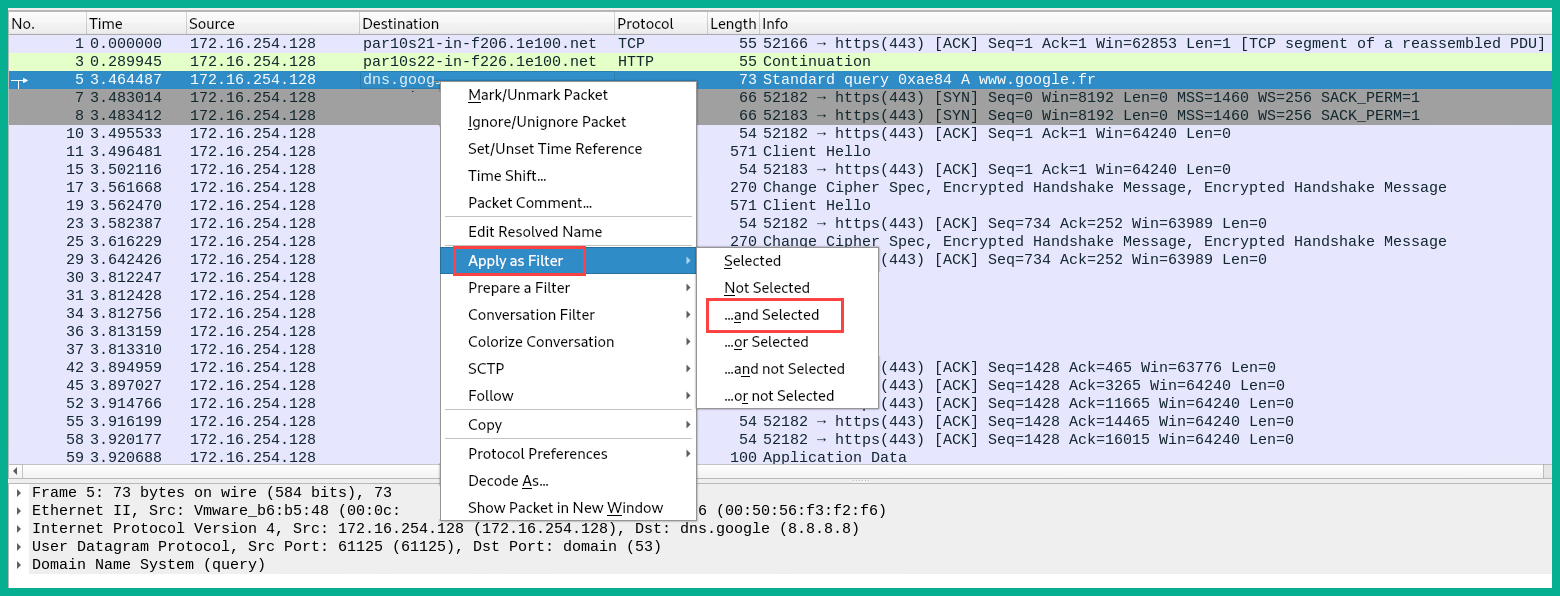
This will create the effect of displaying only traffic originating from 172.16.254.128 going to Google's DNS server.
The Apply as Filter option will immediately apply the display filter on Wireshark. However, Prepare as Filter provides the same options but does not immediately apply the display filter. Rather, it allows you to continue building the filter syntax and apply it afterward.
- To view all conversations between devices on the network, click on Statistics | Conversations:

The Conversations window will open, providing multiple tabs with various details such as Ethernet, IPv4, IPv6, TCP, and UDP sessions between devices, as shown in the following screenshot:
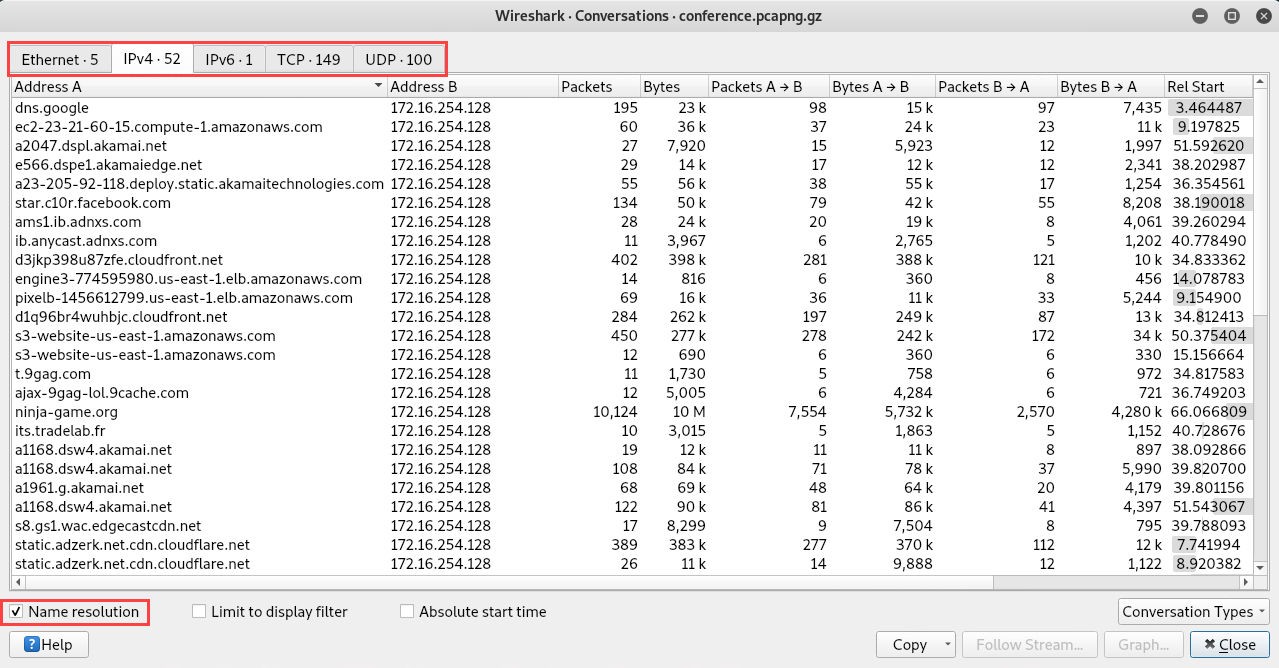
You'll be able to determine which devices were communicating and transferring packets for a given time.
- Wireshark allows us to easily view all the files that are downloaded and uploaded over the network. To perform this task, click on File | Export Objects | HTTP. The HTTP export window will open, displaying Packet, Hostname (source), Content Type, Size, and Filename details. To export a file to your desktop, select a packet on the interface and click on Save:
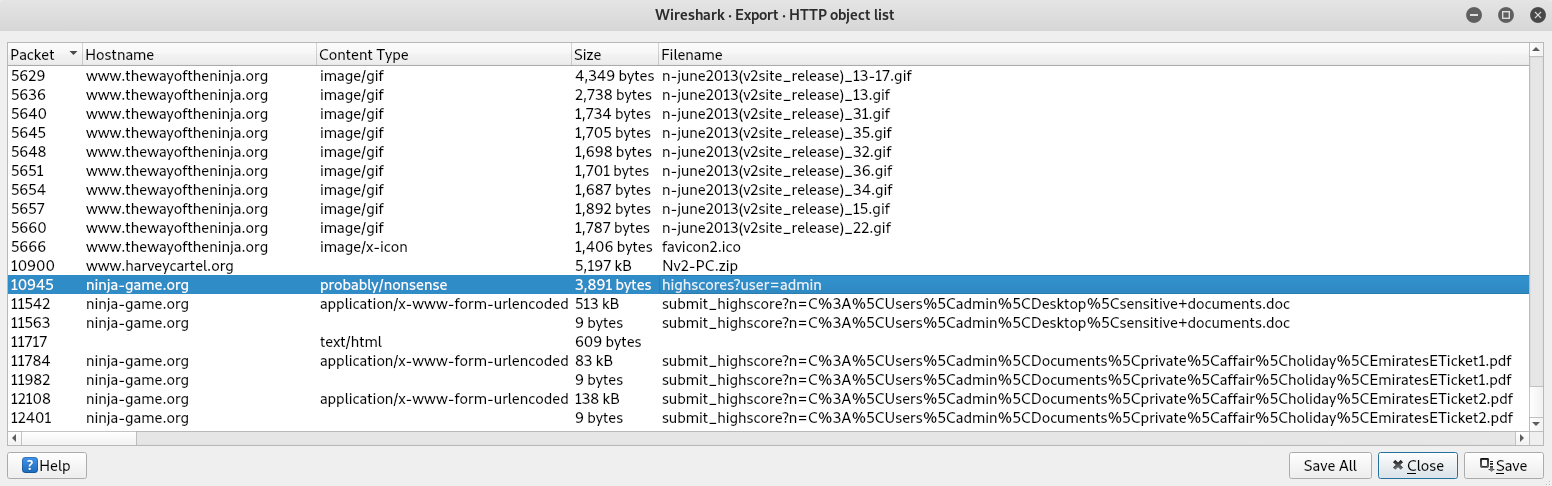
To export all the files from a Wireshark capture, use the Save All option.
- To reassemble and view all the messages for a single conversation between two devices, right-click on a packet and select Follow | TCP Stream:
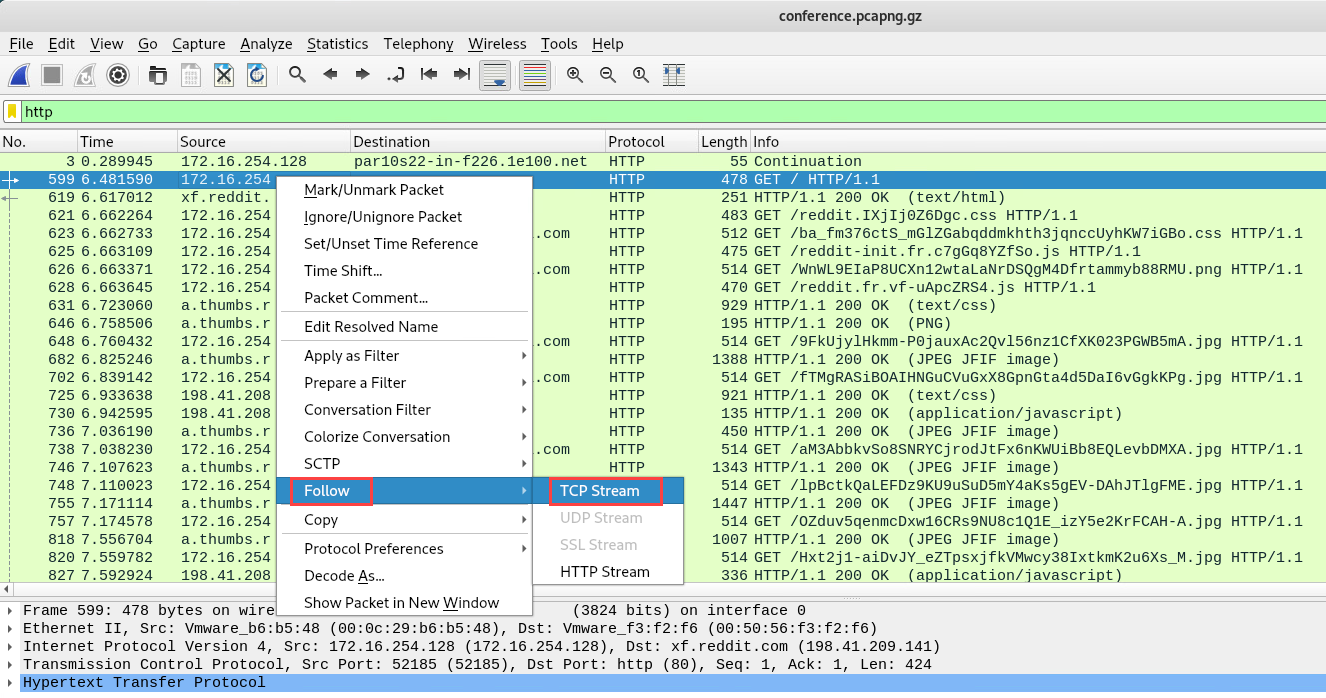
Wireshark will gather all the packets for this stream, reassemble them, and present you with the dialog of messages exchanged between the two devices, as shown in the following screenshot:

The following is a screenshot of a Telnet conversation between a client and a Linux server. Telnet is an unsecure protocol, and all communication between the Telnet client and Telnet server is sent across the network in plaintext. The following screenshot shows how Wireshark reassembles all the packets for a single conversation:

We can see the user credentials used to log in to the server, the server message of the day (MOTD) banner, and all other transactions.
Having completed this section, you now have the skill set required to create custom display filters in Wireshark. In the next section, we will learn about escalating privileges.