
Acunetix is one of the most popular and recognized web application vulnerability scanners in the industry. It's currently one of the leading vulnerability scanners used among Fortune 500 companies. Acunetix is designed to deliver both advanced XSS and SQL injection attacks by scanning a target website or web server.
To start using Acunetix, please observe the following steps:
- Go to https://www.acunetix.com/vulnerability-scanner/download/ and register for a trial version. Acunetix is a commercial product, but we are able to acquire a trial version for our exercise.
- After completing the registration, you'll be presented with the following screen:

Download the Linux version as we'll be using it on our attacker machine, Kali Linux.
- After the acunetix_trial.sh file has been downloaded, use the chmod +x acunetix_trial.sh command to apply executable privileges to your local user account. To begin installation, use the ./acunetix_trial.sh command as shown here:
![]()
- On the command-line interface, read through and accept the End User License Agreement (EULA).
- Open your web browser in Kali Linux and enter the following address, https://kali:13443/, to access the Acunetix user interface. Log in using the user account created during the setup process:

- To begin a new scan, click on Create new Target or Add Target, as shown here:

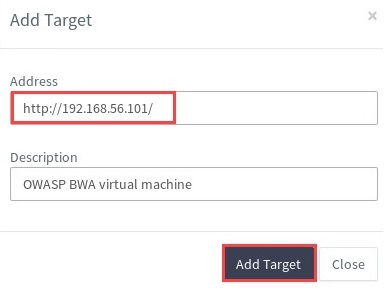
- The Add Target pop-up window will open, which allows you to specify a target:
- After adding a target, you'll be presented with options for customizing your scan:
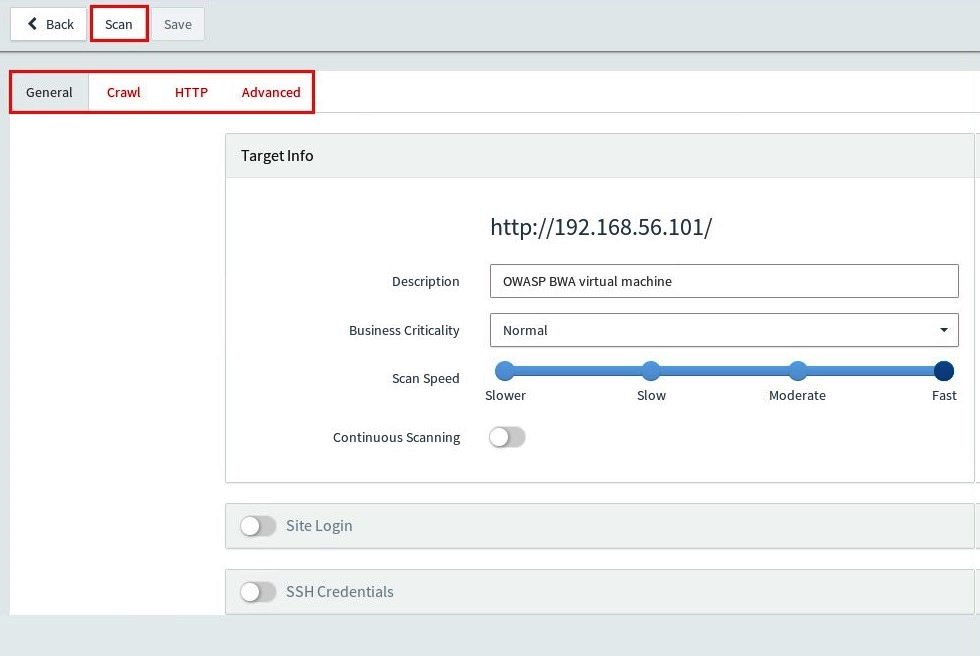
For now, we will leave all the options with their default settings.
- Specify the type of scan and reporting options:
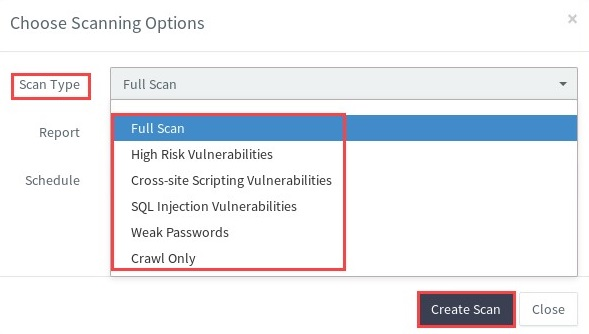
Acunetix allows you to generate the following types of report for your business needs:
-
- Affected items
- Developer
- Executive
- Quick
- Compliance reports
- CWE 2011
- HIPAA
- ISO 27001
- NIST SP800 53
- OWASP Top 10 2013
- OWASP Top 10 2017
- PCI SDD 3.2
- Sarbanes Oxley
- STIG DISA
- WASC Threat Classification
- When you're ready, start the scan on the target.
Once the scan is complete, a summary is provided on the main Acunetix dashboard, as shown here:
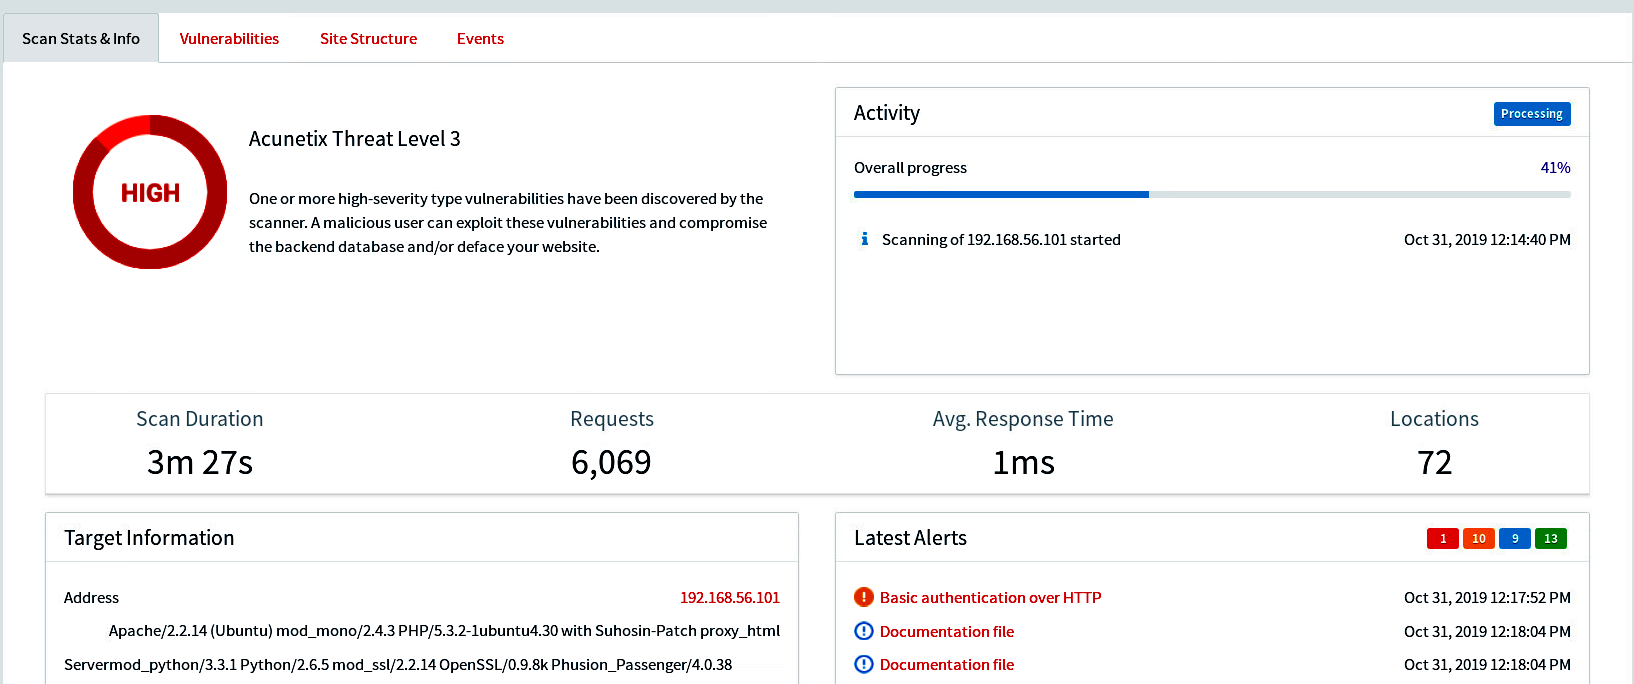
You can quickly see the duration of the scan and any high-risk vulnerabilities found.
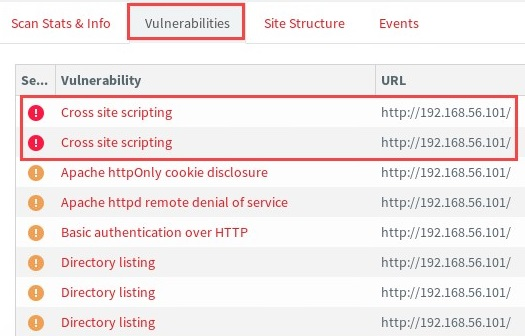
- To see a detailed list of vulnerabilities found, click on the Vulnerabilities tab and select one of the web vulnerabilities:
To create a report, click on Generate Report. The reporting wizard will allow you to specify the type of report that is most suitable based on the objective of the web application penetration test. Once the report has been generated, you can download the file onto your desktop. The following shows a PDF version of the executive report:

Acunetix is definitely a must-have tool as part of your penetration testing arsenal. It will allow you to quickly perform black box testing on any web applications and present findings in an easy-to-read and understandable report.
In the next section, we will learn how to use OWASP ZAP to perform web vulnerability assessments.