
Since more organizations use the Windows operating system as the main operating system for their employees' workstation/desktop, you need to understand how to perform a penetration test on the Windows platform.
One of the benefits offered by Microsoft is the 90-day trial of their operating systems through the Microsoft Evaluation Center. In this section, I'll demonstrate how to set up a Windows VM in our penetration testing lab:
- First, you'll need to download the ISO image of Windows 10 and Windows Server 2016 using the following URLs:
The installation procedures for Windows Desktop and Windows Server are the same.
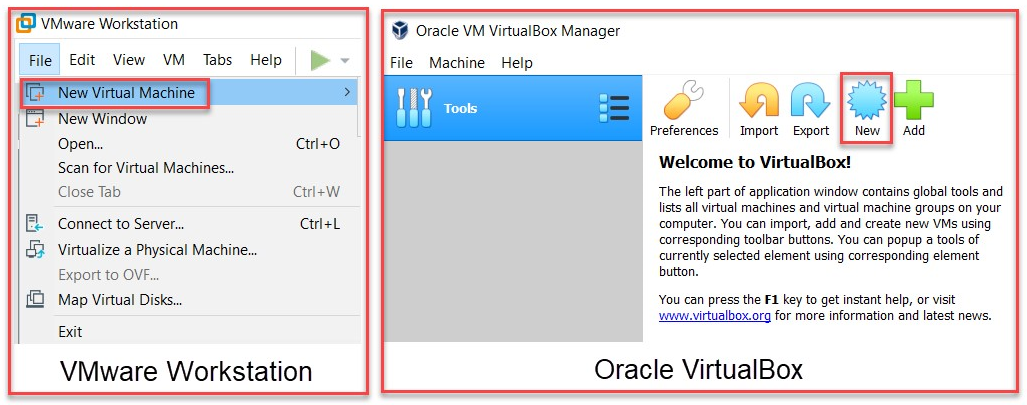
- Once the ISO file has been downloaded successfully, open your hypervisor and choose New Virtual Machine:
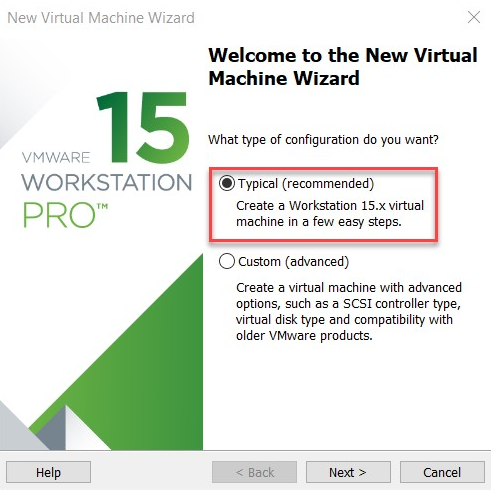
- If you're using VMware, the New Virtual Machine Wizard will prompt you to continue your setup in either the Typical (recommended) or Custom (advanced) mode. For this exercise, I have chosen the typical option as it comprises a few simple steps:
- Next, choose the Installer disc image file (iso): option to add the ISO file by clicking on Browse. Once the file has been added successfully, click on Next to continue:

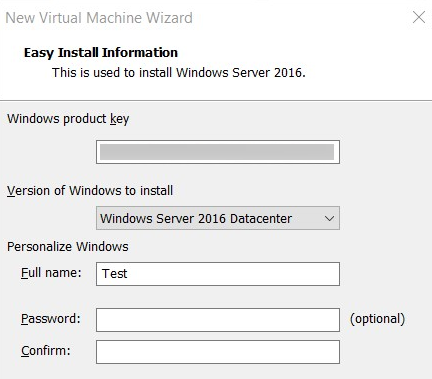
- VMware will present a custom window, allowing you to insert the product key (obtained from the Microsoft Evaluation Center during the registration phase) and create an administrator account during the installation phase. Simply complete the details, use the dropdown box to select the version of the operating system you are about to install, and click on Next:
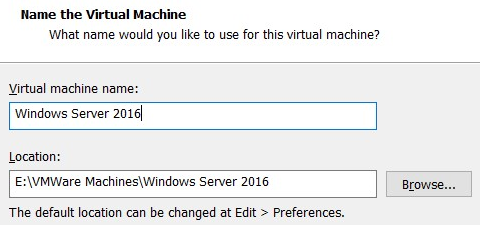
- Next, you'll have the option to name the VM and choose a location to store its configurations. This step can be left as the default setting:
- Next, you'll have the option to create a new virtual hard disk for the Windows VM. I have chosen its size to be 100 GB and to split its files into multiple pieces for easier portability:

You can choose any size for the hard disk, as long as it's the recommended size or above. The system requirements can be found at https://docs.microsoft.com/en-us/windows-server/get-started/system-requirements.
- The final window will show you a summary of the configurations. You can customize the hardware resources by clicking on the Customize Hardware... option:

- Upon clicking Finish, the Windows 10/Server 2016 VM will appear in your library. You can also modify the hardware configurations when the VM is powered off.
- Now, it's time to power on the Windows VM. Ensure that you choose your corresponding language, time, and keyboard format.
- Choose the Install now option to begin the installation phase.
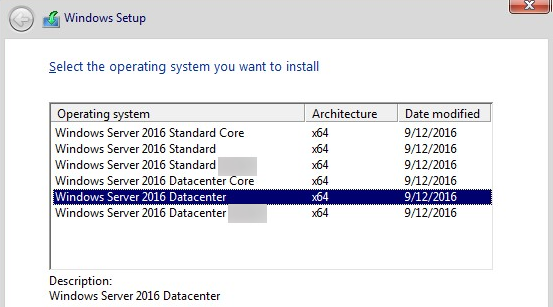
- Choose the version of Windows you'd like to install. If you're using Windows Server 2016, use the Datacenter edition. If you're using Windows 10, choose the Enterprise edition:
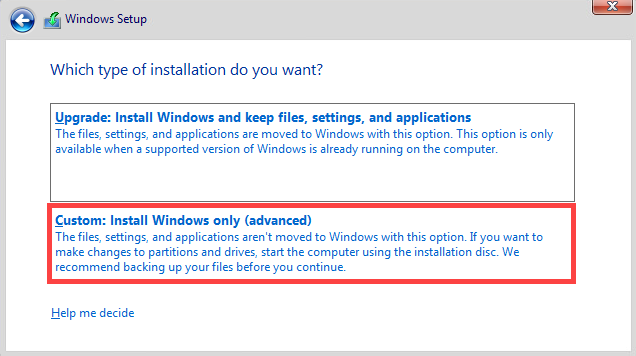
- Next, you'll need to read and accept the End User License Agreement (EULA), followed by the type of installation on the virtual hard disk drive (HDD). Since it's a new installation, select the Custom: Install Windows only (advanced) option, as shown in the following screenshot:
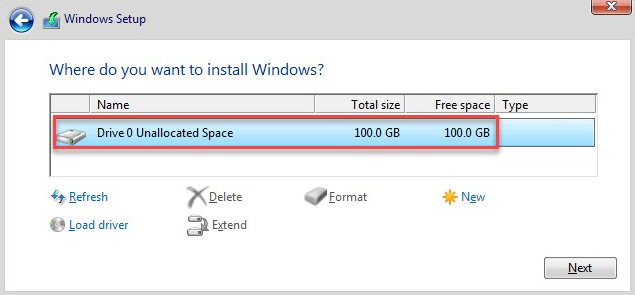
- Select the virtual HDD as the installation destination, as shown in the following screenshot, and click Next to continue:
- The installation process may take a while, depending on the amount of CPU and RAM resources that have been allocated to the VM.
Once this process has been completed, Windows will present a login window to you.
Now that we have installed a Windows VM, we will look at how to create additional user accounts on Microsoft Windows.