
Lesson 33 | Creating Multiline Text
This lesson describes how to create Multiline Text.
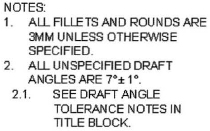
It is common practice to place paragraph style notes on drawings. These notes generally refer to the drawing as a whole rather than specific features, and often require more formatting options than standard single-line text objects.
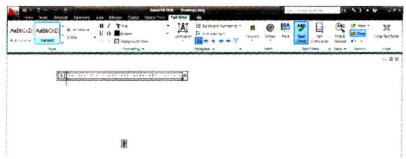
The following illustration shows multiline a multiline text object being created.
Objectives
After completing this lesson, you will be able to:
- Describe Multiline text.
- Use the Multiline Text command to create and format paragraphs of text.
- List the changes implemented to increase productivity when using Mtext.
About Multiline Text
You use the Multiline Text command to create paragraphs of text for notes and other information in your drawing or drawing Layout.
Words and paragraphs remain intact and the width can be adjusted using grips.

Multiline Text Defined
Multiline Text is an assembly of words, symbols, and other textual information that can be written, formatted, and edited using the AutoCAD® built-in editor. You can create several paragraphs of text as a single multiline (mtext) object and format the text appearance which includes justification, italics, underline, bold, and inserting symbols.
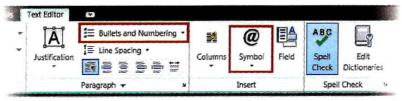
The illustration below shows the editing options that are available within the multiline Text Editor when you right-click. These options also appear in the ribbon when the Multiline Text command is invoked or the text is selected for editing.
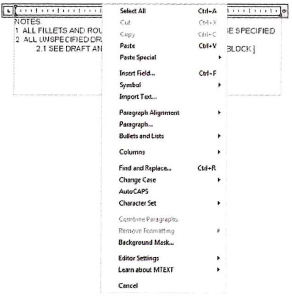
The options for the Text Editor appear within the AutoCAD drawing environment and are similar to other word programs.

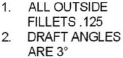
Example of Multiline Text
This is an example of Multiline Text.
Example of Single Line Text
The text in single line text, which you will learn about in the next section, does not allow paragraph formatting.

Creating Multiline Text
You use the Multiline Text command to create paragraph style text. You can create text in your drawing using formatting options found in most standard word processors, as well as functions that are specific to the software.
With the Multiline Text editor, you can:
- Create paragraph styled text.
- Create numbered and bulleted lists.
- Insert specific drafting and engineering symbols.
- Change the text justification.
- Create columns of text.
- Create Fields such as date, time and author.
Once the Multiline Text area is specified, the ribbon displays the Text Editor tool panels.
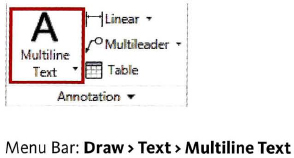
Command Access
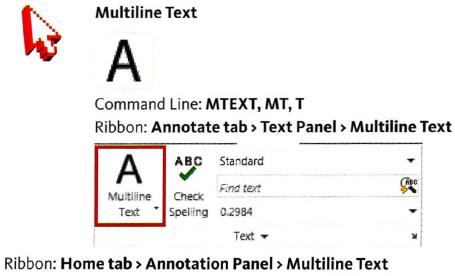
Multiline Text Tab
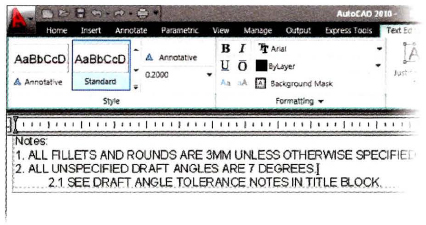
When you use the Multiline Text command, the ribbon opens to the Multiline Text tab displaying the Text Editor. Use the options on the panels to control the text appearance, format your paragraphs, insert symbols, add fields, check spelling, and perform other functions specific to the annotation of your drawing.

| Style controls text style and text height. | |
| Formatting controls whether the text is bold, italic, underlined, or overlined. You can also choose to override the current text style font and color. | |
| Paragraph controls the justification, line spacing, numbering, and bullets of selected text. | |
| Insert allows you to insert symbols, columns, and fields (such as author and date). | |
| Spell Check allows you to check spelling. | |
| Tools contains the find and replace, import text, and change case options. | |
| Options controls the display of text box rulers and changes the character set and editor settings. | |
| Close enables you to close the Multiline Text Editor. |
Editing Multiline Text
To edit existing multiline text, double-click the text. The Text Formatting toolbar appears so you can edit the text in the same way you created it.
![]()
Procedure: Creating Multiline Text
The following steps give an overview of creating multiline text.
- Start the Multiline Text command.
- Click two points to define the text area.
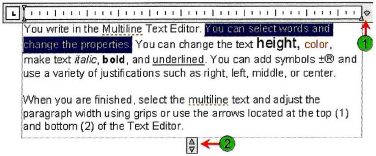
- Confirm the text style (1) and text height (2) settings on the Style panel.

- Begin creating text using the options as required for numbered or bulleted lists and symbols.
- Use the ruler to adjust the width and height of the text area if necessary.

- Double-click outside the Text Editor to accept the text and exit.
Multiline Text Guidelines
- Keep the text window size relative to the area where you want the text to appear in the drawing. Use the grips to adjust the width and height.
- You can override the font in the current style by setting specific font options on the Formatting panel.
- To ensure that multiline text sentences maintain the ability to wrap within the text box, press ENTER only to begin a new line or paragraph.
- To format selected text, select the text first, then select the Formatting option. Single-clicking places the cursor in a new location, double-clicking selects the entire word and triple-clicking selects the entire paragraph.
- You can copy text from another location or program and paste it into the Text Editor. However it may retain the text format associated with its source. Paste the text first into Notepad then copy it again and past it into the Multiline Text Editor. This way it retains the text style you designate in AutoCAD.
- Multiline Text options may also be accessed by right-clicking in the Text Editor window.
- If you Explode multiline text, it becomes single lines of text.
- You can type MTEXT or simply T and press ENTER to begin the Multiline Text command.
- It is good practice to always place text on its own layer.
MText Columns and Grips
When you use Mtext objects in your drawings, you have the ability to format the text into columns. You can also edit the text using grips in a similar manner to tables.
Placing Mtext
When you place Mtext, the Text Editor tab activates on the ribbon. Additionally, you can specify that you want the text to be formatted with columns using the Column option on the Insert panel.
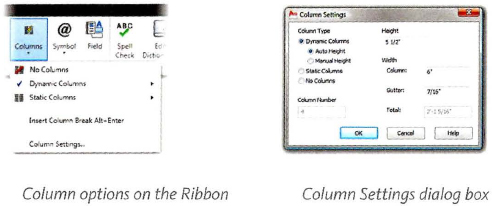
Note
You can also insert a manual column break from the ribbon. This option is disabled when No Columns is selected.
![]()
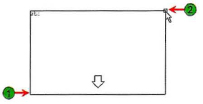
Editing Mtext with Grips
Grip editing mtext is the ability to adjust column width and height using grips.
| Location Grip | |
| Column Width | |
| Mtext Width | |
| Mtext Width and Mtext Height | |
| Mtext Height |