Lesson 48 | Creating Ellipses
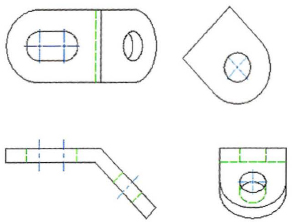
This lesson describes how to create ellipses and elliptical arcs with the Ellipse command. The following image shows examples of ellipses and elliptical arcs in drawings.
When your design requires an elliptical shape, you can create ellipses and elliptical arcs as easily as you can create geometry such as lines and circles.
Objectives
After completing this lesson, you will be able to:
- Describes ellipses.
- Create an ellipse.
About Ellipses
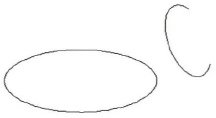
The Ellipse command creates a closed ellipse. The Ellipse Arc command creates a section of an ellipse. Both objects can be modified in the same way as other drawing objects.
Definition of Ellipse
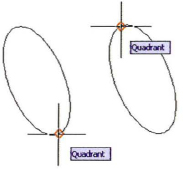
An ellipse is a closed curve generated by four fixed points defining major and minor axes and crossing at right angles through the center point.
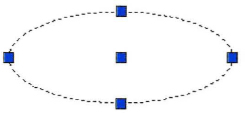
Each axes endpoint is recognized as a quadrant when using object snap. But notice that an ellipse quadrant is relative to the axes endpoint, regardless of the angle.
Creating an Ellipse Arc
You can create an ellipse arc the same way you create an ellipse with parameters that define the portion of the arc that displays. You could also create an ellipse arc by creating an ellipse and trimming out a portion of it. You can create an ellipse arc with the Ellipse Arc command using the arc option, or you can create an ellipse arc using the ellipse arc command. An ellipse arc is still recognized as an ellipse.
An ellipse, or oval shape, is a circle tilted on a plane at a specified rotation angle.
Example of Ellipses
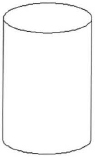
Ellipses and arcs are particularly useful when drawing an isometric view of an object.
Creating Ellipses
You use the Ellipse command to create an ellipse object. An ellipse is a smooth curve shape defined by a major axis and a minor axis that intersect at their midpoints and are perpendicular to each other. You can create a full ellipse or an elliptical arc. To create an ellipse, you can either define the start point and endpoint of one axis and then the endpoint of the other axis, or you can first define the center of the ellipse and then define the location of the axis endpoints relative to the center.
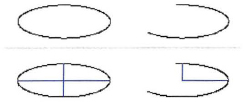
The following image shows an ellipse at the top left and the same ellipse at the bottom left with lines indicating the major axis and minor axis. The major axis is the longer of the two axes. The image also shows an elliptical arc with half of the major and half of the minor axis lines.
There are three procedures you can follow to create an ellipse or elliptical arc. The procedure you use depends on what you want to create and the data you have available.
Command Access
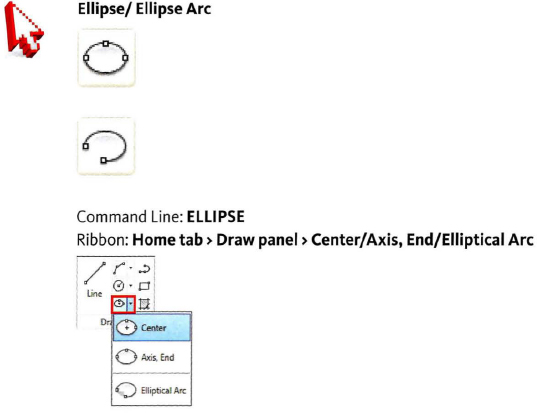
| Option | Description |
| Center | Use this option to create an ellipse by defining the center point of the ellipse and then one endpoint for each axis. |
| Arc | Use this option to add additional prompts to the command sequence to create an elliptical arc or a full continuous ellipse. |
| Axis, End | Use this option to create and ellipse or an elliptical arc. The first two points of the ellipse determine the location and length of the first axis. The third point determines the distance between the center of the ellipse and the end point of the second axis. |
Procedure: Creating an Ellipse
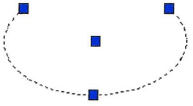
The following steps give an overview of creating an ellipse by defining the axis endpoints.
- On the ribbon, click Home tab > Draw panel > Ellipse.
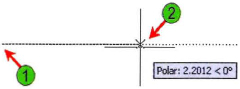
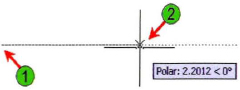
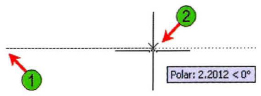
- Click to specify the first axis endpoint (1) and the other axis endpoint (2).
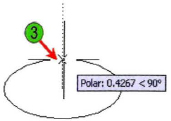
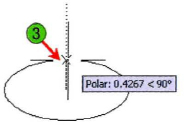
- Click to specify the distance to the other axis endpoint (3).
The completed ellipse.

Note: To use the other Ellipse options, follow the command line prompts. Right-click to specify the options from the shortcut menu or enter the capitalized letter on the command line.
Procedure: Creating an Elliptical Arc
The following steps give an overview of creating an elliptical arc. The first few steps are identical to creating a ellipse.
- On the ribbon, click Home tab > Draw panel > Ellipse Arc.
- Click to specify the first axis endpoint (1) and the other axis endpoint (2).
- Click to specify the distance to the other axis endpoint (3).
The completed ellipse.
Note: To use the other Ellipse options, follow the command line prompts. Right-click to specify the options from the shortcut menu or enter the capitalized letter on the command line.
Procedure: Creating an Elliptical Arc
The following steps give an overview of creating an elliptical arc. The first few steps are identical to creating a ellipse.
- On the ribbon, click Home tab > Draw panel > Ellipse Arc.
- Click to specify the first axis endpoint (1) and the other axis endpoint (2).
- Click to specify the distance to the other axis endpoint (3).

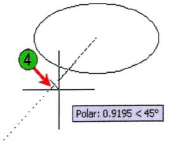
- Move the cursor to specify the start angle position (4).
- Move the cursor to specify the end angle (5). Notice that the polar angle is set to 45 degrees.

Note: The order in which the start and end angle are specified will determine which part of the ellipse is removed.