
Lesson 50 | Using Page Setups
This lesson describes how to activate and save page setups in the layout environment.
Since you may need to output data to a variety of devices and in different forms at different times, using saved page setups can save you valuable time. You can also save time by selecting saved page setups when outputting multiple sheets from a number of files at once with the Publish command. However, the Publish command is not covered in this lesson.
Objectives
After completing this lesson, you will be able to:
- Apply a page setup to an existing layout.
- Create and modify a page setup.
Applying Page Setups to Layouts
Named page setups are useful for easily plotting a layout in different ways and for quickly configuring a layout. Each time you create a layout or execute the Plot command, you can set various configuration options and save these settings as a named page setup. Using Page Setup Manager, you can then activate a page setup for a layout or modify your page setups. When you create a page setup in the layout environment, you can only make that page setup current for layouts, not for model space. However, you can also create page setups for your model space plotting needs.
Command Access
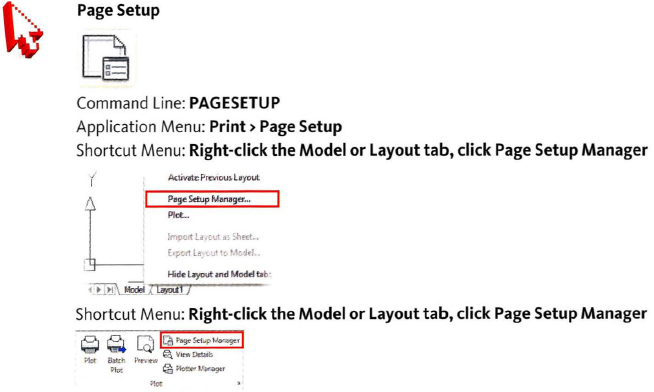
Page Setup Manager Dialog Box
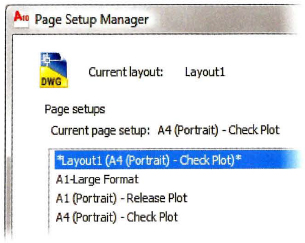
In the Page Setup Manager, you can make an existing page setup current, modify page setups, create new page setups, and import a page setup from a different drawing file. The current page setup is the one that takes effect when you execute the Plot command.

Page Setup Manager Access Options
When you click the Page Setup Manager from the ribbon you will be creating settings for the current drawing layout or model space. To access the Page Setup Manager from a selected layout or model space, there are two options.

Option #1: Make the Layout and Model Space tabs visible:
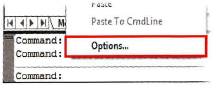
- Right-click in the drawing window or Command line area and select Options.
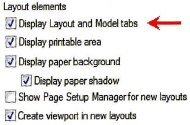
- In the Options dialog box, select the Display tab.
- Click to place a checkmark before Display Layout and Model Tabs.
- Select Apply and Close the Options dialog box.
- Select the desired layout or model tab.
- Right-click to access Page Setup Manager.
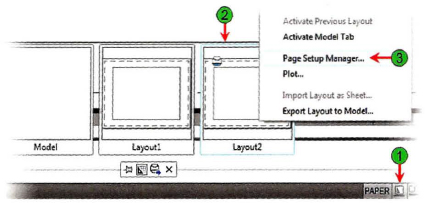
Option #2: Activate Page Setup from the Quick View Layouts or Quick view Drawings button on the status bar:
- Double-click the Quick View Layouts, or click Drawings.
- Select the desired Layout (2) and right-click.
- Select the Page Setup Manager (3)
Procedure: Applying a Saved Page Setup to a Layout
The following is an overview of making a saved page setup current in an existing layout.
- Select the layout tab.
- Right-click the tab. Click Page Setup Manager.
- In the list of saved page setups in Page Setup Manager, double-click the name of the page setup.
- Click Close.
Practice Exercise | Applying Page Setups to Layouts
In this practice exercise, you create a simple Page Setup based on some very simple settings in the Page Setup Manager, then you apply that new setup to your drawing. In the next section, you learn more about creating and modifying page setups using the Page Setup Manager.
- Open a new drawing using the acad.dwt template.
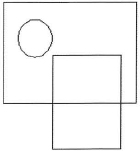
- Create some simple geometry.
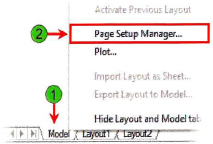
- To Access the Page Setup Manager for the Model Tab:
- Select the Model tab and right-click (1).
- Click Page Setup Manager.
Note: If the Model tab is not visible, right-click in the Command line area. Click Options. In the Options dialog box on the Display tab, under Layout elements, select the Display Layout and Model tabs check box.
- To Create a New Page Setup:
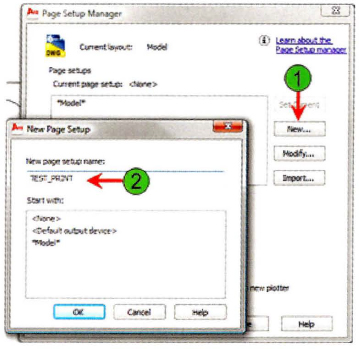
- In the Page Setup Manager, select New (1).
- For the New page setup name, enter TEST_PRINT (2).
- Click OK.
- To create some simple settings in the Page Setup dialog box:
- Under Printer/Plotter, select a printer from the Name list.
- Select a common paper size from the Paper Size list.
- Under Plot area, select Extents from the What to Plot list.
- Under Plot Offset, select Center the Plot.
- Under Plot Scale, select Fit to Paper.
- Select Landscape for the Drawing Orientation.
- Click Preview. Confirm that the drawing is displayed in the preview window. Press to exit the preview window.
- Click OK to exit the Page Setup dialog box.
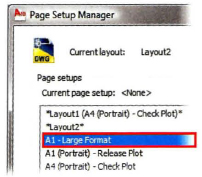
- To make the New Page Setup current:
- In the Page Setup Manager, select TEST_PRINT.
- Click Set Current.
- Close the dialog box.
Now when you print from the Model tab, the drawing prints according to the current page setup.
Creating Page Setups
Once your layouts are created, you should assign a page setup to them. You can import page setups from your template files or other drawings. If necessary, either modify an existing setup or create a new one. When creating a new page setup, you need to know the printer/plotter device, paper size, plot scale, and many other plot properties.
New Page Setup
In Page Setup Manager, click New. The New Page Setup dialog box opens. Here, you can start with an existing setup or create a new one from the default <None>.

Page Setup Dialog Box
The Page Setup dialog box is displayed when you are creating a new page setup or when you click Modify in the Page Setup Manager.
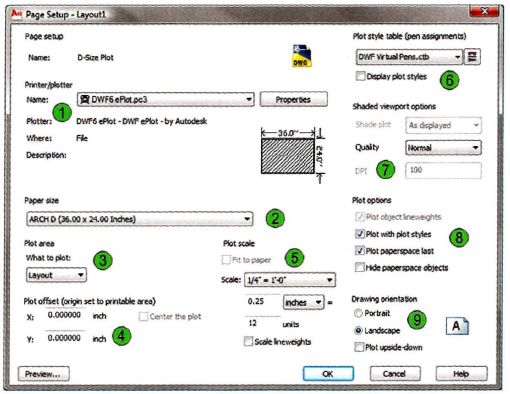
The Page Setup dialog box is almost identical to the Plot dialog box. Use the Page Setup dialog box to select and define the following items:
| Select the plotter or plotter configuration file to use. | |
| Select the paper size to output to. | |
| Select the area of the file that should be plotted. You can select to plot the current display, drawing extents, or specify a window. When you create a page setup on the model tab, you can also specify to plot the limits of the drawing. When you create a page setup on the layout tab, you can specify to plot the entire layout. | |
| Select where the geometry is positioned on the paper relative to the paper's origin point. | |
| Select the scale factor to use when outputting the geometry. | |
| Select the plot style table to use to further control the appearance of the geometry on the paper or in the output file. | |
| Determine whether a viewport should be shaded and, if so, the quality of that shading. | |
| Select additional plot options, such as whether to plot using plot styles, and the order for calculation when outputting the geometry. | |
| Select the orientation of the geometry on the paper. |
Procedure: Creating and Saving a Page Setup
The following steps give an overview of creating and saving a page setup.
- Select the model space or a layout.
- On the Application Menu, click Print > Page Setup Manager.
- In the Page Setup Manager dialog box, click New.
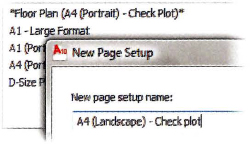
- In the New Page Setup dialog box, enter a name for the new page setup. Click OK.
- Set the options in the Page Setup dialog box as required. Click OK. You can now make the page setup current in any layout.