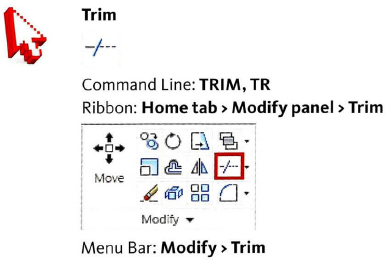
Lesson 24 | Trimming and Extending Objects to Defined Boundaries
This lesson describes how to trim and extend objects in the drawing.
A typical design process involves shortening or lengthening the construction lines or other geometry at various times to represent the design's features.
After completing this lesson, you will be able to describe the uses of the Trim and Extend commands to modify objects, cut edges, and extend boundaries in your drawing.
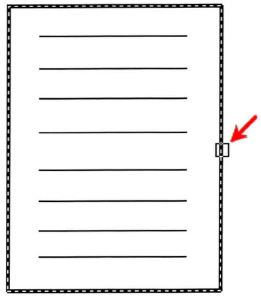
The following image illustrates lines that need to be trimmed.
Objectives
After completing this lesson, you will be able to:
- Use the Trim and Extend commands to modify geometry in your drawing.
Using the Trim and Extend Commands
You can use the Trim command to shorten and the Extend command to lengthen existing geometry to meet the edges of other objects. This means that you can create an object such as a line and later adjust it to fit precisely between other objects.
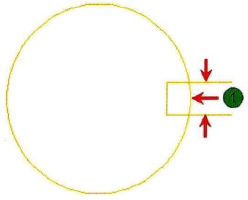
When you use the Trim command, you select objects to use as cutting edges and trim geometry back to those objects. You select the portion of the object to trim, not the portion to keep.
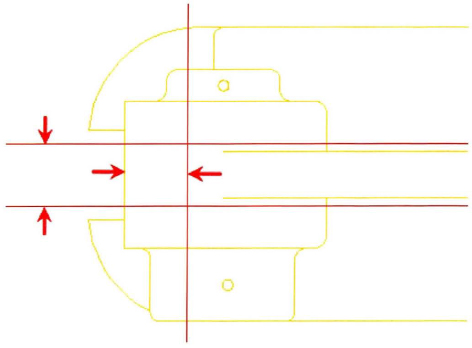
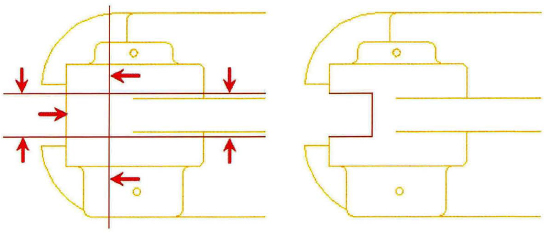
In the following image, the arrows indicate where you would click to trim the lines.
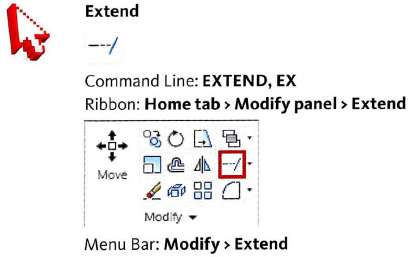
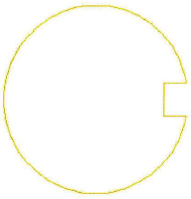
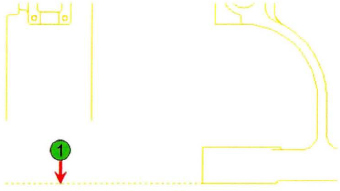
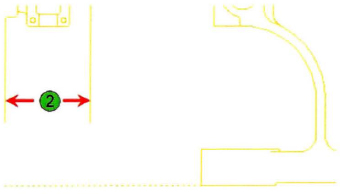
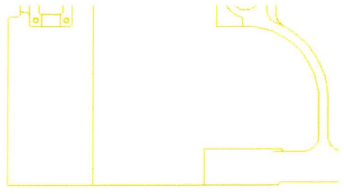
When you use the Extend command, you select objects to use as boundary edges and extend geometry to those objects.
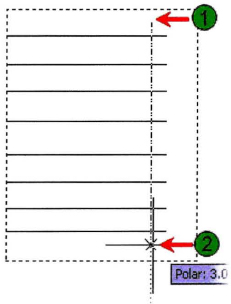
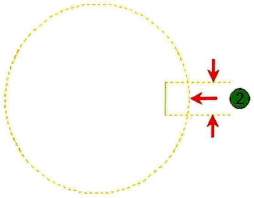
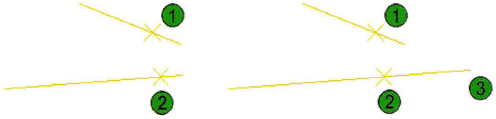
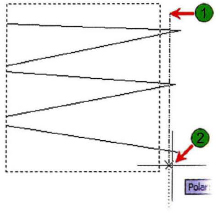
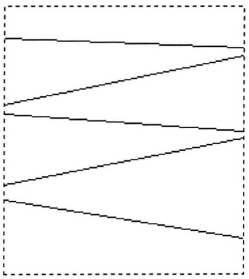
In the following illustration, the boundary edge (2) is indicated with an arrow. Selecting the lines (1) at the location of the arrows extends each line to the first boundary edge it encounters. The completed command is illustrated in the image on the right.
Before extend and after extend
Command Access
Command Access
Procedure: Trimming Objects
The following steps give an overview of using the Trim command to shorten objects to cutting edges.
- On the ribbon, click Home tab > Modify panel > Trim.
- Either select the objects to serve as cutting edges (1) and then press ENTER, or press ENTER without selecting any objects. Pressing ENTER without selecting activates implied selection, where all suitable objects in the drawing are treated as potential cutting edges.
- Select the objects to trim (2).
- Press ENTER to end the command and view your completed operation.
Procedure: Extending Objects
The following steps give an overview of using the Extend command to lengthen objects to boundary edges.
- On the ribbon, click Home tab > Modify panel > Extend.
- Either select the objects to serve as boundary edges (1) and then press ENTER, or press ENTER without selecting any objects. Pressing ENTER without selecting, activates implied selection, where all suitable objects in the drawing are treated as potential boundary edges.
- Select the objects to extend (2).
- Press ENTER to end the command and view your completed operation.
Guidelines for Trim and Extend
Consider the following guidelines when using the Trim and Extend commands:
- Cutting or boundary edges may be lines, arcs, circles, polylines, ellipses, splines, xlines, regions, blocks, text, and rays.
- If you do not specify a cutting or boundary edge and press ENTER instead at the Select Objects prompt, all objects become potential cutting edges or boundaries. This is called implied selection.
- If you hold down SHIFT, you can SHIFT + select to switch between Trim and Extend. For example, if you are in the Trim command, you can hold down SHIFT and select objects to be extended to the boundary edge. Similarly, you can be in the Extend command and use SHIFT + select to trim objects to a cutting edge.
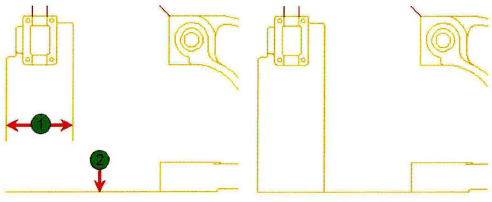
- Cutting and boundary edges do not have to intersect the object being trimmed or extended if you use the Edge option set in the Extend mode. With this setting, you can trim or extend an object to where it would intersect if the cutting or boundary edges were extended. For example, in the following illustration, the lower line (2) in the left illustration can be extended as if line (1) really was extended to point (3) as shown in the illustration on the right.
Extended Edge Mode
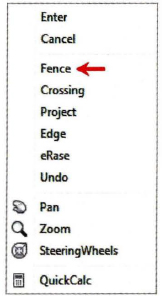
Guidelines for Trim and Extend Options
- The default edge mode for Trim and Extend is No Extend. Most of the time, you will want to use these commands with this default setting.
- The Trim or Extend Project option is for 3D.
- The Trim or Extend eRase option enables you to erase line segments within either of these commands.
- The Trim or Extend Undo option enables you to reverse an action you have made to trim or extend without exiting either of these commands.
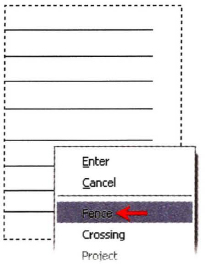
Note: You can right-click to select these options from the shortcut menu or you can type the capitalized letter of the option at the command line and press Enter.
Practice Exercise | Trim and Extend
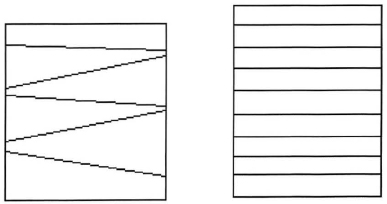
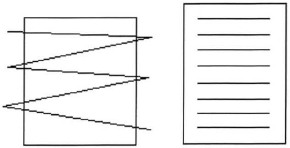
In this practice exercise, you use the Trim and Extend commands. First, draw two rectangles. Across one rectangle, draw a series of lines that intersect the rectangle. Inside the other rectangle, create lines that do not touch the sides of the rectangle as shown below. You also practice the Trim and Extend commands using the Fence selection option.
- To set up this practice exercise:
- Draw two rectangles of any size.
- Across one rectangle, draw a series of lines that intersect the rectangle.
- Inside the other rectangle draw a line that is completely inside and copy it several times.
- To use the Trim command, select the cutting edges first:
- On the Home tab, click Modify panel > Trim.
- Select the rectangle for the cutting edge.
- Press ENTER.
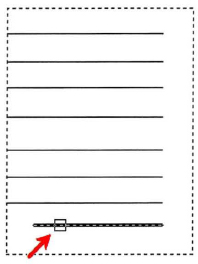
- To trim the lines:
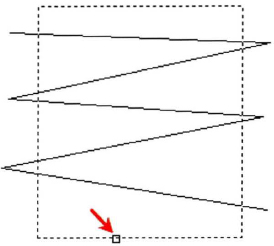
- Continue to trim, this time using the Fence option:
- Right-click in the graphics window. Click Fence.
- Click the first fence point just above the series of line segments to the right of the rectangle (1).
- Click the next fence point just below the bottom line segment to the right of the rectangle (2).
- Right-click in the graphics window. Click Fence.
- To complete the Trim command:
- Press ENTER to complete the Fence selection option.
- Press ENTER to exit the Trim command.
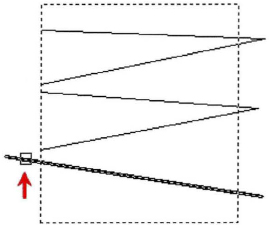
- To use the Extend command, select the boundary edges first:
- On the Home tab, click Modify panel > Extend.
- Select the rectangle for the boundary edge.
- Press ENTER.
- To extend the lines, select the line near the end that you want to extend:
- To complete the Extend command:
- Press ENTER to complete the Fence selection line option.
- Press ENTER to exit the Extend command.
- View your results.