
Exercise | Input Data
In this exercise, you gain familiarity with the various input methods including the command line, the keyboard, and the dynamic interface.
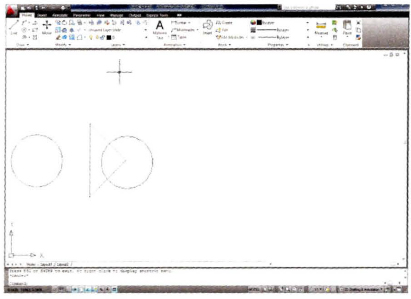
The completed exercise
Completing the Exercise
To complete the exercise, follow the steps in this book or in the onscreen exercise. In the onscreen list of chapters and exercises, click Chapter 2: Creating Basic Drawings. Click Exercise: Input Data.
![]()
- On the Quick Access toolbar, click New.
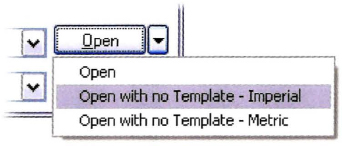
- In the Select Template dialog box, click the arrow next to Open and select Open with no Template - Imperial.
Note: For AutoCAD LT users, select acadlt.dwt.
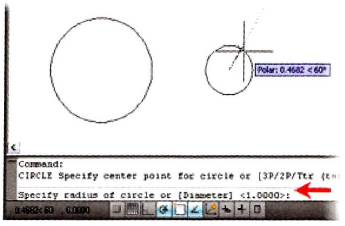
- On the status bar, make sure dynamic input is off.
- Use the command line to create a circle:
- Enter Circle. Press ENTER.
- Observe the options listed in the brackets.
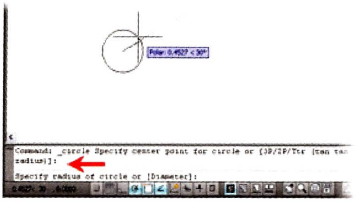
- Click near the center of the graphics window for the center point.
- Enter 1. Press ENTER.
Zoom to view your drawing, if necessary.
- To draw a second circle the same size as the first:
- Press ENTER. This repeats the previous command.
- Click to select a point to the left of the first circle.
- Press ENTER to accept the default value for the circle radius.
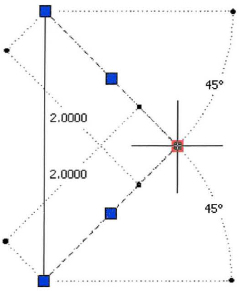
- Use the Line command with relative polar coordinates to draw a triangle near the circles:
- To begin the Line command, enter L for line. Press ENTER.
- Specify a point in the drawing window for the first point (1).
- Enter the polar coordinate @2<45 (2). Press ENTER.
- Enter the polar coordinate @2<135 (3). Press ENTER.
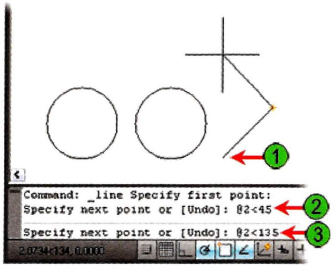
- Enter c for the close option. Press ENTER.

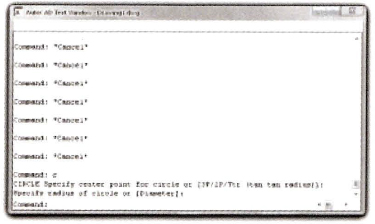
- Display the command history:
- Press F2.
- Review the command history shown. Use the scroll function on the right side of the window or the mouse wheel to display additional history.
- Press F2 again to turn off the command window.
- Turn on Dynamic Input. On the status bar, click Dynamic Input.
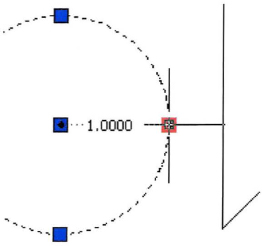
- Reveal geometric data using the dynamic interface:
- Click to select the first circle that you created.
- Place your crosshairs over, but do not click the square grip box on the right edge of the circle.
- Verify that the circle radius is 1.
- Press ESC to remove the circle selection.
- Reveal additional geometric data using the Dynamic Input interface:
- Click the two angular lines that you created.
- Place your crosshairs over, but do not click the square grip box at the intersection of the two lines.
- Observe that both the length and angle data are displayed for the selected lines.
- Press ESC to remove the line selection.
- Close all files. Do not save.
..................Content has been hidden....................
You can't read the all page of ebook, please click here login for view all page.