Lesson 30 | Changing Part of an Object' s Shape
This lesson describes how to use the Stretch command to change part of an object' s shape.
Reusing objects and ease of editing are key benefits of using the Stretch command. As your design evolves, changes to features naturally occur as part of the process, or perhaps you are attempting to reuse geometry from another drawing and some features require a change in length or shape. The Stretch command can help in these situations by enabling you to modify the shape of existing objects easily.
After completing this lesson, you will be able to describe key aspects of the Stretch command and use the command to stretch objects.
Objectives
After completing this lesson, you will be able to:
- Use the Stretch command to stretch objects.
Stretching Objects
You use the Stretch command to change the shape of objects in the drawing, defining the area to be stretched with a crossing window or crossing polygon selection tool. After you define the stretch window, you then specify a base point and a second point for the stretch.
Defining the stretch operation with a crossing window or crossing polygon is critical, because the area that is crossed by the selection method determines how the objects are stretched.

Command Access

Procedure: Stretching Objects Using Grips
The following steps give an overview of using grips to stretch objects.
- Select an object to activate its grips.
- Select any grip (use SHIFT+select to select multiple grips).
- Click and drag the grips to a new location.
Procedure: Stretching Objects
The following steps give an overview of stretching objects in a drawing.
- Start the Stretch command.
- Select the objects to be stretched by defining a crossing window or crossing polygon selection.
- Select the base point for the stretch.
- Select the second point or enter a value for the stretch distance.
Stretch Guidelines
- When you stretch objects, you must define the stretch window using a crossing window (CW) or crossing polygon (CP). If you use implied windowing, you must create the selection from right to left.
- Objects that are crossed by the selection window are stretched, while objects that are completely enclosed by the window are moved.
- To stretch an object in a straight line, be sure that Polar Tracking or Ortho Mode is on.
- After you have selected your object(s) to Stretch, pick a base point near the object but far enough away from any other objects you might snap to accidentally.
Practice Exercise | Stretching Objects
In this practice exercise, you draw some rectangles and then practice using the Stretch command to stretch using grips.
Keep in mind that object endpoints included in the crossing selection window are moved or stretched to a new location. Endpoints left out of the crossing selection window remain anchored to their position.
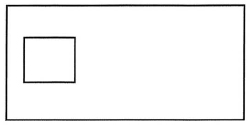
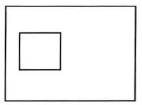
- To Stretch the large rectangle:
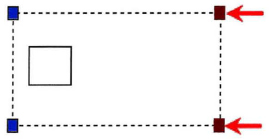
- Draw a rectangle with another one inside, as shown above.
- Begin the Stretch command.
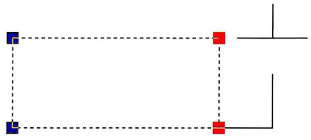
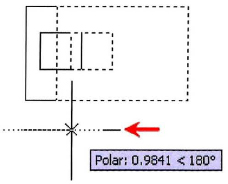
- Begin an implied crossing window by clicking the right corner (1) of the select ion window then click the opposite corner to the left (2), as indicated below.
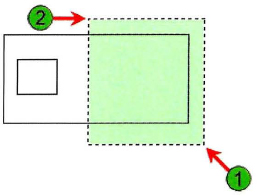
- Press ENTER to complete your selection.
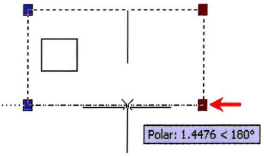
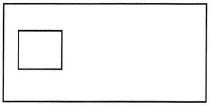
- Click a base point near the object (1). DO NOT SELECT the next point. Drag the cursor to the left (2) as shown below, enter 2, and press ENTER.
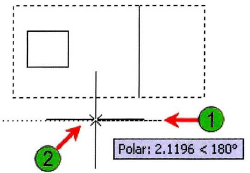
Notice that Polar Tracking or Ortho Mode must be on to ensure that you drag the objects in a straight line.
- To stretch both rectangles:
- Begin the Stretch command.
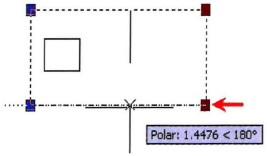
- Begin an implied crossing window picking corners first at (1) and then at (2) as shown below.
- Press ENTER to complete the selection.
- Click a base point near the object as shown below and drag to the left.
- Enter 2 and press ENTER.
Notice that Polar Tracking or Ortho Mode must be on to ensure that you drag the objects in a straight line.
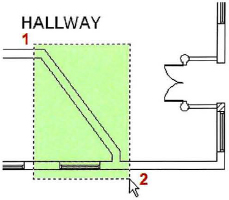
- To stretch the large rectangle and move the small rectangle using the Stretch command:
- Begin the Stretch command.
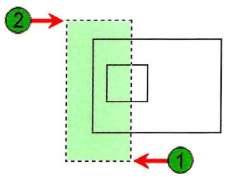
- Begin an implied crossing window first at point (1) then at point (2). Be sure the smaller rectangle is completely inside the selection window.
- Press ENTER to complete the selection.
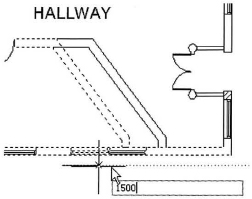
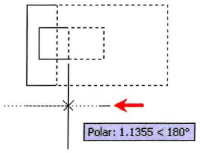
- Click a base point near the object as indicated below.
- Drag the cursor to the left.
- Enter 2 and press ENTER.
Notice that the small rectangle was completely within the selection window so all endpoints or vertex points were moved.
- To stretch an object using grips:
- To stretch a single vertex or endpoint of an object:
- With the command line blank, select the rectangle.
- Click a corner endpoint.
- Drag to the right and click.
- Press ESC to deselect the object.

Notice that the single endpoint or vertex was moved and the other endpoints remained anchored. The lines in between were stretched.