Exercise | Trim and Extend Objects
In this exercise, you use the Trim and Extend commands to trim and extend edges on the drawing. When you have completed the exercise, you will be able to trim and extend geometry using standard trim and extend methods. You will also be able to use the Edge option to extend or trim geometry to implied intersections and the SHIFT+select feature to switch between trimming and extending.
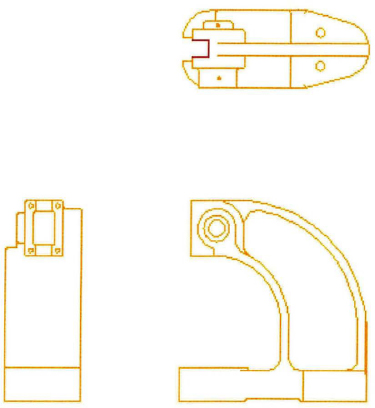
The completed exercise
Completing the Exercise
To complete the exercise, follow the steps in this book or in the onscreen exercise. In the onscreen list of chapters and exercises, click Chapter 5: Altering Objects. Click Exercise: Trim and Extend Objects.
![]()
- Open M_Trim-Extend.dwg.
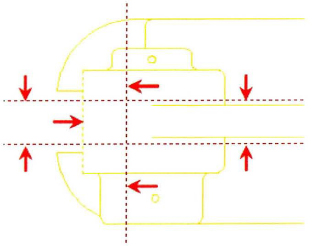
- Zoom to display the view as shown in the following image.
- Use the Trim command to complete the slot geometry:
- On the Home tab, click Modify panel > Trim.
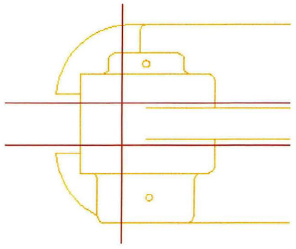
- Select the lines highlighted in the following image as the cutting edges.
- Press ENTER.
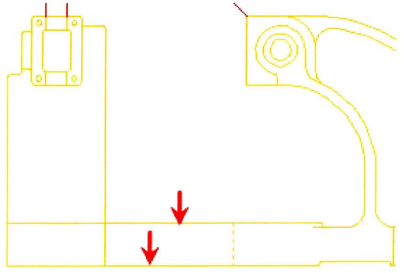
- Select the lines to trim at the points indicated in the following image. Press ENTER.
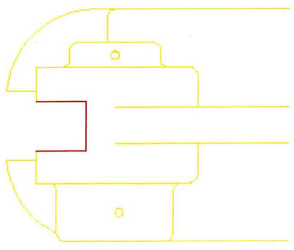
Your drawing should appear as shown in the following image.
- Zoom out to display the entire drawing.
- To use the Extend command:
- On the Home tab, click Modify panel > Trim drop-down > Extend.
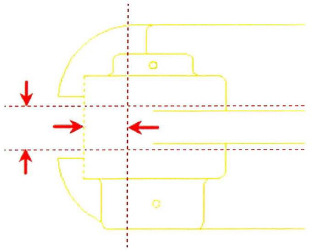
- Select the geometry highlighted in the following image as your boundary edges.
- Press ENTER.
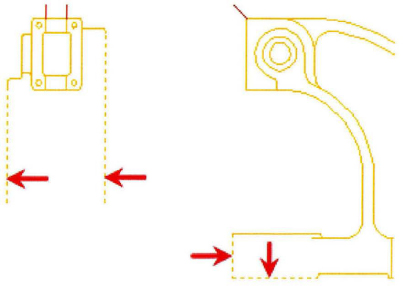
- To complete the view on the left:
- Right-click anywhere in the drawing window. Click Edge.
- Right-click anywhere in the drawing window. Click Extend.
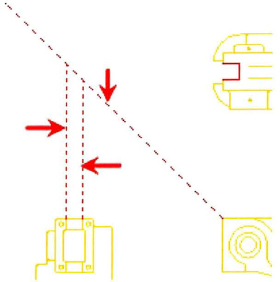
- Select the geometry indicated in the following image as the objects to extend.
Note: You need to select the two horizontal lines twice because they are initially extended to the first boundary. The second selection extends them to the next boundary that the edge intersects.
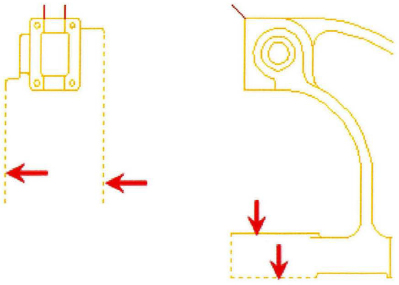
Your drawing should appear as shown in the following image.
- SHIFT+select the lines indicated in the previous image to trim them.
- Press ENTER to end the Extend command.
- To remove the construction lines:
- Start the Erase command.
- Select the lines indicated in the following image. Press ENTER.
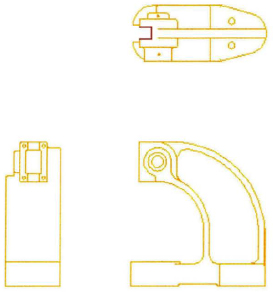
- Your completed drawing.
- Close all files. Do not save.