
Exercise | Rotate Objects
In this exercise, you use the Rotate command to rotate objects in the drawing. You use the default rotate method for specifying a rotation angle, as well as the Reference and Copy options of the Rotate command. When you have finished, you will be able to use the Rotate command to rotate objects in other drawings.
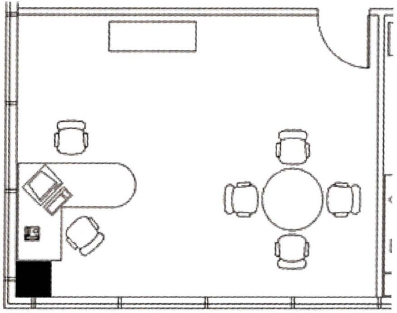
The completed exercise
Completing the Exercise
To complete the exercise, follow the steps in this book or in the onscreen exercise. In the onscreen list of chapters and exercises, click Chapter 3: Manipulating Objects. Click Exercise: Rotate Objects.
![]()
- Open C_Rotate-Objects.dwg.
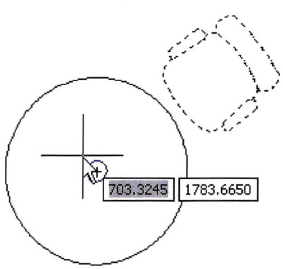
- To rotate the computer:
- Activate the Rotate command.
- Select the computer object. Press ENTER.
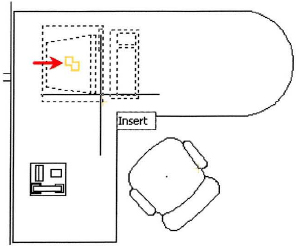
- Press SHIFT+right-click anywhere in the drawing. Click Insert.
- Touch the computer block to display the Insert Object Snap marker, then select the point.
Note: The Insert Object Snap override enables you to select the insertion point of the block.
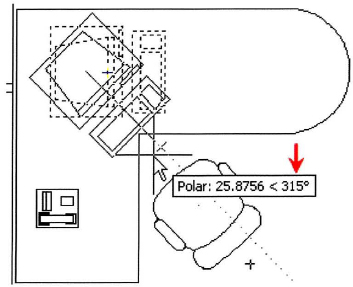
- To position the computer to face the chair:
- Verify that the polar setting is selected.
- Drag clockwise until the PolarSnap display reads 315 degrees. The distance is not critical, just make sure that your cursor is not activating any object snaps.
- Click to select the point.
- To select the chair:
- On the Home tab, click Modify Panel > Rotate.
- Click the chair object above the desk. Press ENTER.
- Press SHIFT+right-click anywhere in the drawing. Click Insert.
- Click the chair object to display the Insert Object Snap marker, then click to select the point.
- To rotate the chair to face the desk:
- Enter -90.
- Press ENTER to rotate the chair 90 degrees counterclockwise.
- The chair should be positioned facing the desk.
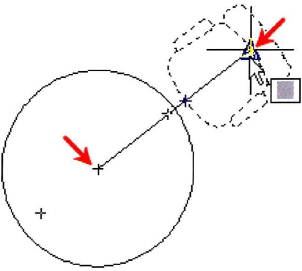
- To select the chair and base point:
- Press ENTER to repeat the Rotate command.
- Select the chair object next to the small conference table. Press ENTER.
- Select the center of the conference table as the base point.
- To rotate the chair around the round table using the Reference option:
- Right-click anywhere in the drawing. Click Reference.
- Define the reference angle by selecting the center of the conference table and the midpoint of the chair back rest.
- Enter 90. Press ENTER.
The chair should be positioned 90 degrees up from the center of the conference table.
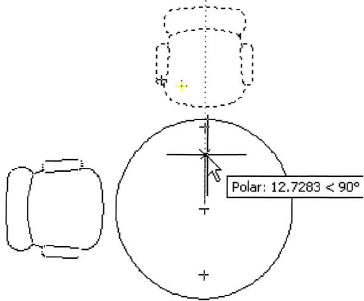
- To make a copy of the chair while rotating it around the round table:
- On the command line, enter RO. Press ENTER.
- Select the chair object. Press ENTER.
- Click the center of the conference table as the base point.
- Right-click anywhere in the drawing. Click Copy.
- Position the cursor so that the polar angle displays 90 degrees. Click to select that point.
A copy of the chair is rotated.
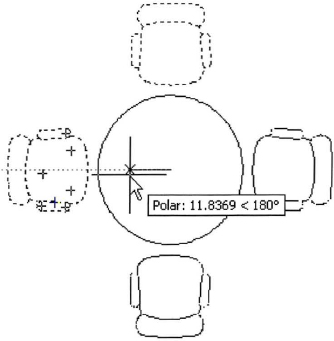
- To rotate both chairs with the Copy option so that four chairs are around your table:
- Press ENTER to repeat the Rotate command.
- Select both chair objects. Press ENTER.
- Click the center of the conference table to specify the base point.
- Right-click anywhere in the drawing window. Click Copy.
- Position the cursor so that the polar angle displays 180 degrees. Click to select that point.
- Close all files. Do not save.