Exercise | Create Fills and Gradients
In this exercise, you create solid fills and gradients. You use draw order to place the gradients and fills behind existing patterns, and you use the Inherit Properties options to copy gradient and fill patterns.
Warning!
Gradient fills are not supported by AutoCAD LT. If you attempt this exercise in AutoCAD LT, you will need to use solid fills instead of gradient fills. The Hatch and Gradient dialog box is named the Hatch dialog box in AutoCAD LT.

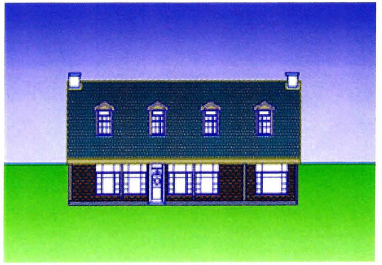
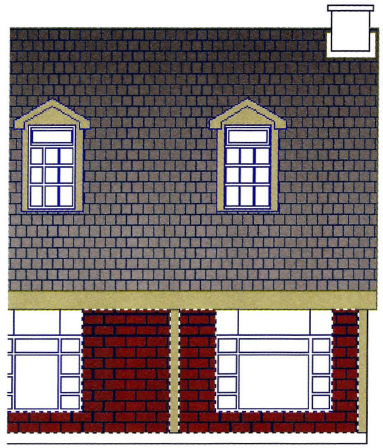
The completed exercise
Completing the Exercise
To complete the exercise, follow the steps in this book or in the onscreen exercise. In the onscreen list of chapters and exercises, click Chapter 9: Hatching Objects. Click Exercise: Create Fills and Gradients.
![]()
- Open M_Create-Fills-Gradients.dwg.
- Apply a gradient to the elevation roof:
- On the Home tab, click Draw panel > Gradient.
- Click Inherit Properties.
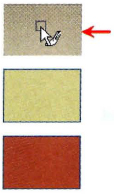
- Select the gradient pattern in the top block.
- Select a point on the roof as shown.
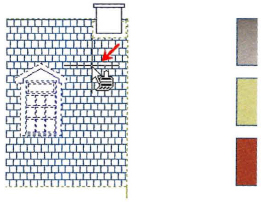
- Right-click anywhere in the drawing. Click Preview. Notice how the gradient pattern hides the roof hatch pattern.
- To move the gradient fill behind the roof hatch:
- Press ESC to return to the Hatch and Gradient dialog box.
- Under Options, select Send to Back in the Draw Order list.
- Under Islands, make certain Outer is selected.
- Under Options, select Send to Back from the Draw Order list.
- Click Preview. The gradient should appear behind the roof hatch pattern.
- Right-click anywhere in the drawing to accept the gradient fill.

- To add a gradient fill to the fascia and columns area of the elevation:
- On the Home tab, click Draw panel > Gradient.
- Click Inherit Properties. Select the second swatch.
- Press ESC to return to the Hatch and Gradient dialog box.
The fill is detected as a solid color, and the Hatch tab of the dialog box is displayed again.
- Under Options, select Send to Back in the Draw Order list:
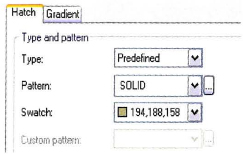
- Click Add: Pick Points.
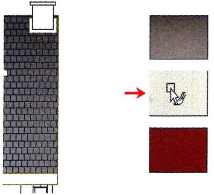
- Select points inside the fascia area, columns, and outer areas of the upper floor windows.
Note: The following image reflects the selections only on the right side of the drawing.
- Press ENTER.
- Click Preview.
- If the fills look correct, right-click anywhere in the drawing to accept the hatch.
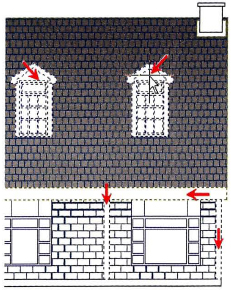
- Repeat the Gradient command. Use the Inherit Properties option to assign the gradient on the lower swatch to the bricks on the front elevation.
Once applied, the elevation should appear as shown.
- To add a solid hatch to the foundation area or the elevation:
- On the Home tab, click Draw panel > Hatch.
- In the Pattern list, make sure SOLID is selected.
- In the Swatch list, choose Select Color.
- In the Select Color dialog box, Index Color tab, under Color, enter 254.
- Click OK.
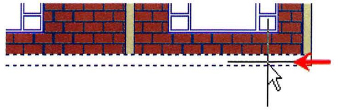
- Click Add: Pick Points. Select the foundation area of the elevation.
- Preview the hatch.
- Right-click anywhere in the drawing to accept the hatch.
Note: Make sure you select the foundation area on both sides of the door.
- On the Layers panel, freeze the Hatch_Swatch layer.
- On the Layers panel, thaw the Background-Frame layer.
- Zoom to display the entire drawing. Note: To save time, lines were drawn to use as a boundary for the background and foreground fills.
- Add a gradient fill to the upper background representing the sky:
- On the Home tab, click Draw panel > Gradient.
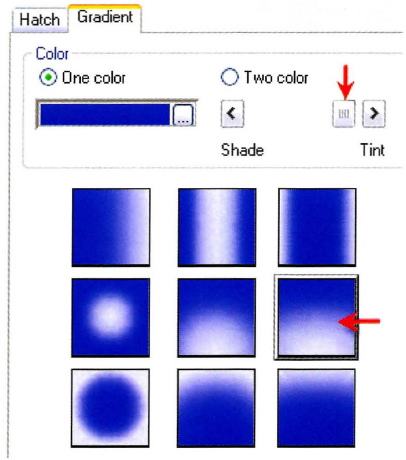
- Under Color, click One Color.
- Click the Color button and select Blue on the Index Color tab of the Select Color dialog box.
- Click OK.
- Adjust the Shade - Tint slider as shown. Click the middle right gradient swatch.
- Click Add: Pick Points. Select the upper area above the elevation.
- Right-click anywhere in the drawing. Click Preview.
- Right-click anywhere in the drawing to accept the gradient fill.
- Repeat the Gradient command, this time using a green color on the lower area of the elevation.
Tip: Use the True Color tab of the Select Color dialog box, and enter 109,184,71 for Color.
- Close all files. Do not save.