
Exercise | Add Content from Tool Palettes
In this exercise, you use tool palette tools to add a block, a hatch, and text to a drawing.
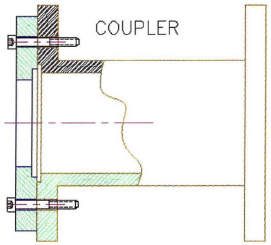
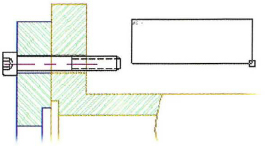
The completed exercise
Completing the Exercise
To complete the exercise, follow the steps in this book or in the onscreen exercise. In the onscreen list of chapters and exercises, click Chapter 10: Working with Reusable Content. Click Exercise: Add Content from Tool Palettes.
![]()
- Open M_Tool-Palettes.dwg.
- On the View tab, click Palettes panel > Tool Palettes.
- On the Tool Palettes window, click the Mechanical tab.
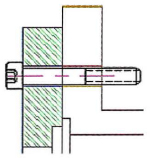
- To insert a bolt into the drawing:
- Click the icon for Hex Socket Bolt (Side) - Metric.
- Click the intersection of the top centerline and the far left line.
The drawing should look like the following illustration.
- In the Tool Palettes window, click the Hatches and Fills tab.
- Make layer 3 current.
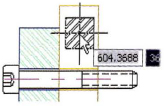
- To apply a steel hatch pattern to the cutaway section:
- Under ISO Hatches, click the icon for the Steel hatch pattern.

- Position the cursor in the open rectangular area just above the recently placed bolt, as shown.
- Click to create the hatch.
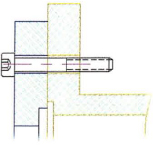
- Under ISO Hatches, click the icon for the Steel hatch pattern.
- Insert the same hatch pattern in the area below the bolt, as shown.
- In the Tool Palettes window, click the Draw tab.
- To add a text note to the drawing:
- Make the text layer current.
- Click the icon for MText.
- Create the text window to the right of the bolt and hatch, as shown.
- Enter 12 for the text height in the Style panel of the Text editor shown in the ribbon.
- Enter COUPLER.
- Click Close Text Editor.
- Close all files. Do not save.
..................Content has been hidden....................
You can't read the all page of ebook, please click here login for view all page.