Lesson 15 | Creating Object Patterns
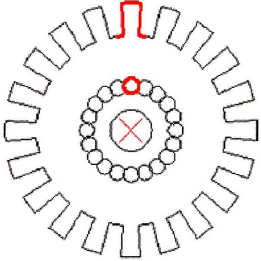
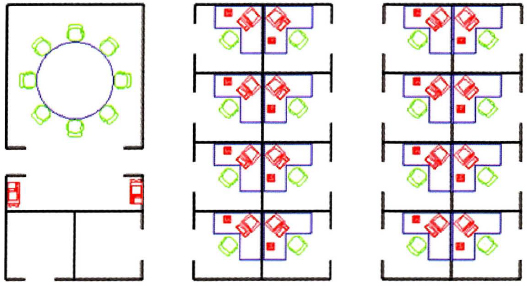
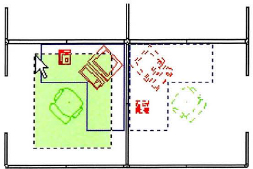
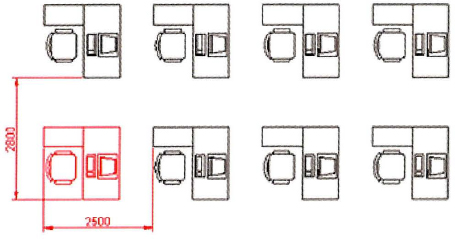
This lesson describes what an array is and how you can use arrays to create duplicate objects, such as the circular array of chairs around the table in the following floor plan.
Most common patterns contain geometry that is duplicated in a rectangular or circular array. You can use the Array command to duplicate objects in a repeatable pattern.
Objectives
After completing this lesson, you will be able to:
- Use the Array command to pattern objects in the drawing.
Creating an Array of Objects
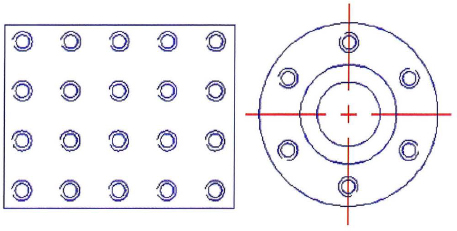
Using the Array command, you can duplicate existing objects in a rectangle or circular (polar) pattern. You can select which type of array to use in the Array dialog box. Click the Rectangular or Polar options to see point, distance, and method requirements for each type.
The following illustration shows a rectangular and polar array.
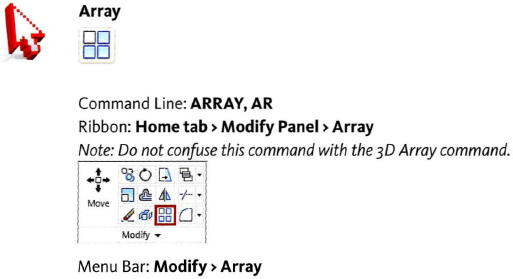
Command Access
Array Dialog Box: Rectangular Array
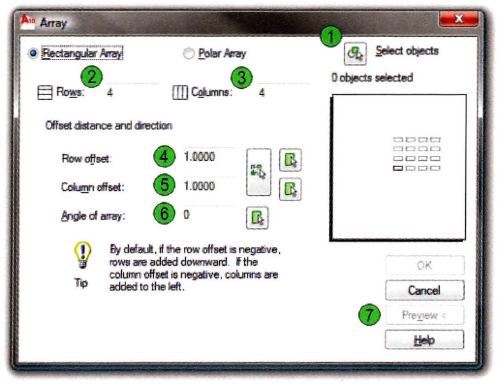
| Click to select the object(s) to include in the array. | |
| Enter the number of rows (horizontal patterns) for the array. | |
| Enter the number of columns (vertical patterns) for the array. | |
| Enter a distance to offset each row. Use the simulated preview window to see the direction of the pattern. | |
| Enter a distance to offset each column. | |
| Enter an angle for the pattern. | |
| Click Preview to preview the array. Preview is not available until you select an object or objects for the array. |
Array Dialog Box: Polar Array
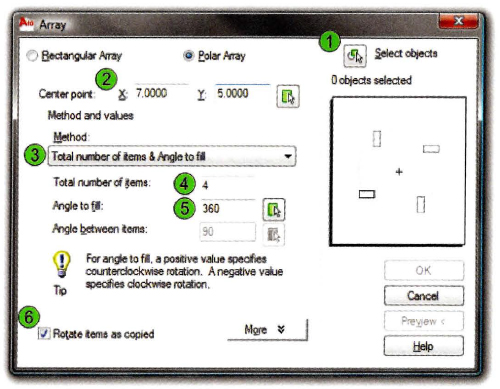
| Click to select the object(s) to include in the array. | |
| Enter the center point's coordinates in the X and Y fields or click the Select Point icon to select a center point in the drawing window. | |
Select the method for calculating the polar array.
|
|
| Enter the total number of items for the array. This includes the original object. | |
| Enter the total angle for the array. A negative number creates the array in a clockwise direction. | |
| Select to rotate each object as it is placed in the array. |
Zooming while using the Array command
Although you cannot zoom or pan the drawing using traditional methods while the Array dialog box or Array Preview is active, you can select the Pick Object button, or any of the other pick point buttons to temporarily hide the dialog box, allowing you to zoom and pan. To return to the Array dialog box, press ENTER without selecting any objects or points.
![]()
Procedure: Creating a Rectangular Array of Objects
The following steps give an overview of creating rectangular arrays.
- On the ribbon, click Home tab > Modify Panel > Array.
- In the Array dialog box, click the Rectangular option. Click Select Objects and select the objects to include in the array.
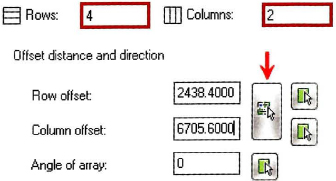
- Enter row and column values, or click Pick Offset to define the row and column offset values.
- If required, enter an angle for the array.
- Click Preview to preview the array.
- Right-click to accept and create the array, or press ESC to return to the dialog box.
Procedure: Creating a PolarArray of Objects
The following steps are an overview of creating polar arrays.
- On the ribbon. click Home tab > Modify Panel > Array.
- In the Array dialog box, click the Rectangular option. Click Select Objects and select the objects to include in the array.
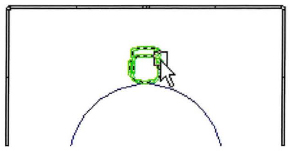
- In the Center Point fields, enter the X and Y coordinates for the center point of the array, or click Pick Center Point to select the center point in the drawing.
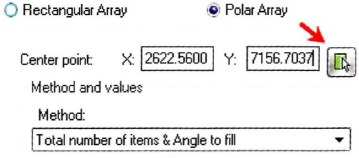
- In the Method list, select the method to use for the array.
- Enter values in the appropriate fields according to the method that you chose.

- Click Preview to preview the array.
- Right-click to accept and create the array, or press ESC to return to the dialog box.
Guidelines for Rectangular Versus Polar Array
Follow these guidelines when using the Array command:
- To create many regularly spaced objects, the Array command is faster than Copy command.
- For rectangular array, specify the number of rows and columns and the distance between each.
- For Polar Array, specify the number of copies of the object, the angle to fill, and whether the copies are rotated.
- Specify the center point about which the objects will array.
- A Polar Array is drawn counterclockwise or clockwise, depending on whether you enter a positive or a negative value for the angle to fill.