
Exercise | Create Parallel and Offset Geometry
In this exercise, you use the Offset command to create geometry that is offset from existing geometry in the drawing. You also use the Trim command to clean up the geometry after it has been offset. When you have completed the exercise, you will be able to use the Offset command in other drawings.

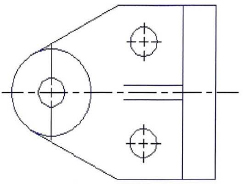
The completed exercise
Completing the Exercise
To complete the exercise, follow the steps in this book or in the onscreen exercise. In the onscreen list of chapters and exercises, click Chapter 5 : Altering Objects. Click Exercise: Create Parallel and Offset Geometry.
![]()
- Open M_Offset-Objects.dwg.
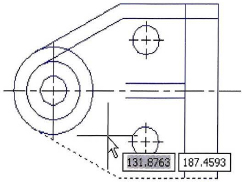
- Zoom to display the upper-left view as shown.
- To offset a circle:
- On the Home tab, click Modify panel > Offset.
- On the command line, verify that the current settings for the offset are as follows:
- Current settings: Erase source=No
- Layer=Source
- OFFSETGAPTYPE=0
- If the settings are different from the above, do the following, otherwise continue at the next primary bullet:
- Right-click anywhere in the drawing window. Click Erase. Click No.
- Right-click anywhere in the drawing window. Click Layer. Click Source.
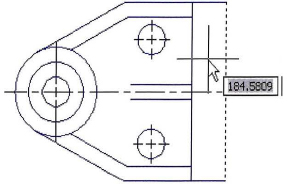
- Enter 7.5. Press ENTER.
- Select the small circle, then select a point outside the circle.
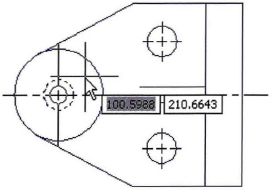
- Select the top outside edge of the part and select a point below the profile as shown.
- To complete the offset:
- To trim the objects created in the previous step:
- On the Home tab, click Modify panel > Trim.
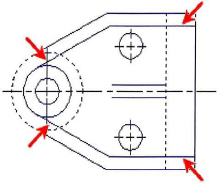
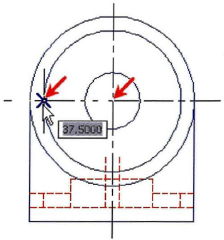
- Use the large circle and vertical line as the cutting edges.
- Select the objects created with the Offset command near the points indicated with arrows.
- To offset the vertical line and place it on the current layer:
- On the Home tab, click Modify panel > Offset.
- Right-click anywhere in the drawing. Click Layer. Click Current.
- Enter 5.25. Press ENTER.
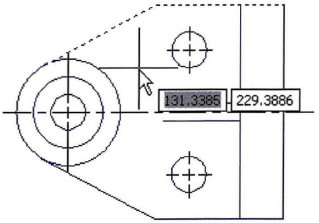
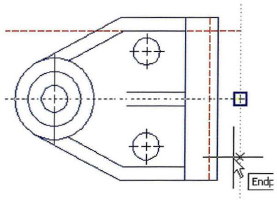
- Select the vertical line indicated in the following image and then select a point to the left of the line.
- Press ENTER to end the Offset command.
- Zoom to display the entire drawing.
- To offset the centerlines using existing views to set a distance:
- On the Home tab, click Modify panel > Offset.
- Select the two points indicated in the following image to specify the offset distance.
- To complete the offset:
- Select the centerline in the upper left view and select a point above the centerline.
- Select the centerline again and select a point below the centerline.
- Press ENTER to exit the Offset command.
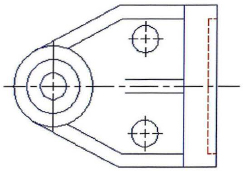
- Using the Trim command, clean up the hidden lines as shown in the following image.
- To create a hidden pocket in the front view:
- On the Home tab, click Modify panel > Offset.
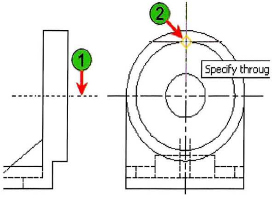
- Right-click anywhere in the drawing window. Click Through.
- When prompted for the object to offset, select the centerline in the left view (1).
- When prompted for the through point, select the point indicated in the following image (2).
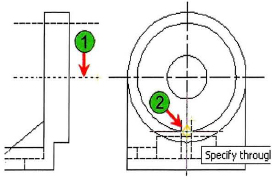
- To offset another line:
- When prompted for the object to offset, select the centerline again (1).
- When prompted for the through point, select the point indicated in the following image (2).
- To complete the pocket:
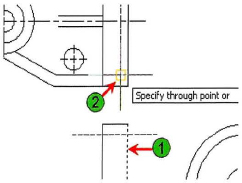
- When prompted for the object to offset, select the vertical line in the lower left view (1).
- When prompted for the through point, select the point on the top-left view (2).
- Press ENTER to exit the Offset command.
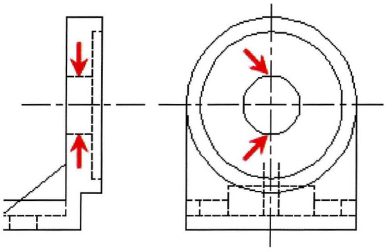
- Use the Offset command with the Through option to offset the centerline through the quadrants of the smaller circle, then use the Trim command to clean up the lines as indicated in the following image.
- Close all files. Do not save.
..................Content has been hidden....................
You can't read the all page of ebook, please click here login for view all page.