
Lesson 17 | Using Layers
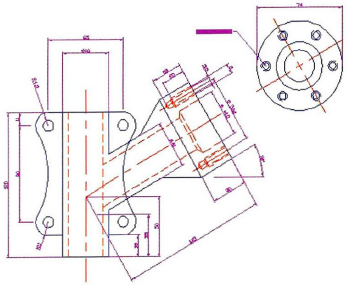
This lesson describes what layers are and how you can use them to organize objects in your drawing. For example, in the following illustration, objects might be placed on different layers, with dimensions on one layer, hidden lines on another, and the hole features isolated on a third. Each layer may have property settings that determine the color, linetype, and lineweight of the objects on that layer.
In a typical drawing, objects are placed to represent some part of the design. These objects can include geometry, text, dimensions, and borders. To organize your drawing, you need a way to logically group objects based on function, appearance, or other commonalities. There are many industry layering standards and most designers base their own standards on one of these. Most important is that you establish a standard for layering and you follow it.
After completing this lesson, you will be able to use layers to organize objects in your drawing.
Objectives
After completing this lesson, you will be able to:
- Describe how layers can be used to organize objects in your drawing.
- Describe the purpose of Layer 0.
- Access the Layer Properties Manager and use other commands to manage layers.
Organizing Objects with Layers
As your drawings increase in complexity, organization of the drawing objects becomes critical to efficiently managing the design data. You can use layers to logically group objects in the drawing.
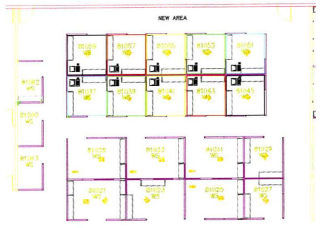
In the following office layout, you would use layers to separate walls, partition walls, furniture, text, and equipment.
About Layers
Use layers to logically organize the objects in the drawing and to enforce linetype, color, and lineweight standards. When you group objects into layers, you can then control these objects by controlling the single layer. For example, if you put all the dimensions on a single layer, you could chose to hide these dimensions simply by freezing that layer.
The following image illustrates how layers are used to organize objects. The image on the left represents the logical grouping of similar objects, while the image on the right illustrates what you see in the software.
Using layers is similar to using overlays in a manual drafting environment where clear media that contains groups of related design elements are placed throughout the overall design. As a result, you see everything that you create, you have the flexibility to easily remove the overlays, and can focus on any aspect of your design.
A Typical Layer Configuration
A typical drawing could use layers to organize objects in the following way.
| Layer Name | Objects |
| Walls | All geometry representing walls. |
| Electrical | All geometry representing electrical. |
| Hidden | Geometry that is represented by hidden lines. |
| Landscape | Geometry representing landscaping objects. |
| Construction | Temporary geometry used for sketching or other construction geometry purposes. |
| Dimensions | Drawing dimensions. |
| Annotation | Text and notes. |
| Hatch | Hatch patterns, fills, and gradients. |
| Titleblock | Borders, Title Block and title block information. |
The preceding table is an example of a typical layer configuration. Most companies have layer standards already defined to suit their particular needs. The following example shows a standard architectural layer configuration.
Typical Architectural Layer Configuration
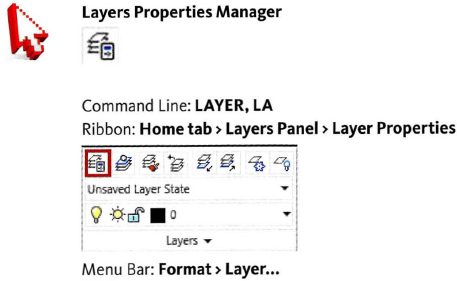
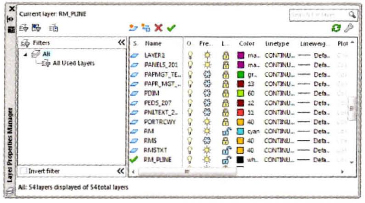
Use the Layer Properties Manager to create and manage the layers in a drawing.
Layer Key Points
- Use layers to organize objects in your drawing.
- Layers have property settings that determine the color, linetype, and lineweight of the objects on that layer.
- Use the Layer Properties Manager dialog box to create and manage layers.
- Every drawing contains at least the default Layer 0.
- To organize a drawing, consider grouping objects onto layers based on function, appearance, or other commonalities.
- There are many industry standards concerning layering from which you can establish a layering standard for your drawings.
- When your drawing is organized with layers, you can easily control entire groups of objects.
Default Layer
Every drawing that you create has a default layer called 0 (zero). This ensures that every drawing contains at least one layer.
Default Layer Defined
When you create a new drawing, a number of layers may be present depending on the template that you used. Layer 0, however, is persistent regardless of the template used. Every drawing will contain the default layer 0.
Layer 0 cannot be renamed or deleted. AutoCAD® uses that layer to establish predictable behaviors for objects such as blocks, regardless of how other layers are named.
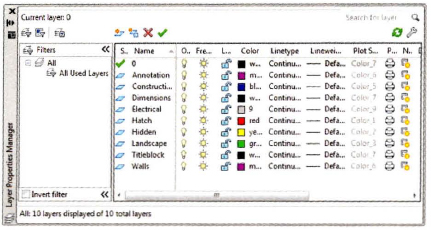
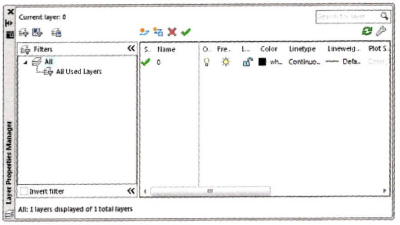
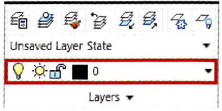
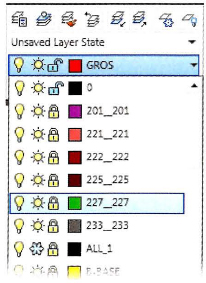
The following illustration shows the Layer Properties Manager dialog box in a drawing created from acad.dwt. The only layer present is 0.
Guidelines for Layer 0
The following are some specific guidelines related to Layer 0.
- You can create layers in addition to Layer 0 in the Layers Properties Manager when you begin a new drawing unless they are already provided in your company's drawing template.
- You can make a layer current first and then draw your objects. This automatically places the geometry on that current layer instead of Layer 0.
- Consider Layer 0 as your working layer when uncertain where to place geometry. Then, move the objects to the appropriate layer.
- You should create simple block geometry on Layer 0 so that when you insert it on another layer it takes on the properties of that layer. For example, a chair block created on Layer 0 and inserted on the Furniture layer will appear with the properties (Color, Linetype, Lineweight) that are assigned to the Furniture layer.
- You should insert blocks with multiple layers on Layer 0 so that the layers and colors assigned to the block appear the way they were created when you insert them into your drawing.
If you do create objects on layer 0, you can assign them to a different layer at anytime.
Layer Tools
When you create and manage layers, you use the Layer Properties Manager and the Layer Control list on the ribbon. Together, these commands and tools provide you with the functionality required to effectively create, manage, and assign objects to layers.
Layers Panel
Command Access
Use the Layer Properties Manager to create layers and control the color, linetype, lineweight, and other properties of each layer.
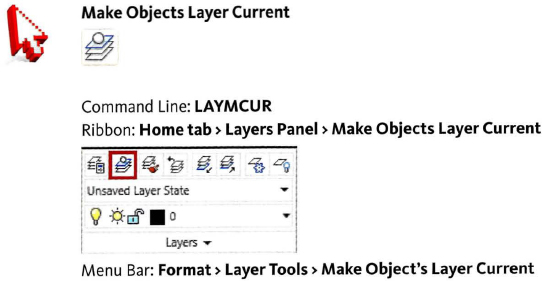
To quickly make an object's layer current, use the following command.
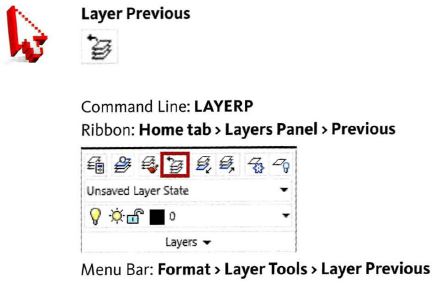
To return to the previous layer settings, use the following command.
Layer Properties Manager Dialog Box
Your primary tool for managing layers is the Layer Properties Manager. Use this dialog box to create and manage layers.
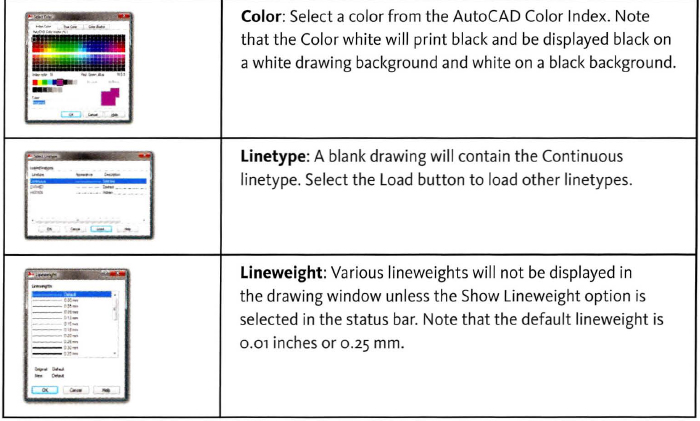
Command Options
The following options are available in the Layer Properties Manager dialog box for essential layer management.
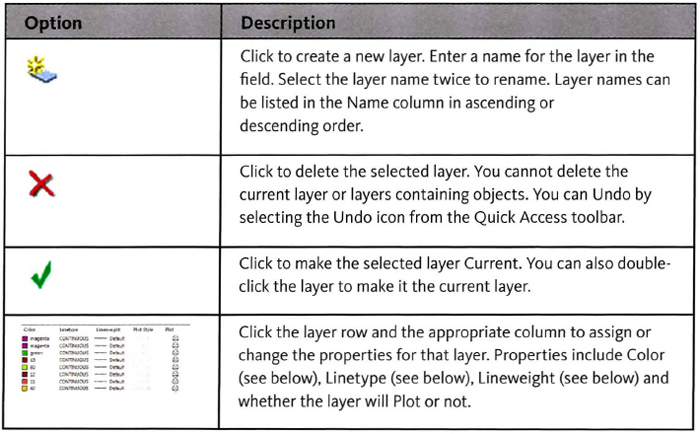
New Layer Properties
When you create a new layer, the properties of the currently selected layer are duplicated for the new layer. If your new layer is going to have properties such as color or linetype in common with another layer, select the similar layer before you click New.

Layer Status
The visibility and availability of objects on specific layers are determined by the layer's status. The following table describes the potential status of a layer.
These icons appear in the Layer Properties Manager and the Layer list. Click the icon to change the status of the layer.

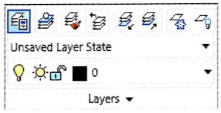
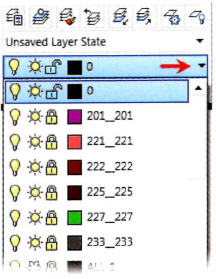
Layer Control List
The Layer Control list is located on the Layers panel.
The Layer Control serves a dual purpose.
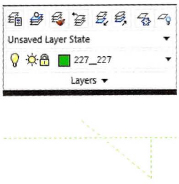
- In normal operations, the current layer is displayed. However, when an object is selected with the command line blank, the list displays the layer that the object is on. The following image shows that when the door block is selected, the A-Doors layer is displayed.
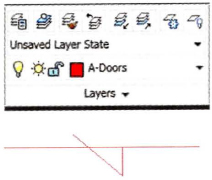
It is helpful to know what layer the object is on. But you may also place the selected object objects on another layer by choosing the layer from the drop-down list.
- After you create layers, you can use the Layer Control to select a layer to make it current, to change the layer status to Freeze or Thaw, Lock or Unlock, or turn layers On or Off.
Layer Tools Key Points
- Creating and managing layers requires the use of some key commands, the Layer Properties Manager, and the Layer Control list on the Layers panel.
- Your primary tool for managing layers is the Layer Properties Manager. Use this dialog box to create and manage layers.
- Once a layer is created, you cannot delete it if it is current or if there are objects referenced on that layer.
- Layer 0 cannot be deleted or renamed.
- Layer properties include color, linetype, lineweight, and whether the layer will plot or not.
- A layer status can be On or Off, Frozen or Thawed, and Locked or Unlocked.
- Layers that are turned off are not visible but are still considered when the drawing is regenerated. Layers that are frozen are not visible and are not considered when the drawing is regenerated.
- With the command line blank, you can select an object and see what layer it is on from the Layers Control list located on the Layers panel.
- You can select an object and move it to another layer using the Layers Control list.
- You can change a layers status from the Layers Control list.
- The Layer Previous command returns you to the previous layer state, to the previous layer setting, and to the previous status of all layers in the drawing.
Performance Tip
For better performance on large drawings, freeze layers instead of turning them off. Objects on layers that are turned off are still considered when the drawing is regenerated, while objects on layers that are frozen are not considered, and thus not calculated when the drawing is regenerated.
