
Lesson 13 | Changing the Angle of an Object's Position
This lesson describes how to use the Rotate command to rotate objects in a drawing. You learn how to use the Rotate command using the default options, and also learn how to use the Reference and Copy options while rotating objects. This lesson also describes how to rotate an object using grips.
After you have created or inserted objects in the drawing, at times you must change the angle of those objects. You can do this easily with the Rotate command, or by using grips to rotate the object.

Objectives
After completing this lesson, you will be able to:
- Use grips or the Rotate command to rotate objects in the drawing.
Rotating Objects
You use the Rotate command to rotate objects in the drawing. Command options enable you to rotate the objects simply by entering an angle for the rotation or by defining a reference angle and then entering a new angle for the reference angle. If you need to make a copy of the object while rotating, you can specify the Copy option. When the Copy option is selected, a copy of the object is rotated, leaving the original object in its current position. You can also use grips to rotate the object.
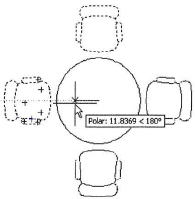
In the following image, two chair objects are being rotated with the Copy option.
Command Access
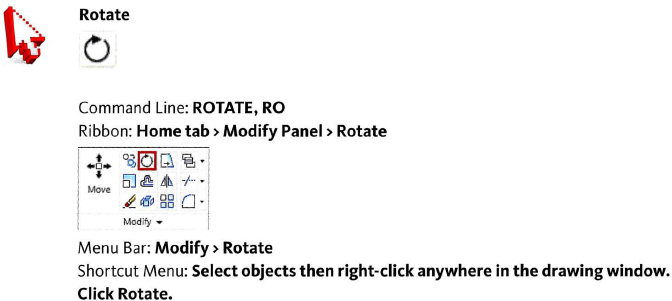
Note
Options for the Rotate command are accessible from the shortcut menu. Right-click anywhere in the drawing area while the Rotate command is active. Command-specific options are always in the middle of the shortcut menu.
![]()
Procedure: Rotating Objects
The following steps provide an overview of rotating objects using the Rotate command.
- On the ribbon, click Home tab > Modify Panel > Rotate.
- Select the object(s) to rotate and press ENTER.
- Specify a base point for the rotation. The object will rotate around this point.
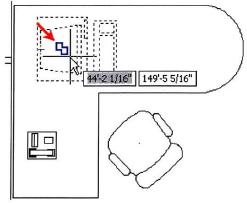
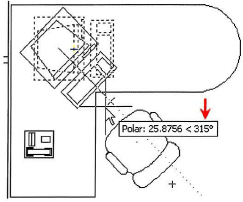
- Specify a rotation angle by moving the cursor or entering an angle.
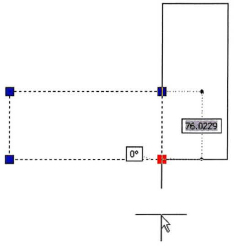
Procedure: Rotating Objects Using Grips
The following steps give an overview of using grips to rotate objects.
- Select an object to activate its grips.
- Click a grip to activate grip edit mode. By default, this point will also be used as the center point of rotation.
- Right-click anywhere in the drawing. Click Rotate.
- Specify a rotation angle.
Guidelines
- Rotate the original object or use the Copy option to rotate a copy of the object.
- The base point for the rotation should be on or near the object being rotated. This is critical because the base point represents the point of rotation for the selected object.
- When appropriate, use polar tracking for accuracy and to speed up the process for defining the rotation angle.
- Use the Reference option to refer to the angle of the object that you want to change. You can enter the angle of that object, or specify that angle by selecting two points to determine the angle vector then entering the desired angle.