
Challenge Exercise | Architectural
In this exercise, you edit existing hatch patterns and fills. You erase geometry and view how the hatch pattern and fills update accordingly. You remove boundaries that are no longer needed and create new boundaries.
Note
You have the option of completing this exercise using either imperial or metric units. Select one version of the exercise to complete the steps.
![]()
Warning!
If completing this exercise in AutoCAD LT, in step 2, use a solid fill with a grey color (color 9).

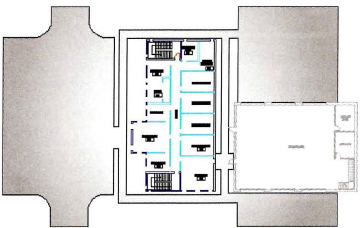
The completed exercise
Completing the Exercise
To complete the exercise, follow the steps in this book or in the onscreen exercise. In the onscreen list of chapters and exercises, click Chapter 9: Hatching Objects. Click Challenge Exercise: Architectural Metric.
![]()
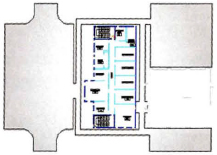
Metric Units
- Open the drawing you saved from the previous challenge exercise, or open M_ARCH-Challenge-CHP09.dwg.
- Set up the layers and add a gradient fill.
- Thaw the existing layer, Site - Concrete, and make it the current layer.
- Freeze the Dimension layer.
- Add a gradient hatch to the geometry as shown.
- Add additional hatching to the drawing as desired. For example, you could hatch the area between the wall lines or hatch different rooms.
- Save and close the file.
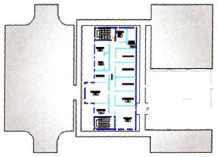
Imperial Units
- Open the drawing you saved from the previous challenge exercise, or open I_ARCH-Challenge-CHP09.dwg.
- Set up the layers and add a gradient fill.
- Thaw the existing layer, Site - Concrete, and make it the current layer.
- Freeze the Dimension layer and add a gradient hatch to the geometry on as shown.
- Add additional hatching to the drawing as desired. For example, you could hatch the area between the wall lines or hatch different rooms.
- Save and close the file.
..................Content has been hidden....................
You can't read the all page of ebook, please click here login for view all page.