
Exercise | Use Polar Tracking and PolarSnap
In this exercise, you create lines at precise distances and angles using polar tracking and PolarSnap. When you have completed the exercise, you will be able to use the polar tracking and PolarSnap features to create precise geometry.
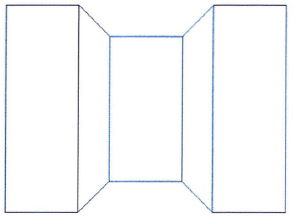
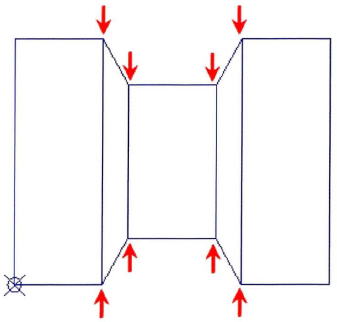
The completed exercise
Completing the Exercise
To complete the exercise, follow the steps in this book or in the onscreen exercise. In the onscreen list of chapters and exercises, click Chapter 2: Creating Basic Drawings. Click Exercise: Use Polar Tracking and PolarSnap.
![]()
- Open M_Roller.dwg.
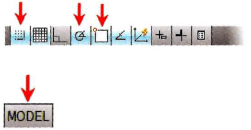
- On the status bar, make sure the following settings are on:
- Snap
- Polar tracking
- Object snap
- Model
Right-click Polar Tracking and select Settings.
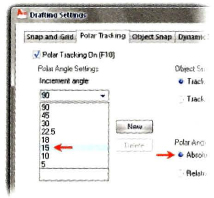
- In the Drafting Settings dialog box, Polar Tracking tab:
- Select 15 from the Increment Angle list.
- Under Polar Angle Measurement, click Absolute.
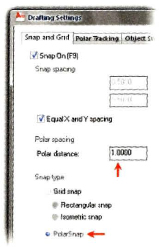
- On the Snap and Grid tab:
- Click PolarSnap.
- Enter 1 in the Polar Distance field.
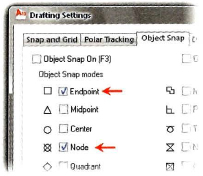
- On the Object Snap tab:
- Make sure Endpoint and Node are selected.
- Click OK.
- To draw the line using polar tracking:
- Activate the Line tool.
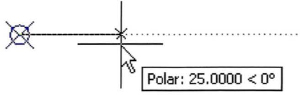
- Specify the line's start point from the point object, using the Node object snap override.
- Drag the cursor to the right until the polar tracking tooltip reads 25.00 < 0 degrees. Click the point.
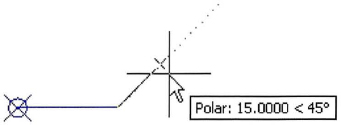
- Position the cursor so that the polar angle tooltip reads 15.00 < 45. Click the point.
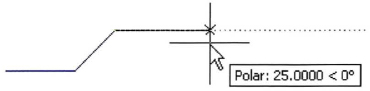
- Position the cursor so that the polar angle tooltip reads 25.00 < 0. Click the point.
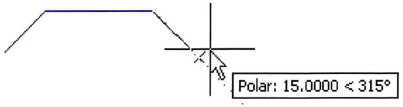
- Position the cursor so that the polar angle tooltip reads 15.00 < 315. Click the point.
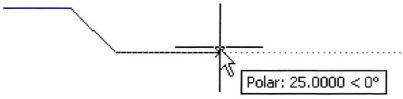
- Position the cursor so that the polar angle tooltip reads 25.00 < 0. Click the point.
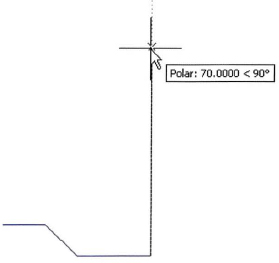
- Move the cursor upwards until the polar tracking cursor reads 70.00 < 90. Click the point.
- Repeat these steps to draw the top half of the object which mirrors the bottom half, changing the Polar angle accordingly. Your final endpoint should be at the original start point.
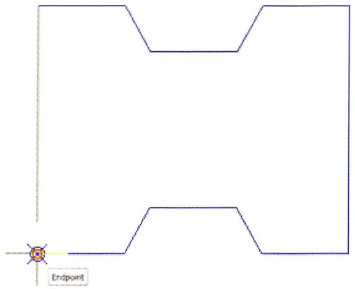
- Press ENTER to repeat the Line command. Select the endpoints indicated in the following image to draw the inner vertical lines. Press ENTER to end the Line command.
- Close all files. Do not save.
..................Content has been hidden....................
You can't read the all page of ebook, please click here login for view all page.