Lesson 28 | Applying a Radius Corner to Two Objects
This lesson describes how to fillet objects using the Fillet command.
Fillets and rounds are common in mechanical drawings, but you can use the Fillet feature across all design disciplines to create radius geometry connecting two objects.
After completing this lesson, you will be able to identify options of the Fillet command and use the command to create radius geometry between two objects.
Objectives
After completing this lesson, you will be able to:
- Use the Fillet command to create radius geometry connecting two objects.
Creating Fillets
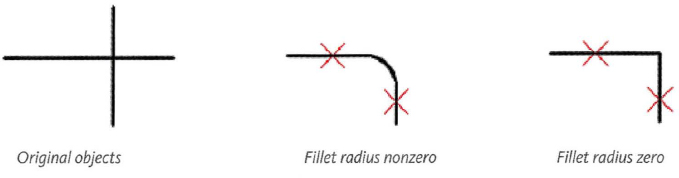
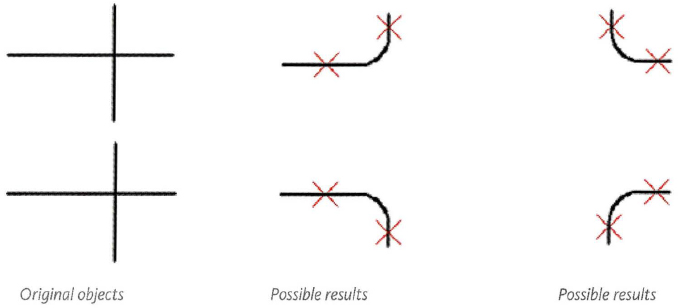
You can use the Fillet command to connect two objects quickly with a smoothly fitted arc of a specified radius. You usually use it to represent a rounded edge on a corner; an inside corner is called a fillet and an outside corner is called a round. You can fillet lines, arcs, circles, ellipses, polylines, xlines, splines, and rays.
You can also create a sharp corner with the Fillet command by specifying a radius value of 0.
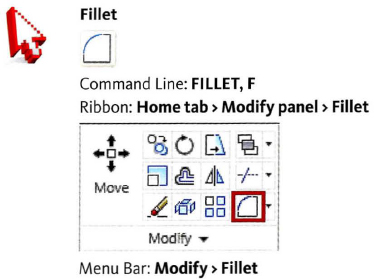
Command Access
Command Options
The following options are available for the Fillet command.
| Option | Description |
| Undo | Reverses the previous action of the Fillet command. |
| Polyline | Fillets all vertices of a polyline using the current radius value. |
| Radius | Sets the radius for the fillet arc. |
| Polyline | When Trim mode is selected, the lines are trimmed to be tangent with the fillet. If Trim mode is set to No Trim, the fillet radius is drawn but the lines are not trimmed. |
| Multiply | When the Multiple option is selected, you can create multiple fillets without restarting the command. |
Procedure: Applying a Radius Corner with the Fillet Command
The following steps give an overview of how to apply a radius corner with the Fillet command.
- Start the Fillet command.
- On the command line, verify the current fillet settings. If required, set the options appropriately.
Command: FILLETCurrent settings: Mode = TRIM, Radius = T.ooooSelect first object or [Undo/Polyline/Radius/Trim/Multiple]:
- Select the first object to fillet.
- Select the second object to fillet. The fillet is created.
Note: If you choose the Polyline option, the last step is not required, since all vertices of the polyline are filleted at once.
SHIFT+Select for Zero-Radius Fillet
Regardless of the current Fillet Radius setting, if you SHIFT+select the two objects, a zero-radius fillet is applied.

Guidelines
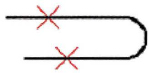
- Depending on the locations you specify, more than one possible fillet can exist between the selected objects. Always select the part of the objects that you want to keep.
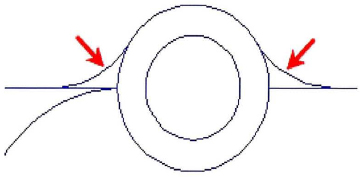
- You can fillet parallel lines, xlines, and rays. The current fillet radius is ignored and an arc is created that is tangent to both parallel objects and located in the plane common to both objects.
- You can also fillet a polygon, or an entire polyline, or remove fillets from an entire polyline.
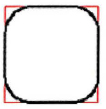
- If you set a nonzero fillet radius, fillet arcs are inserted at the vertex of each polyline segment that is long enough to accommodate the fillet radius.

Key Points
- The fillet radius is the radius of the arc that connects the objects.
- If both objects being filleted are on the same layer, the fillet arc is created on that layer. Otherwise, the fillet arc is created on the current layer.
- Entering a radius value of 0 creates a sharp corner.
- Holding down the SHIFT key while selecting the object to fillet will override the current radius value and create a radius of 0.
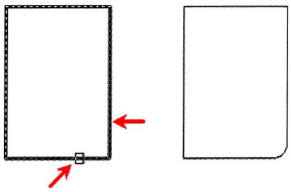
- An object that is filleted to a polyline becomes part of that polyline.
- A polyline cannot be filleted to an arc. Explode the polyline, then fillet the objects and join them again using the Polyedit command.
Practice Exercise | Creating Fillets
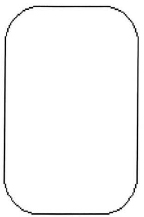
In this practice exercise, you use the Fillet command on a simple rectangle.

- Draw a rectangle.
- To Fillet a single corner:
- Begin the Fillet command.
- Enter R and press ENTER.
- Specify a fillet radius of .25 and press ENTER.
- Click the lines near one corner of the rectangle as indicated below.
- Now change the radius and use the Fillet polyline option:
- Begin the Fillet command.
- Enter R and press ENTER.
- Enter a fillet radius of .5 and press ENTER.
- Enter P and press ENTER.
- Select the rectangle.
Note: If this rectangle was made of separate line segments instead of a polyline, the previous radius would have remained and you could not have used the Polyline option to fillet all of the corners at once.
- Now change the fillet radius to o to make sharp corners on the rectangle:
- Begin the Fillet command.
- Enter R and press ENTER.
- Enter a fillet radius of o and press ENTER.
- Enter P and press ENTER.
- Select the rectangle.