Lesson 25 | Creating Parallel and Offset Geometry
This lesson describes how to use the Offset command to create geometry that is offset from or parallel to other geometry in the drawing.
In a typical drawing, you are likely to find several objects that are parallel to or offset from each other. You can use the Offset command to create this effect on geometry in the drawing and increase efficiency by reusing existing geometry.
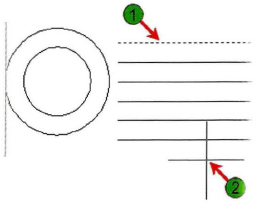
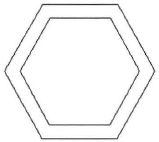
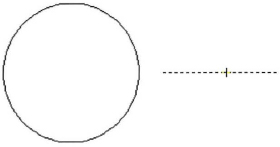
The following illustration shows several parallel lines and concentric circles. The Offset command can be used to create these types of objects..
Objectives
After completing this lesson, you will be able to:
- Use the Offset command to create parallel and offset geometry.
Offsetting Objects
The Offset command creates a new object whose shape parallels the shape of a selected object.
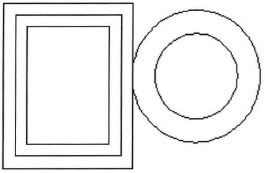
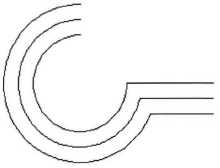
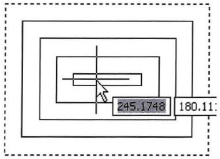
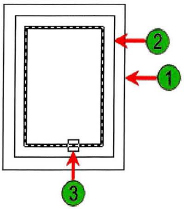
For example, in the following image, the inside shape has been offset twice using the Offset command with the Multiple option.
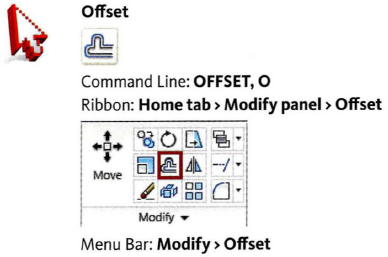
Command Access
Command Options
The Offset command has the following options. From the shortcut menu, either right-click to select the option or enter the capitalized letter and press ENTER.
| Option | Description |
| Through | Offsets a selected object the distance of a point picked in the drawing window. |
| Erase | Erases the source object after it has been offset. |
| Layer | Offsets the object to the original source layer or the current layer. |
| Multiple | Makes multiple offsets of the object in increments specified by the offset distance. |
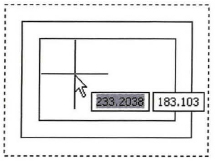
Procedure: Offsetting Geometry a Specific Distance
The following steps give an overview of offsetting geometry a specified distance.
- On the ribbon, click Home tab > Modify panel > Offset.
- Specify the offset distance by selecting two points.
Note: You can enter a value instead of selecting points.

- Select the object to offset.
- Select a point on the side where you want to place the new objects.
- Select another object to offset or exit the command.
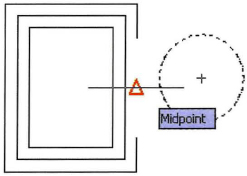
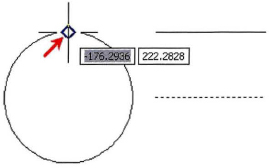
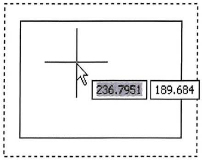
Procedure: Offsetting Geometry Through a Point
The following steps give an overview of using the Offset command with the Through option to offset a line through a point on a circle.
- On the Home tab, click Modify panel > Offset.
- Right-click anywhere in the drawing. Click Through. You can also enter t on the command line.
- Select the object to offset.
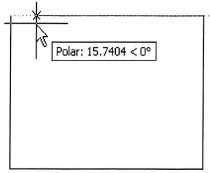
- Specify the point through which to offset the object.
Note: The top horizontal line represents the position of the object after the offset. If it were extended, it would pass through the point indicated by the cursor.
- Select another object to offset or exit the command.
Procedure: Offsetting Multiple Objects
The following steps give an overview of serially offsetting geometry a specified distance using the Multiple option.
- On the Home tab, click Modify panel > Offset.
- Specify the offset distance by entering a value or selecting two points.
- Select the object to offset.
- Right-click anywhere in the drawing. Click Multiple.
- Select a point on the side where you want to place the new objects.
- Select another point to offset the last object by the same amount.
- Continue selecting points to repeat the offset on the last object created.
Guidelines for Using the Offset Command
- Setting the offset distance is the default and most common method for using offset. Enter the distance and press ENTER.
- The offset distance may also be set by picking two points in the drawing window. When using this method, it is best to use object snap and reference objects in the drawing to accurately set a distance.
- When you begin the Offset command, the last offset distance used is displayed in the command line. Press ENTER to accept this distance, or enter a new offset distance then press ENTER.
- Use the Multiple option to create a series of offsets once you have selected the original object to offset. Then simply click the side to offset as many times as needed.
- An offset object will automatically retain the color, layer, and linetype of the source object unless you change the offset Layer option to Current. The most common method is to keep the offset objects on the source layer.
- When you offset a circle, arc or polyline, at some point it may not be possible to create the offset to the inside or outside of the object because of geometry restrictions. For example, if the offset distance is greater than the radius of a circle, it would be impossible to offset to the inside of that circle.
- You remain in the Offset command until you press ENTER, unless you have initiated the Through option. Then only one offset is created through the object selected.
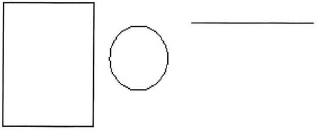
Practice Exercise | Offsetting Objects
In this practice exercise, you practice using the Offset command with three different methods. First, draw a circle, a line, and a rectangle, and then offset the rectangle a specific distance. Offset the circle through a selected point. Make multiple offsets of the line.
- To offset a distance:
- On the Home tab, click Modify panel > Offset.
- Enter an offset distance of .05. Press ENTER.
- Select the rectangle (1).
- Click inside the rectangle.
- Select the new rectangle (2).
- Click inside the rectangles.
- Select the next rectangle (3) and click inside the rectangles.
- Press ENTER to complete the Offset command.
- To offset through a point:
- To make multiple offsets:
- On the Home tab, click Modify panel > Offset.
- Enter an offset distance of .1. Press ENTER. Select the line to offset.
- Right-click the selected object. Click Multiple.
- Specify a point on the side of the line to offset.
- Continue to make offsets of the line. Press ENTER to end the Offset command.