
Exercise | Create Single Line Text
In this exercise, you create Single Line Text in the drawing Layout and in model space. You will size the text accordingly so that it appears at the proper height.
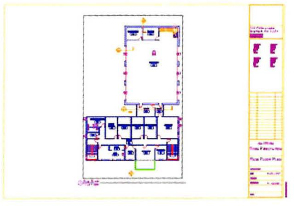
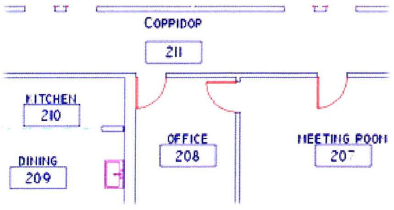
The completed exercise
Completing the Exercise
To complete the exercise, follow the steps in this book or in the onscreen exercise. In the onscreen list of chapters and exercises, click Chapter 7: Annotating the Drawing. Click Exercise: Create Single Line Text.
![]()
- Open C_Create-Single-Line-Text.dwg.
- Zoom into the lower-right area of the title block.
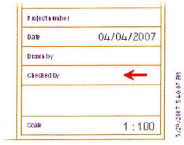
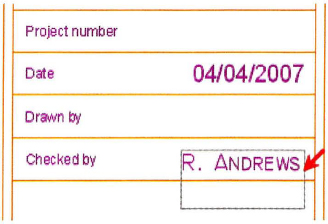
- Use Single Line Text to place your name in the Checked By area of the title block.
- Start the Single Line Text command.
- Right-click anywhere in the drawing. Click Justify. Click Right.
- Click the point indicated by the arrow in the following image to specify the right justification of the text.
Note: You may need to zoom in closer to prevent Object Snap from selecting the endpoint of that nearby line.
- Press ENTER to use default text size.
- Press ENTER to confirm the default rotation angle of 0.
- Enter your name and press ENTER twice.
- To check the Viewport Scale:
- Zoom Extents to view the entire drawing.
- With the Command line blank, select the viewport (1).
- Note the Viewport Scale of 1:100 (2).

- Press ESC to cancel the viewport selection.
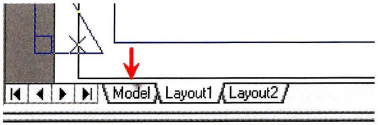
- Click the Model tab to switch to model space.
- Start the Zoom Window command. Click two points approximately as shown by the arrows in the following image.

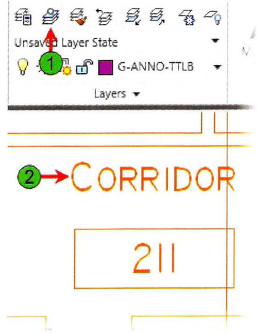
- On the Layers panel, click Make Object's Layer Current (1) and select the Corridor (2) text object.
- To check the status bar settings:
- Make sure Polar Tracking, Object Snap, Object Snap Tracking and Dynamic Input are on.
- Right-click Object Snap. Click Settings and confirm that the Midpoint object snap mode is checked.
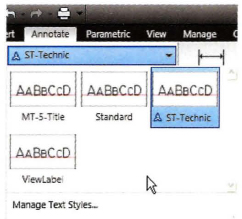
- Select the text style list from the Text panel and click Standard.
- To center text above a rectangular object:
- Zoom in closer to the rectangle to the lower left side of the word “Corridor”.
- Start the Single Line Text command.
- Right-click anywhere in the drawing. Click Justify.
- Click Center.
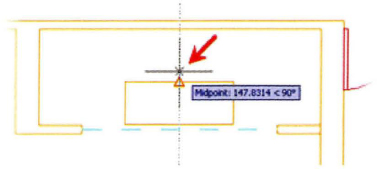
- Hover over the midpoint of the rectangle as shown (do not select) and track slightly above it. Click.
- Specify a text height of 300.
Note: Since the Viewport Scale in the Layout is set to 1:100, setting your text height to 300 in model space will result in a text height of 3 when viewed through the layout viewport.
- Specify a rotation angle of (0).
- Enter kitchen and press ENTER twice.

- To place text in the middle of the rectangle:
- Begin the Single Line Text command.
- Right-click. Click Justify.
- Select Middle from the next menu.
- Track the midpoints of two adjacent lines of the rectangle and select the point where they intersect in the middle of the rectangle. Click.

- Press ENTER twice to accept the default height of 300 and the default rotation angle of 0.
- Enter 210 and press ENTER twice.

- Repeat the previous steps to label each room with text as shown below:
- To view the results:
- Zoom to display the entire drawing in model space.
- Select the Layout tab to view the text in the drawing layout.
- Close all files without saving.
..................Content has been hidden....................
You can't read the all page of ebook, please click here login for view all page.