
Exercise | Create Hatch
In this exercise, you use the Hatch command to create hatch patterns on the elevation drawing. You use the Create Separate Hatch option to see how it affects a multiple boundary pattern.
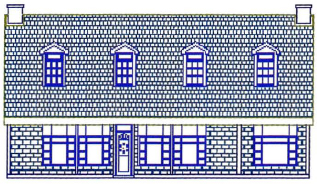
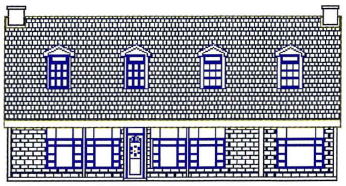
The completed exercise
Completing the Exercise
To complete the exercise, follow the steps in this book or in the onscreen exercise. In the onscreen list of chapters and exercises, click Chapter 9: Hatching Objects. Click Exercise: Create Hatches.
![]()
- Open M_Hatch-Objects.dwg.
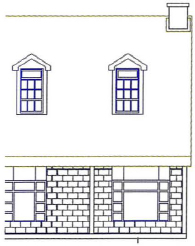
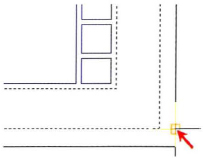
- Zoom into the left area of the elevation as shown.
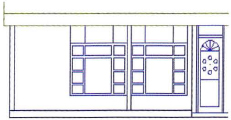
- Use the Hatch command to place separate hatches on the front of the building:
- On the Home tab, click Draw panel > Hatch.
- In the Hatch and Gradient dialog box, select AR-B816C from the Pattern list.
- In the Scale field, enter 1.
- Place a check mark in the box next to the Create Separate Hatches option.
- Click Add: Pick Points.
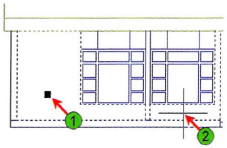
- Click two points (1) and (2) define the boundary as shown.
- To complete the hatch:
- Press ENTER.
- In the Hatch and Gradient dialog box, click Preview to preview the hatch.
- If the hatch pattern appears correct, press ENTER to accept the hatch.
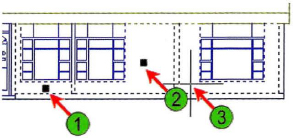
- Pan to the right side of the elevation.

- To place a single hatch on the three areas on the right side of the elevation:
- On the Home tab, click Draw panel > Hatch.
- Clear the Create Separate Hatches option.
- Click Add: Pick Points.
- Click three points (1), (2), and (3) to define the boundaries as shown.
- To complete the hatch:
- Press ENTER to return to the Hatch and Gradient dialog box.
- Click Specified Origin.
- Click the Click to Set New Origin button.
- Select the endpoint as shown.
- In the Hatch and Gradient dialog box, click OK.
- Select the previously created hatch. Notice all boundaries are treated as a single hatch object.
- Zoom to display the entire drawing.
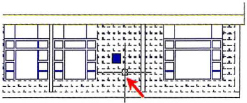
- On the View tab, click Navigate panel > Extents drop-down > Window. Window zoom into the area shown in the following image. Make certain only part of the roof area is visible.
- On the command line, enter Regen.
- To expand the Hatch dialog box:
- On the Home tab, click Draw panel > Hatch.
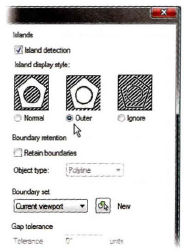
- Expand the Hatch and Gradient dialog box.
- To specify the island detection type, under Islands, click Outer.
- To apply a hatch pattern to the roof even though the entire area is not displayed:
- In the Pattern list, select AR-B88.
- Click Add: Pick Points.
- Select a point on the roof.
- Press ENTER.
- Click Preview.
- Press ENTER to accept the hatch pattern.
- Zoom to display your entire drawing.

- Close all files. Do not save.
..................Content has been hidden....................
You can't read the all page of ebook, please click here login for view all page.