Lesson 21 | Using the Properties Palette
This lesson describes the Properties palette and how to use it to modify object properties.
Each object you create has a set of properties that defines how the object appears in the drawing. In fact, as you create the objects, you are assigning properties as part of the geometry creation process. You can view and modify these properties with the Properties palette.
After completing this lesson, you will be able to use the Properties palette to adjust object properties.
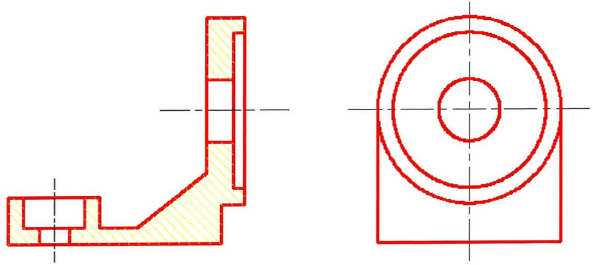
The following illustration shows a typical drawing containing objects of different types. You can use the Properties palette to modify the common property types of dissimilar objects at the same time.
Objectives
After completing this lesson, you will be able to:
- Use the Properties palette to adjust object properties.
Using the Properties Palette
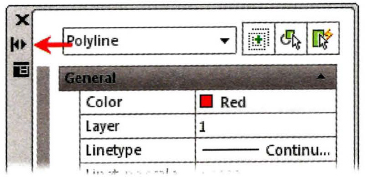
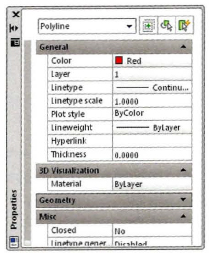
You can use the Properties palette to change the characteristics of an object such as its color, linetype, lineweight, or layer. The Properties palette is context sensitive, so it only displays the properties that are relevant to the type of object that you select.
Object Properties
Properties are organized into separate groups, such as General, Geometry, and Misc. Click the arrows on the title area for each group to collapse or expand the group.
Read-only properties are indicated by a gray background in the values column, and cannot be selected.
You can select read-write properties. Options for changing these properties vary with the property. Some are lists, some are simple text boxes, and others require you to click an icon in the field to redefine a point.
Command Access

Tip
You can also double-click on some objects to access the Properties palette.

Selecting Objects Using the Object Types List
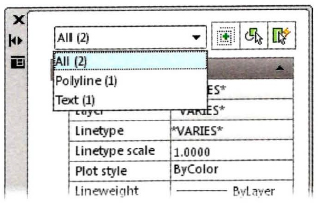
When you have multiple object types selected, the Object Types list shows all of the objects. When you select different types of objects, the Properties palette displays only those property types that are common to all object types that are selected. For each object type that you select, the object type name appears in the list. You can select an object type in the list to adjust properties for the selected objects of that type.
For example, in the following illustration, the Object Type list is shown with two objects that are selected, a polyline and a text object.
Procedure: Using the Properties Palette to Change Object Properties
The following steps give an overview of using the Properties palette to change object properties.
- On the ribbon, click Home tab > Properties panel > Dialog Box Launcher > Properties or press CTRL+1.
- Select the objects to adjust properties for.
- You can change any value in a read-write field and all changes occur in real time.
- Press ESC to cancel the object selection. The Properties palette remains open.
Key Points for Using the Properties Palette
- The Properties palette differs from a traditional dialog box interface in that it can remain open while you are using other commands.
- Other methods are available for editing an object's properties, but the Properties palette provides a common interface for changes to different object types and to the properties of multiple objects simultaneously.
- Click the Auto-hide icon on the Properties palette (shown in the following illustration) to make the palette collapse when the cursor moves away from it.